


16
7
Reading Chemiluminescent Samples
1. Turn on the FLA-5000 and peripheral devices.
2. Turn on the computer (DOS/V PC or Macintosh).
3. Make sure that the FLA-5000 has warmed up. (Only the power lamp on the
upper left panel on the front of the FLA-5000 is lit when warming-up is
completed.) Start the FLA-5000 Image Reader from the startup menu
or using the shortcut key. (On the Macintosh, double-click the alias to
start the software.)
4. The main window of the FLA-5000 Image Reader is displayed.
5. Setting the reading conditions
5-1
Click the
button.
5-2
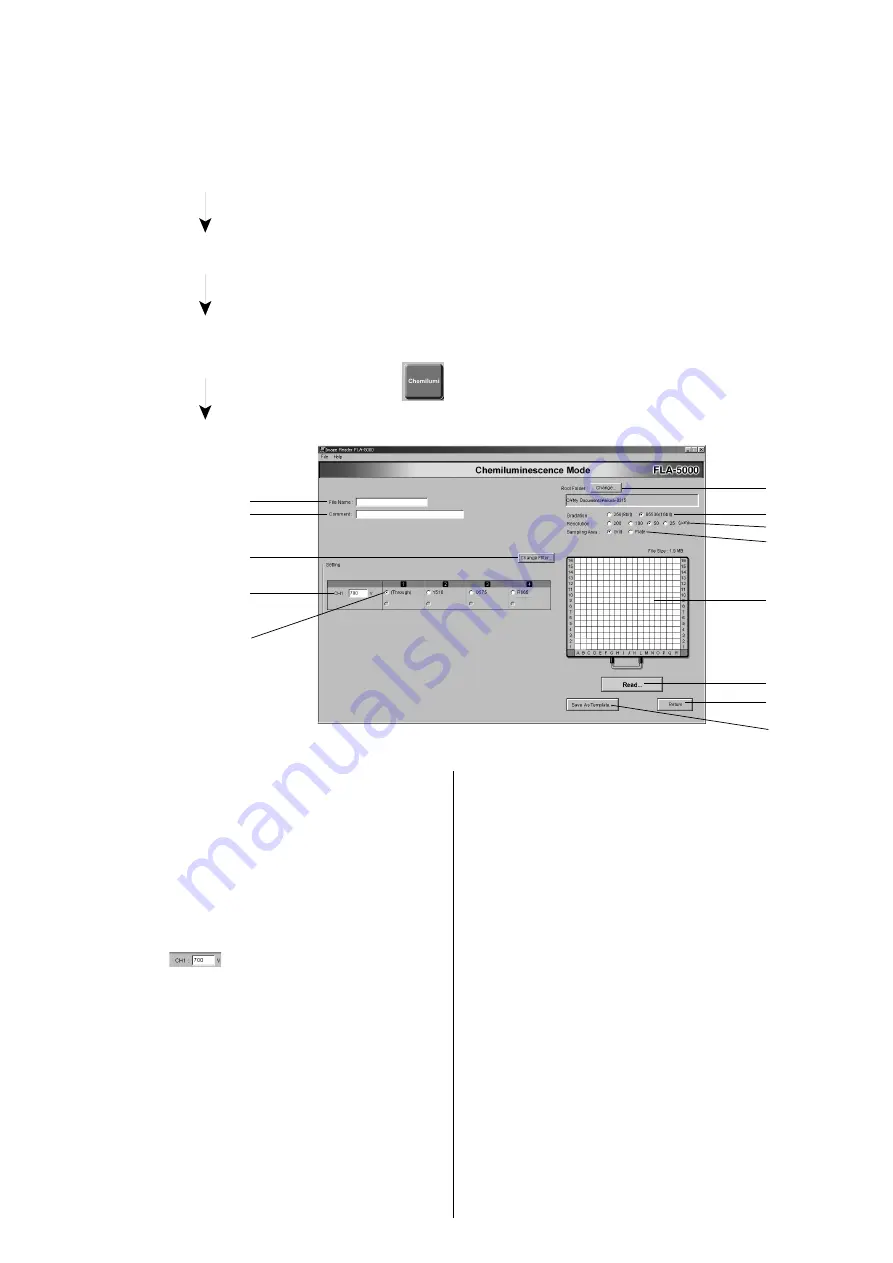
The following window opens.
Set the reading
conditions.
Set the stage on the
FLA-5000.
Set a Chemilumines-
cent Sample on the
stage.
Start reading.
(1)
(2)
(3)
(4)
(5)
(6)
(7)
(8)
(9)
(10)
(11)
(13)
(12)
Set the reading conditions by following the instructions
shown below.
(1)
File Name
Assign a file name to the read image data
for saving.
(2)
Comments
Enter any comments required for saving
with the assigned file name.
(3)
Change Filter...
Use this button when changing any filter
information. (No need to use this option in
the normal chemiluminescent sample
reading operation.)
(4)
Enter the voltage value to be applied to
the first PMT. (Voltage values must be an
integer between 250 and 1000.)
(5)
Filter
Select the filter to be used for reading.
In the chemiluminescent sample reading
mode, no filter is used as a general rule.
In the chemiluminscence mode, the filter
tray must contain at least one through-
position where no filter module is
installed. (For details, refer to the
Operation Manual.)
(6)
Root Folder Change
Specify where to save the file for saving
the image data.
(7)
Gradations
Click to select the number of gradations
of a read image.
(8)
Resolution
Click to select the pixel size for reading.
(9)
Sample Area
Click to select the method for setting the
reading area.
(10)
Reading Area
The actual reading area will be shown in
the form of a red-colored box.
As necessary, move the cursor onto the
red frame or to any point in the red box
and drag the box to change the size and/
or position of the reading area.
(11)
Read
Click on this button to start the reading
operation.
(12)
Save Template
Use this button to save the reading
conditions in a file. (For details, see the
Operation Manual.)
(13)
Return
Click on this button to return to the Main
window.


