background image

49

More

 on
 P

lay
bac

k

j

 Edit

C

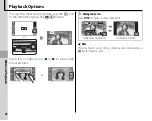
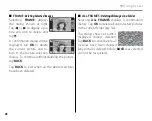
 IMAGE ROTATE

 IMAGE ROTATE

This option creates rotated copies of pictures for display in the monitor.  It has no eff ect on pictures 
displayed on a computer or other device.

1

  Tap the left and right arrows (

8

 and 

9

) to select the picture you wish to ro-

tate.

HOME

IMAGE ROTATE

IMAGE ROTATE

BACK

OK

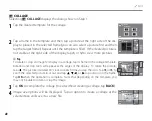
2

 Tap 

W

 to rotate the picture 90 ° clockwise, 

X

 to rotate it 90 ° counterclockwise.

HOME

IMAGE ROTATE

IMAGE ROTATE

BACK

OK

3

 Tap 

OK

 to create the rotated copy (to exit without rotating the picture, tap 

BACK

).

The next time the picture is played back, the rotated copy will be displayed.

1

 Note

The camera may not be able to rotate pictures created with other devices.

Содержание FinePix Z700EXR

Страница 1: ...ied software Be sure that you have read and understood its contents before using the camera For information on related products visit our website at http www fujifilm com products digital_cameras index html Before You Begin First Steps Basic Photography and Playback More on Photography More on Playback Movies Connections Menus Technical Notes Troubleshooting Appendix YF07908 121 EN ...

Страница 2: ...ould never be placed near or over a radiator or heat register Attachments Do not use attachments not recommended by the video prod uct manufacturer as they may cause hazards WaterandMoisture Do not use this video product near water for example near a bath tub wash bowl kitchen sink or laundry tub in a wet basement or near a swimming pool and the like Power Cord Protection Power Supply cords should...

Страница 3: ...ired be sure the service technician has used replacement parts specified by the manufacturer or have the same characteristics as the original part Unauthorized substitutions may result in fire electric shock or other hazards Safety Check Upon completion of any service or repairs to this video product ask the service technician to perform safety checks to determine that the video product is in prop...

Страница 4: ...d case When storing the battery keep it in the hard case When discarding cover the battery terminals with insulation tape Contact with other metallic objects or battery could cause the battery to ignite or burst WARNING WARNING Keep Memory Cards out of the reach of small children Because Memory Cards are small they can be swallowed by children Be sure to store Memory Cards out of the reach of smal...

Страница 5: ...cts such as necklaces or hairpins Do not expose to flame or heat Do not disassemble or modify Use with designated chargers only Dispose of used batteries promptly Do not drop or subject to strong physical shocks Do not expose to water Keep the terminals clean The battery and camera body may become warm to the touch after ex tended use This is normal AC Adapters Available Separately Use only FUJIFI...

Страница 6: ... be determined by turning the equipment off and on the user is encouraged to try to correct the interference by one or more of the following measures Reorient or relocate the receiving antenna Increase the separation between the equipment and receiver Connect the equipment into an outlet on a circuit different from that to which the receiver is connected Consult the dealer or an experienced radio ...

Страница 7: ...ies or accumulators please contact your local authorities and ask for the correct way of disposal NotesonCopyright NotesonCopyright Unless intended solely for personal use images recorded using your digital cam era system cannot be used in ways that infringe copyright laws without the con sent of the owner Note that some restrictions apply to the photographing of stage performances entertainments ...

Страница 8: ...sary Glossary pg 105 pg 105 The meanings of some technical terms may be found here TableofContents TableofContents pg xii pg xii The Table of Contents gives an overview of the entire manual The principal camera operations are listed here WarningMessagesandDisplays WarningMessagesandDisplays pg 101 pg 101 Find out what s behind that flashing icon or error message in the monitor CameraQ A CameraQ A ...

Страница 9: ...t mode 21 Can I change the sound the shutter makes Sound 85 What are the parts of the camera called Parts of the camera 2 What do the icons in the display mean Displays 3 5 How do I use the menus Menus 68 What s behind that flashing icon or error message Messages and displays 101 How much charge is left in the battery Battery level 18 How do I calibrate the touch panel Calibration 90 Can selected ...

Страница 10: ... 38 Can I choose my own settings for different scenes H scene position 25 Is there a mode for photographing pet dogs l Pet detection dog mode 25 Is there a mode for photographing pet cats m Pet detection cat mode 25 How do I shoot close ups Macro mode close ups 35 How do I keep the flash from firing Flash mode 30 How do I stop my subjects eyes glowing red when I use the flash How do I fill in shad...

Страница 11: ...do I view a lot of pictures at once Multi frame playback 44 How do I display pictures in tall portrait orientation Rotating the camera 5 Can I protect my pictures from accidental deletion Protect 78 Can I view my pictures in a slide show Slide show 77 Can I crop unwanted elements out of my pictures Crop trimming 50 How do I rotate pictures Rotate 49 Can I make small copies of pictures Resize 50 Ca...

Страница 12: ...era on and Off 14 Shooting Mode 14 Playback Mode 14 Basic Setup 15 Basic Photography and Playback Basic Photography and Playback Taking Pictures in R EXR AUTO Mode 17 Viewing Pictures 22 More on Photography More on Photography A Shooting Mode 23 E EXR 23 AUTO 24 TOUCH SHOOT 24 H SCENE POSITION 25 l DOG m CAT 25 D NATURAL LIGHT 27 C NATURAL N 27 MANUAL 27 g Intelligent Face Detection and Red Eye Re...

Страница 13: ...ving and Copying Pictures 55 h Picture Compare 56 Movies Movies F Recording Movies 57 a Viewing Movies 59 Connections Connections Printing Pictures via USB 60 Connecting the Camera 60 Printing Selected Pictures 61 Viewing Pictures on a Computer 62 Installing the Software 62 Connecting the Camera 66 Menus Menus The Shooting Menu 68 Using the Shooting Menu 68 Shooting Menu Options 69 d EXP COMPENSAT...

Страница 14: ... FRAME NO 84 Q DIGITAL ZOOM 85 I VOLUME 85 b SOUND 85 J LCD BRIGHTNESS 85 K FORMAT 86 M AUTO POWER OFF 87 N TIME DIFFERENCE 88 S POWER MANAGEMENT 89 h CALIBRATION 90 Technical Notes Technical Notes Optional Accessories 91 Accessories from FUJIFILM 92 Caring for the Camera 93 Troubleshooting Troubleshooting Troubleshooting 94 Warning Messages and Displays 101 Appendix Appendix Glossary 105 Internal...

Страница 15: ...mera 2 Tip Additional information that may be helpful when using the camera Menus and other text in the camera monitor are shown in bold In the illustrations in this manual the monitor display may be simplified for explanatory purposes Supplied Accessories Supplied Accessories The following items are included with the camera NP 45A rechargeable battery BC 45W battery charger USB cable CD ROM Strap...

Страница 16: ...r cover 9 15 Tripod mount 16 USB connector 60 66 17 Battery latch 9 12 18 Memory card slot 12 19 Battery chamber 9 7 Illuminator 82 Self timer lamp 34 8 Flash 30 9 On off switch and lens cover 14 10 Monitor touch panel display 3 7 11 Indicator lamp 20 12 Strap eyelet 1 1 Zoom control 19 58 2 Shutter button 21 3 B a button 14 22 42 4 Microphone 57 5 Lens 107 6 Speaker 59 ...

Страница 17: ... Dynamic range 73 12 Date and time 15 82 13 Sensitivity 71 14 Number of available frames 106 15 Film simulation 73 16 Image quality and size 72 73 17 Internal memory indicator 11 18 Current folder 54 1 Dual IS mode 18 2 Intelligent Face Detection indicator 28 3 Silent mode indicator 21 4 White balance 74 5 Continuous mode 74 6 Battery level 18 7 Focus warning 20 101 8 Blur warning 101 9 Focus fram...

Страница 18: ...ring playback MENU DISP 3 Cautions To avoid damaging the monitor and touch panel dis play observe the following precautions Do not affix plastic covers stickers or other objects to the panel Use only your fingers to operate the panel Do not use excessive force Do not sit on the camera by for example leaving it in a back pocket when sitting down place it under heavy objects or attempt to force it i...

Страница 19: ...in the monitor rotates 90 when the camera is in tall orientation Shooting Shooting Playback Playback MENU DISP MENU DISP MENU DISP MENU DISP Camera held in wide landscape orientation Camera held in wide landscape orientation Camera held in tall portrait orientation Camera held in tall portrait orientation ...

Страница 20: ...ary with the options currently selected MENU DISP Flash mode Choose a flash mode pg 30 Self timer Use the self timer pg 32 Macromode Shoot in macro mode pg 35 Shooting menu View the shooting menu pg 68 Shootingmode Choose a shooting mode pg 23 Playback View pictures pp 22 42 Display Turn indicators on or off pg 18 Face recognition View face recog nition options pg 38 ...

Страница 21: ...mpare Compare pic tures pg 56 Folder management Move or copy pictures between folders pg 54 Playback menu View the playback menu pg 76 Delete Delete the current picture pg 22 Previous View the previous pic ture pp 22 42 Display Turn indicators on or off pg 18 Next View the next picture pp 22 42 Edit Create collages or retouched copies of pictures pg 47 Multi frame View multiple pic tures pg 44 Ima...

Страница 22: ...als with a clean dry cloth Failure to observe this precau tion could prevent the battery from charging Charging times increase at low temperatures 2 Plug the charger in Plug the charger into a power outlet The charging indicator will light The Charging Indicator The charging indicator shows battery charge status as follows Chargingindicator Chargingindicator Battery status Battery status Action Ac...

Страница 23: ...not use excessive force when handling the battery chamber cover 2 Insert the battery Align the orange stripe on the battery with the orange battery latch and slide the battery into the camera keeping the battery latch pressed to one side Confirm that the battery is securely latched 3 Caution Insert the battery in the correct orientation Do NOT use force or attempt to insert the battery up side dow...

Страница 24: ... v Use only battery chargers designated for use with the battery Failure to observe this precaution could re sult in product malfunction Do not remove the labels from the battery or attempt to split or peel the outer casing The battery gradually loses its charge when not in use Charge the battery one or two days before use 2 Tips Using an AC Power Adapter The camera can be powered by an optional A...

Страница 25: ... To prevent internal memory from becoming full be sure to delete pictures when they are no longer needed When a memory card is inserted as described below the card will be used for recording and playback CompatibleMemoryCards CompatibleMemoryCards FUJIFILM and SanDisk SD and SDHC memory cards have been approved for use in the camera A com plete list of approved memory cards is available at http ww...

Страница 26: ... memory card is not correctly inserted pictures will be recorded to internal memory 3 Close the battery chamber cover Close the battery cham ber cover and then lightly press it down and slide it in to latch Removing Memory Cards Turn the camera off and then press the card in and release it slowly The card can now be removed by hand 3 Cautions The memory card may spring out if you remove your finge...

Страница 27: ...ally if the card does not eject take the camera to an authorized service representative Do not forcibly remove the card Do not affix labels to memory cards Peeling labels can cause camera malfunction Movie recording may be interrupted with some types of SD memory card Use a card with a class 4 write speed 4MB s or better when shooting HD movies The data in internal memory may be erased or corrupte...

Страница 28: ...in playback mode by pressing the B a button for about a second Press the B a button for about a second to turn the camera off 2 Tip Switching to Shooting Mode To exit to shooting mode press the shutter button or the B a button 3 Caution The indicator lamp lights when the camera is turned off Do not remove the battery while the lamp is lit The camera can not be turned on again until the lamp turns ...

Страница 29: ...camera is turned on 1Note To change the order in which the year month and day are displayed tap YY MM DD 3 Set the time Select AM or PM tap the 6 or 7 arrows to set the time and tap OK DATE TIME NO AM PM 12 00 hh mm START MENU BACK OK 4 Choose a shooting mode Tap to select NO START MENU SHOOTING MODE TOUCH SHOOT Focus on the touched area and shoot AUTO Selects EXR mode and camera settings for each...

Страница 30: ...ed period the camera clock will be reset and the language selection dialog will be displayed when the camera is turned on If the battery is left in the camera or an optional AC power adapter connected for about a day the battery can be removed for about a week without resetting the clock language selection shooting mode or pow er management options NO START MENU POWER MANAGEMENT POWER SAVE QUICK A...

Страница 31: ...s mode the camera auto matically analyzes the compo sition and selects a scene and EXR mode according to shoot ing conditions and the type of subject b PORTRAIT Human portrait sub ject c LANDSCAPE Man made or natu ral landscape d NIGHT Poorly lit landscape e MACRO Subject close to camera g BACKLIT PORTRAIT Back lit portrait subject f NIGHT PORTRAIT Poorly lit portrait subject a AUTO is selected if...

Страница 32: ...display tap the DISP icon Tap again to display indicators MENU MENU DISP N N 127 127 DISP Indicators displayed Indicators hidden Avoiding Blurred Pictures If the subject is poorly lit blur ringcausedbycameraorsubject movement can be reduced by selecting fON for L DUAL IS MODE in the shooting menu pg 69 The type of blur reduc tioncanbeselectedinthesetup menu pg 82 OFF ON DUAL IS MODE HOME BACK x is...

Страница 33: ...2 Tip Focus Lock Use focus lock pg 36 to focus on subjects that are not in the center of the frame Holding the Camera Hold the camera steady with both hands and brace your el bows against your sides Shak ing or unsteady hands can blur your shots To prevent pictures that are out of focus or too dark underex posed keep your fingers and other objects away from the lens and flash Best Framing To displ...

Страница 34: ...nd the indicator lamp will blink green Change the composition or use focus lock pg 36 The Indicator Lamp Indicator lamp The indicator lamp shows camera status as follows Indicator lamp Indicator lamp Camera status Camera status Glows green Focus locked Blinks green Blur focus or exposure warning Picture can be taken Blinks green and orange Recording pictures Additional pictures can be taken Glows ...

Страница 35: ...q w Press halfway Press the rest of the way down Double beep Click Where Are My Pictures Stored Pictures will be stored in internal memory if no mem ory card is inserted When a memory card is inserted pictures are stored in the D my pictures folder Use folder management pg 54 to organize pictures into other folders after shooting Silent Mode In situations in which camera sounds or lights may be un...

Страница 36: ...tional pictures Scroll left or right or tap 8 or 9 MENU DISP or MENU DISP Press the shutter button or B a button to exit to shooting mode Deleting Pictures To delete the current picture tap e MENU DISP A confirmation dialog will be displayed tap OK to delete the picture or tap BACK to exit without deleting the picture HOME BACK OK ERASE OK 2 Tip The Playback Menu Pictures can also be deleted from ...

Страница 37: ... can be used to al low the camera to optimize settings for your current sub ject or to improve clarity re duce noise or enhance dynamic range Selecting this mode displays the following options select an option and tap OK or tap BACK to return to the shooting mode menu Option Option Description Description R E AUTO The camera automatically se lects the scene and E mode according to shooting conditi...

Страница 38: ... most situations TOUCH SHOOT TOUCH SHOOT Choose this mode to take pictures by touching the display instead of pressing the shutter button Touch anywhere inside the touch and shoot area to focus on the selected subject and take a picture MENU DISP Touch and shoot area Touch subject to shoot ...

Страница 39: ...ati cally when a pet is detected pg 32 During playback image search pg 52 can be used to search for pictures taken in either mode and the camera can automatically select the faces of pets for playback zoom pg 43 slide shows pg 77 and when ZOOM CONTINUOUS is selected for A IMAGE DISP pg 83 3 Caution Although camera can detect many different breeds of dogs and cats results may vary with the breed an...

Страница 40: ... used to capture the expanding burst of light from a firework Shutter speed can be selected by tapping the left and right arrows 8 and 9 Use a tripod to prevent blur QSUNSET Record the vivid colors in sunrises and sunsets RSNOW Choose for crisp clear shots that capture the brightness of scenes dominated by shining white snow SBEACH Choose for crisp clear shots that capture the brightness of sunlit...

Страница 41: ...d in other situations with difficult lighting Each time the shutter button is pressed the camera takes two shots one shot without the flash to preserve natural lighting followed imme diately by a second shot with the flash Do not move the camera until shooting is complete Flash off Flash on 1 Notes Do not use where flash photography is prohibited The flash will fire even in silent mode Only availa...

Страница 42: ...xposure Quality Continuous Size D Range The options shown at right will be displayed Tap to select OFF FACE DETECTION FACE DETECTION ON RED EYE REMOVAL ON FACE DETECTION ON RED EYE REMOVAL OFF HOME BACK Option Option Description Description q Intelligent Face Detection and red eye removal on Use with the flash g Intelligent Face Detection on red eye removal off OFF Intelligent Face Detection and r...

Страница 43: ...n border when the picture is taken If q FACE DETECTION ON RED EYE REMOVAL ON is selected the picture will be processed to reduce red eye before it is recorded Intelligent Face Detection Intelligent Face Detection is recommended when using the self timer for group or self portraits pg 32 BACK 77 When setting focus and exposure the camera gives priority to subjects in its face recognition database p...

Страница 44: ... under low light 1 Choose a flash mode Tap the flash mode icon to display a menu of flash modes and tap to select the desired mode depending on camera settings some modes may not be available see page 21 of the Basic Manual MENU DISP Option Option Description Description Q AUTO FLASH The flash fires when required Recommended in most situations N FORCED FLASH The flash fires whenever a picture is t...

Страница 45: ...n we recommend that you hold the cam era with the flash above the lens 3 Shoot Press the shutter button the rest of the way down to shoot 3 Caution The flash may fire several times with each shot Do not move the camera until shooting is com plete Red Eye Removal When q FACE DETECTION ON RED EYE REMOVAL ON is selected for Intelligent Face Detection pg 28 red eye removal J is available in RED EYE RE...

Страница 46: ...avoid blur caused by the camera moving when the shutter button is pressed Tap the self timer icon to display self timer options and tap to select Option Option Description Description a COUPLE TIMER For self portraits taken with a friend pg 33 g GROUP TIMER For group portraits pg 33 S 10 SEC Ten second timer pg 34 R 2 SEC Two second timer pg 34 T OFF Self timer off DISP MENU 1 Note Turn macro mode...

Страница 47: ...MER CLOSE UP Select MENU DISP 2 2 Choose 1 b 2s timer 2 bb 2s timer or 3 bbb 1s timer The morehearts thecloserthesubjects must be together gGROUPTIMER GROUPTIMER The camera will start the timer when it detects the selected number of portrait subjects Tap 8 or 9 to choose the number of subjects To stop the timer before the picture is taken press the shutter button halfway 2 persons Select number ME...

Страница 48: ...e camera will blink immediately before the picture is taken If the two second timer is selected the self timer lamp will blink as the timer counts down Intelligent Face Detection Because it ensures that the faces of portrait subjects will be in focus Intelligent Face Detection pg 28 is recommended when using the self timer for group portraits or self portraits To use the self timer with Intelligen...

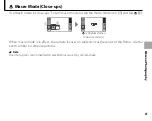
Страница 49: ... the macro mode icon q and tap F w MENU DISP q w MENU DISP F is displayed when macro mode is on When macro mode is in effect the camera focuses on subjects near the center of the frame Use the zoom control to compose pictures 1 Note Use of a tripod is recommended to prevent blur caused by camera shake ...

Страница 50: ... Focus and exposure will remain locked while the shutter button is pressed halfway AF AE lock Press halfway Repeat steps 1 and 2 as desired to refocus before taking the picture 3 Recompose the picture Keeping the shutter button pressed halfway recompose the picture 4 Shoot Press the shutter release button the rest of the way down to take the picture Press the rest of the way down ...

Страница 51: ...ors or car bodies Fast moving subjects Subjects photographed through a window or other reflective object Dark subjects and subjects that absorb rather than reflect light such as hair or fur Insubstantial subjects such as smoke or flame Subjects that show little contrast with the background for example subjects in clothing that is the same color as the background Subjects positioned in front of or ...

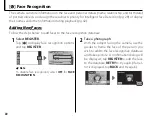
Страница 52: ...recognition options and tap REGISTER MENU DISP FACE RECOGNITION ON REGISTER VIEW EDIT AUTO REGISTRATION ON FACE RECOGNITION HOME BACK 1 Note To disable face recognition select OFF for FACE RECOGNITION 2 Take a photograph With the subject facing the camera use the guides to frame the face of the person you wish to add to the face recognition database and take a picture A confirmation dialog will be...

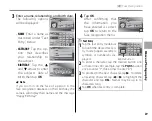
Страница 53: ...ill display their name and the message Happy Birthday 4 Tap OK After confirming that the information you have entered is correct tap OK to return to the face recognition menu Text Entry 1 Tap the text entry mode but ton until the desired text en try mode uppercase letters symbols or numbers is dis played NAME HOME BACK DEL OK space 12 WXYZ TUV PQRS MNO JKL GHI DEF ABC Mode button 2 To enter a char...

Страница 54: ... BACK REPLACING IMAGE NAME FUJIFILM2 CATEGORY NONE BIRTHDAY 12 31 2050 3 View or edit face recognition data To modify the name category or birth date tap the current entry and edit the data as de scribed in Step 3 on page 39 To retake the photo tap REPLACING IMAGE and shoot a new portrait as described in Step 2 on page 38 Tap OK to exit when you have finished view ing or editing the face recogniti...

Страница 55: ...to eight faces If you attempt to add a ninth face a confirmation dialog will be displayed use the VIEW EDIT option to make room for new faces by deleting existing data AUTO REGIS TRATION is disabled if there are already data for eight faces When Intelligent Face Detection pg 28 is on and the frame contains multiple subjects from the face recogni tion database the camera displays the name of the su...

Страница 56: ...right or tap 8 or 9 to view addi tional pictures MENU DISP or MENU DISP Hiding Indicators Tap DISP to hide or view indicators 12 31 2050 10 00 AM 12 31 2050 10 00 AM 1000 F3 9 1000 F3 9 100 0100 100 0100 4 3N 4 3N 3 3 1 1 800 800 MENU DISP DISP Indicators displayed Indicators hidden 1 Note Pictures taken using other cameras are indicated by a m gift image icon ...

Страница 57: ... tap the display to zoom in on the selected area Tap 6 7 8 or 9 to scroll the display Tap BACK to exit zoom 1 Note The maximum zoom ratio varies with image size Intelligent Face Detection Pet Detection Pictures taken with Intelligent Face Detection pg 28 are in dicated by a g icon pictures taken with pet detection pg 25 by a m icon Tap the icon to zoom in on a subject the camera has detected You c...

Страница 58: ...frame views scroll left or right or tap 6 7 8 or 9 to view more pictures or Tap a picture to view it full screen 1 Note When you tap a picture to display it full screen the folder containing the selected picture becomes the current folder pg 54 Rotating the Camera When the camera is held in tall por trait orientation the highlighted pic ture appears at the top of the display Tap 6 7 8 or 9 to high...

Страница 59: ...ge device before proceeding 1 Tap MENU during playback to display the play back menu and tap e Erase MENU DISP BACK HOME PLAYBACK MENU Silent Set up Protect Erase FR Upload Tag Compare Edit Erase Search Slide Show Folder 2 Tap FRAME or ALL FRAMES to display op tions for the selected item pg 46 HOME BACK ERASE ALL FRAMES FRAME 2 Tips Deleting Pictures When a memory card is inserted pictures will be...

Страница 60: ...CK to exit when all the desired pictures have been deleted ALL FRAMES ALL FRAMES DeletingAllImagesinaFolder DeletingAllImagesinaFolder Selecting ALL FRAMES displays a confirmation dialog Tap OK to delete all unprotected pictures in the current folder pg 54 The dialog shown at right is displayed during deletion Tap BACK to cancel before all pictures have been deleted any pictures deleted before BAC...

Страница 61: ...SIZE Tap 6 or 7 to scroll through the menu and tap an option to select it Option Option Description Description f COLLAGE Create collages pg 48 C IMAGE ROTATE Rotate pictures pg 49 G CROP Create cropped copies of pictures pg 50 O RESIZE Create small copies of pictures pg 50 B RED EYE REMOVAL Create copies with reduced red eye pg 51 2 Tip Edit options can also be accessed from the playback menu pg ...

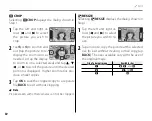
Страница 62: ...s frame in the collage template Rotation and crop tools will appear at the edges of the display To rotate the picture tap n The picture is rotated 90 clockwise each time you tap the icon Tap k or n to zoom the selected picture in or out and tap 6 7 8 or 9 to position it in the frame Tap OK when the operation is complete Note that depending on the template you may not be able to rotate or crop the ...

Страница 63: ...9 to select the picture you wish to ro tate HOME IMAGE ROTATE IMAGE ROTATE BACK OK 2 Tap W to rotate the picture 90 clockwise X to rotate it 90 counterclockwise HOME IMAGE ROTATE IMAGE ROTATE BACK OK 3 Tap OK to create the rotated copy to exit without rotating the picture tap BACK The next time the picture is played back the rotated copy will be displayed 1 Note The camera may not be able to rotat...

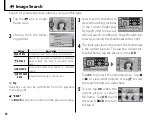
Страница 64: ... a separate file BACK to exit without cropping 1 Note Pictures taken with other cameras can not be cropped O RESIZE RESIZE Selecting O RESIZE displays the dialog shown in Step 1 1 Tap the left and right ar rows 8 and 9 to select the picture you wish to re size 2 Tap an icon to copy the picture at the selected size to exit without creating a small copy tap BACK The sizes available vary with the siz...

Страница 65: ...VING 1 Notes Red eye may not be removed if the camera is unable to detect a face or the face is in profile Results may differ depending on the scene Red eye can not be removed from pictures that have already been pro cessed using red eye removal or pictures created with other devices The amount of time needed to process the image varies with the number of faces detected Copies created with B RED E...

Страница 66: ...w ad ditional search conditions Page through pic tures by scrolling the thumbnails left or right 4 The large preview to the left of the thumbnails is the current picture To view the current pic ture full frame tap the preview or tap OK HOME OK BACK 05 31 2050 08 20 2050 06 03 2050 08 22 2050 06 11 2050 08 28 2050 05 31 2050 BACK DISP OK HOME 05 31 2050 Tap D to protect the current picture Tap 8 or...

Страница 67: ... deleting pictures tap BACK pg 46 Image Search Folder Management Image Search Folder Management To copy or move the pictures tap the I icon when the current picture is shown full frame pg 52 The dialog shown in Step 1 will be displayed 1 Tap 8 or 9 to display the desired picture BACK HOME 05 31 2050 2 Tap the destination folder pg 54 BACK HOME 05 31 2050 3 Tap MOVE or COPY HOME BACK COPY MOVE 05 3...

Страница 68: ...ed to view pictures in all folders except a and H select J in the folder management dialog 1 Note Folder management is only available when a memory card is inserted in the camera Folders on memory cards from other cameras may not be organized as shown above 2 Tip Folder Management Folder management can also be accessed from the playback menu pg 76 The H Folder The H folder is password pro tected T...

Страница 69: ...taining the desired picture HOME OK FOLDER MANAGEMENT 2 Tap the picture HOME OK FOLDER MANAGEMENT 3 Tap the destination folder HOME BACK FOLDER MANAGEMENT 4 Tap MOVE or COPY or tap BACK to exit without moving or copying the pic ture HOME BACK COPY MOVE FOLDER MANAGEMENT 3 Caution Copying ends when the destination is full I Folder Management ...

Страница 70: ...right or tap 8 or 9 to choose the picture shown in the frame To zoom in on the highlighted picture tap k or tap e to delete the highlighted picture To exit to single frame playback tap BACK 2 Tip Picture Compare Side by side comparison can also be accessed from the playback menu pg 76 HOME BACK PICTURE COMPARE HOME BACK PICTURE COMPARE ...

Страница 71: ...lso turn L DUAL IS MODE pg 18 o SILENT MODE pg 21 and b FACE DETEC TION pg 28 on or off before shooting movies Red eye removal is not available BACK HOME SHOOTING MENU Dual Is Mode Framing Set up Film Simula White Bal Face Detec AF Mode Exposure Quality Continuous Size D Range Silent BACK HOME SHOOTING MENU Dual Is Mode Framing Set up Film Simula White Bal Face Detec AF Mode Exposure Quality Conti...

Страница 72: ...ayed before recording begins Sounds made by the camera may be recorded with the movie 5 Press the shutter button all the way down to end recording Recording ends automatically when the movie reaches maximum length or memo ry is full 2 Tip There is no need to keep the shutter button pressed during recording 3 Cautions The indicator lamp lights while movies are being recorded Do not remove the memor...

Страница 73: ...011 100 0011 Progress is shown in the monitor during playback The following operations can be performed while playback is in progress Operation Operation Description Description End playback Tap 3 to end playback Pause playback Tap 2 to pause playback Tap 1 to resume 1m15s 1m15s Progress bar Playback ends automatically when the entire movie has been played 3 Caution Do not cover the speaker during...

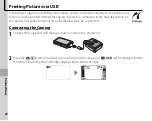
Страница 74: ...ending on the printer not all the functions described below may be supported Connecting the Camera Connecting the Camera 1 Connect the supplied USB cable as shown and turn the printer on 2 Press the B a button for about a second to turn the camera on t USB will be displayed in the monitor followed by the PictBridge display shown below at right USB 00 PICTBRIDGE TOTAL 00000 TOTAL 00000 SHEETS SHEET...

Страница 75: ...nting To end printing be fore all pictures have printed tap CANCEL 2 Tip Printing the Date of Recording To print the date of recording on pictures tap MENU in steps 1 2 to display the PictBridge menu see below and select PRINT WITH DATE s To ensure that the date is correct set the camera clock before taking pic tures PRINT WITH DATE s Print date of recording on pictures PRINT WITHOUT DATE Print pi...

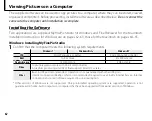
Страница 76: ...ing system requirements Windows 7 Windows 7 Windows Vista Windows Vista Windows XP Windows XP CPU CPU 3GHz Pentium 4 or better 2GHz Pentium 4 or better RAM RAM 1GB or more 512MB or more Free disk space Free disk space 15GB or more 2GB or more Video Video 1024 768 pixels or more with 24 bit color or better A graphics processing unit GPU that supports DirectX 7 or later Other Other Built in USB port...

Страница 77: ...nstaller Does Not Start Automatically If the installer does not start automatically select Computer or My Computer from the Start menu then double click the FINEPIX CD icon to open the FINEPIX CD window and double click setup or SETUP EXE 4 If prompted to install Windows Media Player or DirectX follow the on screen instructions to com plete installation 5 Remove the installer CD from the CD ROM dr...

Страница 78: ...colors or better Other Other Built in USB port recommended Operation is not guaranteed with other USB ports Internet connection 56kbps or faster recommended required to use FinePix Internet Service Internet connection and e mail software required to use e mail option 2 After starting the computer and quitting any applications that may be running insert the installer CD in a CD ROM drive and double...

Страница 79: ...rearlier Open the Applications folder start Image Capture and select Preferences from the Image Capture application menu The Image Capture preferences dialog will be displayed choose Other in the When a camera is connected open menu then select FPVBridge in the Applications FinePixViewer folder and click Open Quit Image Capture Mac OS X 10 6 Connect the camera and turn it on Open the Applications ...

Страница 80: ...supplied USB cable as shown making sure the connec tors are fully inserted Connect the camera di rectly to the computer do not use a USB hub or keyboard 3 Press the B a button for about a second to turn the camera on MyFinePix Studio or FinePixViewer will start automatically follow the on screen instructions to copy pictures to the computer To exit without copying pic tures click Cancel 3 Caution ...

Страница 81: ...letoaccesspictures saved to a network server using the supplied software in the same way as on a standalone computer The user bears all applicable fees charged by the phone company or Internet service provider when using services that require an Internet connection Disconnecting the Camera After confirming that the indicator lamp is out follow the on screen instructions to turn the camera off and ...

Страница 82: ...ode Framing Silent Set up Film Simula White Bal Face Detec AF Mode Exposure Quality Continuous Size D Range 2 Tap the icon for the de sired menu item BACK HOME SHOOTING MENU Dual Is Mode Framing Silent Set up Film Simula White Bal Face Detec AF Mode Exposure Quality Continuous Size D Range 3 Tap the desired option In some menus you may need to tap 6 or 7 to view additional options OFF FACE DETECTI...

Страница 83: ...atural contrast pg 73 AUTO A B C AUTO PFILM SIMULATION Simulate the effects of different types of film pg 73 c d b f c DWHITE BALANCE Adjust color for different light sources pg 74 AUTO i j k l m n AUTO RCONTINUOUS Shoot a series of pictures pg 74 ON OFF OFF bFACE DETECTION Choose whether the camera automatically detects and sets focus and exposure for human portrait subjects Can be combined with ...

Страница 84: ...ents are complete Choosing an Exposure Compensation Value Backlit subjects choose values from 2 3 EV to 12 3 EV for an explanation of the term EV see the Glossary on page 105 Highly reflective subjects or very bright scenes e g snowfields 1EV Scenes that are mostly sky 1EV Spotlit subjects particularly if photographed against dark backgrounds 2 3 EV Subjects with low reflectivity pine trees or dar...

Страница 85: ...e used to reduce blur when lighting is poor note however that mottling may appear in pictures taken at high sensitivities If AUTO is se lected the camera will adjust sensitivity automatically in response to shooting conditions Settings other than AUTO are shown by an icon in the monitor MENU DISP 400 ...

Страница 86: ...in Q16 9 16 9cm 6 5 3 5in The number of pictures that can be taken at each setting is displayed to the right of the option in the menu HOME 1 2 BACK IMAGE SIZE 9 FRAMES 4 3 12M 16 9 9M 4 3 6M 16 9 4M 207 FRAMES 251 FRAMES 325 FRAMES 1 Note Image quality is not reset when the camera is turned off or another shooting mode is selected Aspect Ratio Pictures with an aspect ratio of 4 3 have the same pr...

Страница 87: ... ob jects or people wearing white note however that mottling may appear in pictures taken at higher values If AUTO is selected the camera will auto matically select values between 100 and 400 in response to shooting conditions P P FILM SIMULATION FILM SIMULATION Simulate the effects of different types of film in cluding sepia and black and white Tap 6 or 7 to highlight an option and tap OK to sele...

Страница 88: ...rm white fluorescent lights m Use under cool white fluorescent lights n Use under incandescent lighting If AUTO does not produce the desired results for example when taking close ups choose the op tion that matches the light source 1 Notes Turn the flash off pg 30 to take pictures that reflect the color of the original light source Results vary with shooting conditions Play pictures back after sho...

Страница 89: ...sed halfway the camera detects high contrast subjects near the center of the monitor and selects the focus area automatically MENU DISP Press halfway MENU DISP Focus frame MENU DISP MENU DISP F F AF MODE AF MODE This option controls how the camera focuses when Intelligent Face Detection is off pg 28 Regardless of the option selected the camera will focus on the subject in the center of the monitor...

Страница 90: ...yback Menu Options Playback Menu Options The following options are available Option Option Description Description hPICTURE COMPARE Display two pictures side by side pg 56 gFOLDER MANAGEMENT Organize pictures into folders pg 54 bIMAGE SEARCH Search for pictures by date subject scene or file type pg 52 cEDIT Rotate pictures make collages or create cropped or resized copies of pictures pg 47 ISLIDE ...

Страница 91: ...e slide show will continue when the movie ends Option Option Displayed in Displayed in NORMAL Pictures are displayed one at a time Select FADE IN for fade transitions between frames FADE IN NORMAL g As above except that camera automatically zooms in on faces selected with Intelligent Face Detec tion pg 28 or pet detection pg 25 FADE IN g MULTIPLE Display several pictures at once SELECT BGM Choose ...

Страница 92: ...ut changing picture status HOME BACK SET ALL OK IT MAY TAKE A WHILE OK PROTECT RESETALL RESETALL Tap OK to remove protection from all pictures or tap BACK to exit without changing pic ture status HOME BACK RESET ALL OK IT MAY TAKE A WHILE OK PROTECT If the number of pictures af fected is very large the dis play at right will appear in the monitor while the operation is in progress Tap BACK to exit...

Страница 93: ... Windows only SelectingPicturesforUpload SelectingPicturesforUpload 1 Tap YouTube to select movies for upload to YouTube FACEBOOK to select photos and movies for upload to Facebook 2 Tap 8 or 9 to display pictures and tap OK to select or deselect Tap BACK to exit when all the desired pictures are selected BACK OK HOME UPLOAD TO YouTube OK BACK OK HOME CANCEL MARK OK YouTube YouTube Not selected fo...

Страница 94: ...fore the opera tion is complete UploadingPictures WindowsOnly UploadingPictures WindowsOnly Selected pictures can be uploaded using the YouTube Facebook Upload option in MyFinePix Studio Windows only Select with camera Upload from computer For information on installing MyFinePix Studio and connecting the camera to a computer see Viewing Pictures on a Computer pg 62 BACK OK HOME SET UPLOAD TAG TO R...

Страница 95: ...F Mode Exposure Quality Continuous Size D Range 2 Tap SET Set up BACK HOME SHOOTING MENU Dual Is Mode Framing Silent Set up Film Simula White Bal Face Detec AF Mode Exposure Quality Continuous Size D Range 3 Tap 6 or 7 to display the desired menu item and tap to select BACK IMAGE DISP FRAME NO DUAL IS MODE ILLUMINATION SET UP HOME 1 5 1 5 SEC CONT ON 4 Tap the desired option 3 SEC 1 5 SEC ZOOM CON...

Страница 96: ...ow that shooting is complete ON OFF ON DDIGITAL ZOOM Enable or disable digital zoom pg 85 ON OFF OFF FDATE TIME Set the camera clock pg 15 IVOLUME Adjust volume for the shutter controls and playback pg 85 bSOUND Choose shutter start up and control sounds pg 85 JLCD BRIGHTNESS Control the brightness of the monitor pg 85 0 KFORMAT Format internal memory or memory cards pg 86 La Choose a language pg ...

Страница 97: ...3 SEC or until you tap OK ZOOM CONTINUOUS If ZOOM CON TINUOUS is selected photos can be zoomed in to check focus and other fine details pg 43 tap 6 7 8 or 9 to scroll the display note that zoom is disabled in C mode and when ON is selected for R CONTINUOUS as described on page 74 Intelligent Face Detection Pet Detection When ZOOM CONTINUOUS is selected the camera will automatically zoom in on face...

Страница 98: ...ues from the last file number used or the first available file number whichever is higher Choose this option to reduce the number of pictures with duplicate file names RENEW Numbering is reset to 0001 after formatting or when a new memory card is inserted 1 Notes If the frame number reaches 999 9999 the shutter release will be disabled pg 103 Selecting R RESET pg 83 sets B B FRAME NO to CONTINUOUS...

Страница 99: ...han opti cal zoom I I VOLUME VOLUME Adjust volume for the shutter controls and play back Tap an option and choose a volume either by selecting an option in a menu shutter and control volume or by tapping 6 and 7 to choose a setting between OFF and 10 playback volume Tap OK when settings are complete b SOUND SOUND Choose the sounds used for the shutter at start up and for camera controls Tap an opt...

Страница 100: ...ormat internal memory Tap OK to begin formatting To exit with out formatting tap BACK 3 Cautions All data including protected pictures will be deleted from the memory card or internal memory Be sure important files have been copied to a computer or other storage device Do not open the battery cover during formatting FORMAT FORMAT OK ERASE ALL DATA HOME BACK OK FORMAT FORMAT OK ERASE ALL DATA HOME ...

Страница 101: ... 60 or computer pg 66 or when a slide show is in progress pg 77 and that even if OFF is selected the camera will turn off automatically if no operations are performed for five minutes in R or movie mode or when an option other than n POWER SAVE is selected for S POWER MANAGEMENT an option other than OFF is selected for b FACE DETECTION or Z PORTRAIT ENHANCER l DOG or m CAT is selected in H mode 2 ...

Страница 102: ...OME If g LO CAL is selected g will be displayed in the monitor for three seconds after the camera enters shooting mode and the date will be displayed in yellow After changing time zones check that the date and time are correct 01 30 hh mm OK HOME BACK TIME DIFFERENCE 12 31 2050 10 00 AM 12 31 2050 11 30 AM 01 30 hh mm OK HOME BACK TIME DIFFERENCE 12 31 2050 10 00 AM 12 31 2050 11 30 AM HOME LOCAL ...

Страница 103: ...mera is used for extended periods at high temperatures p QUICK AF Reduces focusing time ensuring a quick shutter response o CLEAR DISPLAY Choose this option for a brighter higher quality display 1 Notes n POWER SAVE does not take effect when Intelligent Face Detection is on Settings other than n POWER SAVE increase the drain on the battery pay attention to battery level An icon is displayed in the...

Страница 104: ... order shown below at left if you tap too far from the correct symbol an error will be displayed tap the correct symbol again The message shown be low at right will be displayed when calibration is complete Tap OK to exit BACK CALIBRATION 1 1 2 2 5 5 3 3 4 4 OK CALIBRATION COMPLETED CALIBRATION ...

Страница 105: ...er available from third party suppliers Printing Printing PictBridge compatible printer available from third party suppliers Printer available from third party suppliers FINEPIX Z700EXR SD card slot or card reader USB SD SDHC memory card USB HDPlayer HDPlayer HDTV available from third party suppliers HDMI cable available from third party suppliers HDP L1 HD player ...

Страница 106: ...e used with NP 45 slimline batteries available separately Battery Battery chargers chargers BC 45W Replacement battery chargers can be purchased as required The BC 45W charges an NP 45A or NP 45 battery in about 120 minutes at 23 C 73 F AC power AC power adapters adapters AC 5VX requiresCP 45DCcoupler Use for extended playback or when copying pic tures to a computer shape of adapter and plug vary ...

Страница 107: ...sing the camera at the beach or seaside avoid exposing the camera to water or sand Do not place the camera on a wet surface Condensation Condensation Sudden increases in temperature such as occur when entering a heated building on a cold day can cause condensation inside the camera If this occurs turn the camera off and wait an hour be fore turning it on again If condensation forms on the memory c...

Страница 108: ... the drain on the bat tery 23 The battery has been charged many times The battery has reached the end of its charging life Purchase a new battery The camera turns off sud denly The battery is exhausted Charge the battery or insert a fully charged spare battery 8 9 The AC adapter or DC coupler has been dis connected Make sure that the AC adapter and DC coupler are properly connected Battery charger...

Страница 109: ...is exhausted Charge the battery or insert a fully charged spare battery 8 9 The camera has turned off automatically Turn the camera on 14 The monitor goes dark after shooting The flash has fired The monitor may darken while the flash charges Wait for the flash to charge 30 Focus The camera does not focus The subject is close to the camera Select macro mode 35 The subject is far away from the camer...

Страница 110: ...cted The selected subject is closer to the center of the frame than the main subject Recompose the picture or turn face detection off and frame the picture using focus lock 28 36 Flash The flash does not fire The flash is not available in the current shooting mode Choose a different shooting mode 23 The battery is exhausted Charge the battery or insert a fully charged spare battery 8 9 The camera ...

Страница 111: ...t high temperatures Turn the camera off and wait for it to cool down 14 Smear in the form of vertical purple or white lines appears in the display The camera has been used continuously at high ambient temperatures Vertical purple or white lines may appear when a very bright object is in the frame this phenomenon is common to all CCD image sensors and does not indicate a malfunction These lines are...

Страница 112: ... were created with a different make or mod el of camera Audio No sound in movie playback Playback volume is too low Adjust playback volume 85 The microphone was obstructed Hold the camera correctly during recording 57 The speaker is obstructed Hold the camera correctly during playback 59 Deletion Selected pictures are not deleted Some of the pictures selected for deletion are protected Remove prot...

Страница 113: ... be printed The camera is not properly connected Connect the camera correctly 60 The printer is off Turn the printer on Only one copy is printed The printer is not PictBridge compatible Some printers may only print one copy or may not print the date The date is not printed AC adapter DC coupler Help text is displayed The camera was turned on while being powered by an AC adapter Follow the on scree...

Страница 114: ...as expected Temporary camera malfunction Remove and reinsert the battery or disconnect and reconnect the AC adapter DC coupler If the problem persists contact your FUJIFILM dealer 9 10 No sound The camera is in silent mode Turn silent mode off 21 The camera does not respond to the touch panel or does not perform the expected action when the touch panel is used The touch panel requires calibration ...

Страница 115: ...speed displayed in red The subject is too bright or too dark The pic ture will be over or under exposed If the subject is dark use the flash LENS COVER Attempted to take photograph with lens cover closed Open lens cover before taking photographs FOCUS ERROR Camera malfunction Turn the camera off and then on again taking care not to touch the lens If the message persists contact a FUJIFILM dealer Z...

Страница 116: ...t the memory card pg 86 If the message persists replace the memory card Incompatible memory card Use a compatible memory card pg 11 Camera malfunction Contact a FUJIFILM dealer a MEMORY FULL The memory card or internal memory is full pictures can not be recorded or copied Delete pictures or insert a memory card with more free space pp 12 45 b MEMORY FULL INTERNAL MEMORY IS FULL INSERT A NEW CARD W...

Страница 117: ...4 999 for BY DATE Choose a search that returns fewer results You have attempted to create collages with a total of over 30 000 images No further collages can be created until you have de leted files or inserted a new memory card FILE NUMBER FULL Memory card contains 30 000 images No new pictures can be recorded Delete files or insert new memory card PROTECTED FRAME An attempt was made to delete or...

Страница 118: ...ROR Printer out of paper or ink or other printer error Check printer see printer manual for details To re sume printing turn the printer off and then turn it back on PRINTER ERROR RESUME Check printer see printer manual for details If print ing does not resume automatically tap OK to resume CANNOT BE PRINTED An attempt was made to print a movie a pic ture not created with the camera or a picture i...

Страница 119: ...PEG Joint Photographic Experts Group A compressed file format for color images The higher the compression rate the greater the loss of information and more noticeable drop in quality when the picture is displayed Motion JPEG An AVI Audio Video Interleave format that stores images and sound in a single file with the images recorded in JPEG format Motion JPEG files can be played in QuickTime 3 0 or ...

Страница 120: ...en no memory card is inserted O O IMAGE SIZE photographs FINE image quality aspect ratio 4 3 IMAGE SIZE photographs FINE image quality aspect ratio 4 3 O O QUALITY movies QUALITY movies 1 1 O O P P Q Q h h2 2 f f Internal memory Internal memory approx 30MB approx 30MB 6 10 19 23sec 1GB 1GB 200 330 620 5min 12min 2GB 2GB 410 670 1230 10min 25min 4GB 4GB 830 1340 2480 20min 50min 8GB 8GB 1680 2700 4...

Страница 121: ... 9 wide angle 4 7 telephoto Focal length f 6 4mm 32mm 35 mm format equivalent 35mm 175mm Digital zoom O P Approx 4 up to 20 when combined with optical zoom Q Approx 4 4 up to 22 when combined with optical zoom Aperture F 3 9 wide angle F 6 4 telephoto Focus range distance from front of lens Normal focus approx 60cm 2ft wide angle 100cm 3 3ft telephoto Macro mode approx 9cm 80cm 0 3ft 2 6ft wide an...

Страница 122: ...nt cool white fluorescent and incandescent lighting Self timer Couple timer group timer auto shutter l and m timer with approx 2s or 10s delay OFF Flash Auto flash effective range when sensitivity is set to AUTO is approx 30cm 3 9m 1 0ft 12 8ft wide angle or 40cm 3 2m 1 3ft 10 5ft telephoto Flash modes Auto fill flash off auto slow sync red eye removal off auto with red eye reduction fill flash wi...

Страница 123: ... of frames that can be taken with fresh or fully charged batteries Battery type Battery type Approximate number of frames Approximate number of frames NP 45A type supplied with camera 170 CIPA standard measured in auto mode using battery supplied with camera and SD memory card Note Number of shots that can be taken with battery varies with battery charge level and will decline at low temperatures ...

Страница 124: ...5 5g 0 5oz BC 45W battery charger Rated input 100V 240V AC 50 60Hz Input capacity 8 0VA 100V 12VA 240V Rated output 4 2V DC 550mA Supported batteries NP 45A rechargeable batteries Charging time Approx 120 minutes Dimensions W H D 91mm 62mm 23mm 3 6in 2 4in 0 9in Weight Approx 67g 2 4oz excluding battery Operating temperature 0 C 40 C 32 F 104 F Weight and dimensions vary with the country or region...

Страница 125: ...logy small bright points and anomalous colors may appear particularly in the vicinity of text This is normal for this type of monitor and does not indicate a malfunction images recorded with the camera are unaffected Digital cameras may malfunction when exposed to strong radio interference e g electric fields static electric ity or line noise Due to the type of lens used some distortion may occur ...

Страница 126: ...7 3 AKASAKA 9 CHOME MINATO KU TOKYO 107 0052 JAPAN http www fujifilm com products index html ...

Отзывы: