

Page
1
of
2
FilterQuick-T Software Update Instructions
To update the software follow the attached instructions. If you have any problems or
questions call Frymaster at 1-800-551-8633.
Loading Software from a USB drive
Updating the software takes approximately
30
minutes for the entire fryer. Ensure the store has enough
product cooked while updating the fryers.
The software update may lose the location of product icon on the front screen after
the update. Take either a picture/notation of the product locations on the 12 lanes
for each vat to ensure they can be loaded back at the end of the update.
Check with the manager about any LTO’s (Limited Time Offer) products that may
have been programmed into the controllers. If so capture the product details such
as product name, cook time, etc. to program in later.
The following reset must be performed to clear items before
updating.
1.
Press the HOME button.
2.
Press the SERVICE button.
3.
Press the SERVICE button again.
4.
Enter 3000.
5.
Press the down arrow button.
6.
Press the FIB-RESET 2 button.
7.
Press YES to confirm.
8.
Press the check button.
9.
Press the home button.
The software only needs to be loaded in the USB port in the far left
fryer cabinet and it will update
all
the controllers and boards in the
system.
To update the software, follow these steps carefully:
1.
Switch all controllers to
OFF
. Press the information (?) button; press the down arrow;
press the SW version button. The controller displays INTIALIZING. Write down the
current (UIB, SIB, VIB and FIB) software versions.
2.
On the
far LEFT
controller press the HOME button.
3.
Press the SERVICE button.
4.
Press the SERVICE button again.
5.
Enter 3000 for and press the checkmark button.
6.
Press the TECH MODES button.
7.
Press the down arrow.
8.
Press the SOFTWARE UPGRADE button.
9.
Controller displays INSERT USB.
10.
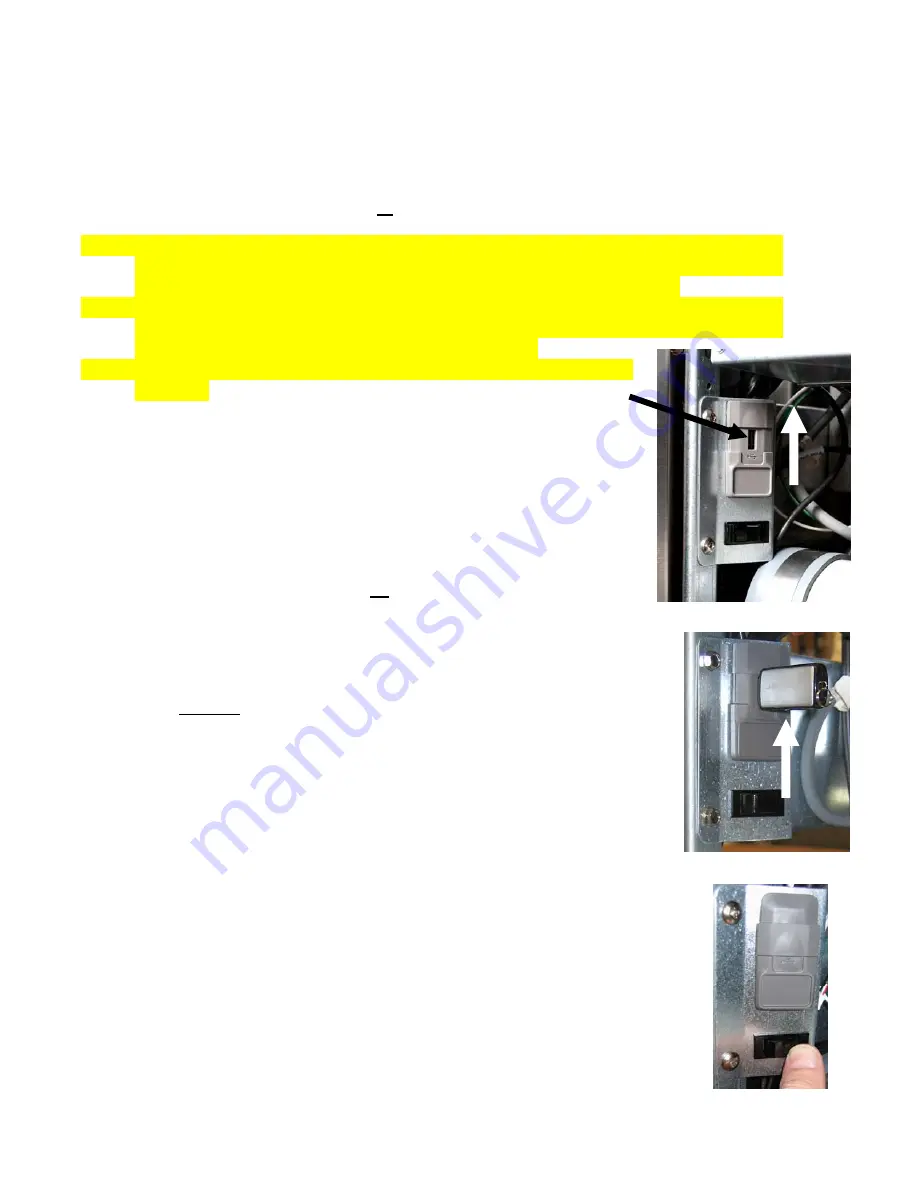
Open the far left cabinet door and slide the USB cover up (see Figure 1).
11.
Insert the USB flash drive (see Figure 2).
12.
The controller displays IS USB INSERTED? YES NO
13.
Press the YES button after the USB flash drive is inserted.
14.
Controller displays READING FILE FROM USB. PLEASE DO NOT REMOVE USB
WHILE READING.
15.
Controller displays READING COMPLETED, PLEASE REMOVE USB.
16.
Remove the USB flash drive and lower cover over the USB slot.
17.
Press the YES button after the USB flash drive is removed.
18.
Controller displays CONFIRM CONTROLLERS AVAILABLE FOR UPGRADE FIB
AND UIB.
19.
Press the YES button to continue or NO to exit.
20.
Controller displays UIB/FIB – DATA TRANSFER IN PROGRESS, WILL COMPLETE
IN X MINUTES for each board.
Figure 1
Figure 3
Figure 2
8197467 07/2017 rev.07.07.2017


