


FrSky Electronic Co., Ltd
Website:www.frsky-rc.com E-mail:[email protected] Technical Support: [email protected]
FrSky Electronic Co., Ltd
Website:www.frsky-rc.com E-mail: [email protected] Technical Support: [email protected]
www.frsky-rc.com
www.frsky-rc.com
3.4 UPDATE Screen:
Voice Set
Select
5S
SWR
RSSI
RBat
A1
A2
A3
A4
Valt
Vspd CUR1 Vcu1 TEM1
Voice Set
Select
5S
Voice can be set to “All off”, “All on”, “Select”
Time interval for the voice announcement (5s, 10s, 20s, 30s, 1m, 1.5m, 2m selectable
under “Select”)
Follow the steps below to change “Voice Set”:
Step 1: Short press “rotate switch” to open “system set”;
Step 2: Use “rotate switch” to choose the position you want to change;
Step 3: Short press “rotate switch” to change the settings.
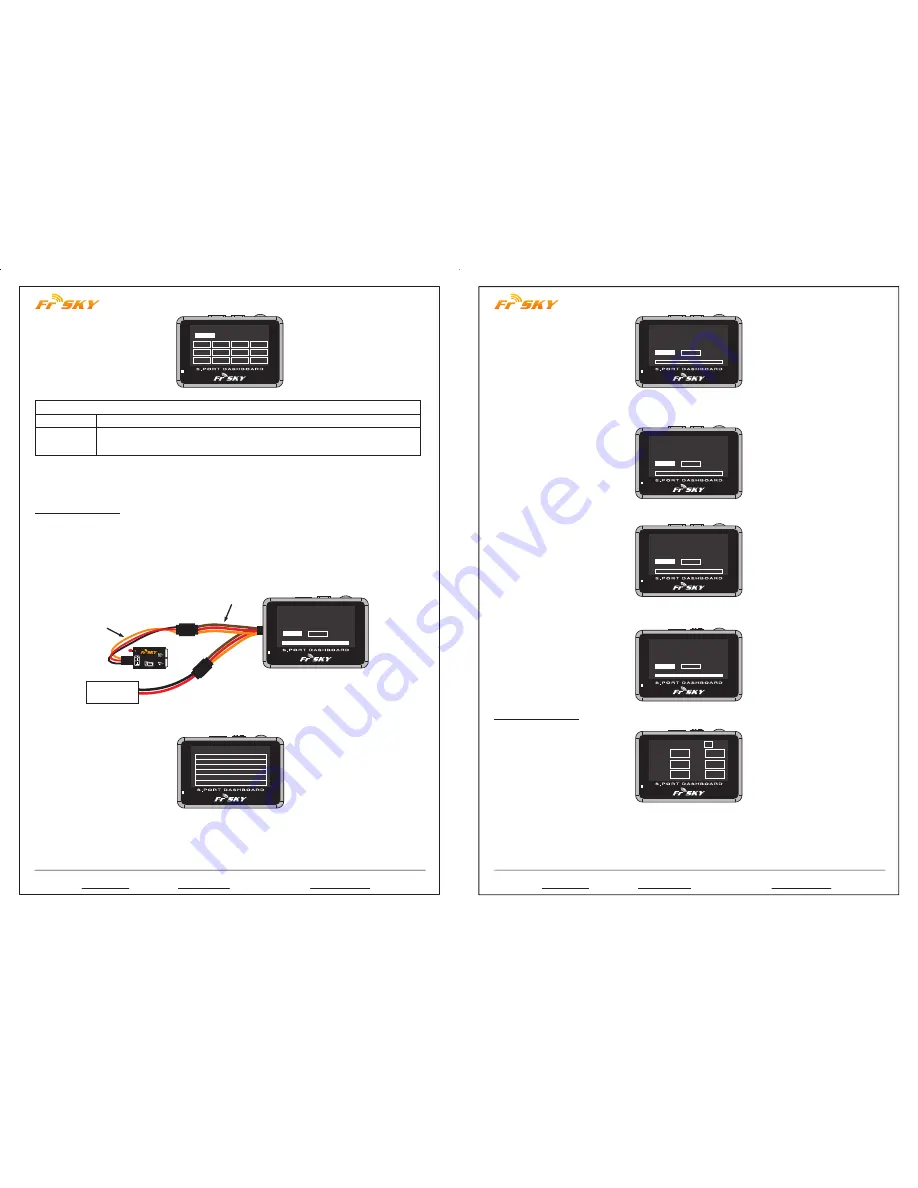
FrSky FSD could upgrade FrSky S.Port products (including modules, receivers, sensors and other S.Port
enabled devices). Follow the steps below to finish the upgrade.
Step 1: Create a new folder named “S.PORT” in the TF card by PC;
Step 2: Download the firmware from FrSky website and put the frk. firmware into the “S.PORT” folder;
Step 3: Insert the TF card back into the FSD card slot;
Step 4: Connect the battery to the FSD by the Y harness, and use rotate switch to choose UPDATE on the main
screen and short press to enter UPDATE screen;
VARIO2.frk
Device found!
Firmware is updated
UPDATE
BACK
LED
PORT
Variometer
Sensor
Battery
s.port
“Y” Cable
Step 5: Use rotate switch to choose the frk. firmware you want to upgrade and short press to open;
To Updated Files
FLVSS.frk
VARIO2.frk
Step 6: Connect the right device to FrSky FSD by the Y harness;
VARIO2.frk
Pls connect device!
Searching....
UPDATE
BACK
Step 7: After the screen shows “Device found! Please click UPDATE”, choose and short “UPDATE” to confirm
update or “BACK” to quit the update;
VARIO2.frk
Device found!
Please click UPDATE!
UPDATE
BACK
Step 8: Wait for flashing;
VARIO2.frk
Device found!
Wait for flashing...
UPDATE
BACK
Step 9: After the firmware is updated, choose and short press BACK to go back to the update screen.
3.5 DATA Screen:
VARIO2.frk
Device found!
Firmware is updated
UPDATE
BACK
00 : 03 : 39
SWR
TF
0
P1
RSSI
0
RBat
0.0
0.0
A1
A2
0.0
0.0
A3
Time: H/M/S (If GPS sensor is connected, the time will be GTM in 10 seconds; if not, the time will be your
operation time)
TF: If the FSD has the TF card inserted already, here will have the TF logo; if not, here will show ER (error).
Short press “rotate switch” will activate the TF to be “ON”, meanwhile start to log your telemetry data.
P: Number of pages


