61709 / 9 ft. Norway Pro Shape FlipTree
Page
2
2.
Getting Tree into the Ready Position:
The Pro Shape FlipTree is resting on a Styrofoam or Cardboard pad. Remove the Pad from
under the Stand.
IMPORTANT: THE TREE STAND IS ATTACHED TO THE TREE BY THE
FACTORY, AND IT SHOULD NOT BE REMOVED FROM THE TREE.
The Tree Top that is packed in its Storage Bag should be taken out of the carton and put to the
side until needed. The Tree Top assembly instructions are listed below.
GETTING YOUR TREE READY TO FLIP!!!
Unlock the wheels and slowly wheel out
your tree from its Carton to the desired tree setup location in your home or office. Give
yourself enough room to Unbuckle and Unzip the Bag and carefully take it off the “A” or Main
Body of the Tree.
(Please store this in a safe place as you will use this bag again to store
the tree after the Christmas Season!!)
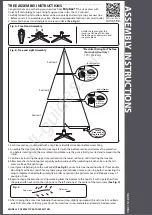
Once you have your tree set in the location that you want to put up the tree, LOCK the two
front wheels!! See Figure 2A below.
Fig 2A
NOTE: WHEN FLIPPING THE TREE, MAKE SURE THAT YOU HAVE
ENOUGH ROOM FOR THE TREE TO FLIP UPWARD. MAKE SURE YOU ARE
NOT TOO CLOSE TO A WALL, FURNTURE LAMP, OR LOW HANGING LIGHT
FIXTURES.
3.
Flip Action:
Now your Tree Section “A” is ready to Flip, Locate the Flip path indicator button at the top of
the Flip Pole. The Flip path runs the length of the Flip pole and is designated by the arrow on
the indicator button. The Tree is made so no Electrical Cords impede flipping the tree. Some
limbs may temporarily catch on each other during storage or shipping. As your start flipping
over your tree you can clear the Flip path of these branches and leaves by just pushing the
bottom branches either left of right.
After you remove the Storage bag, the tree will be in an upside down position. See Fig 3A. Flip
the tree by pulling the top Flip path indicator button towards you in the direction of the arrow.
As you Flip the Tree with one hand, continue to clear the Flip path of any caught limbs with
your other hand (See Fig 3B) until the tree is totally upright (See Fig 3C). The Indicator button
that was on the top of the Flip pole is now at the base and should be flush against the support
pole.


