background image

3

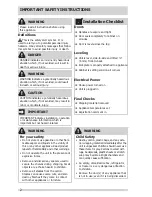
WARNING

Risk of child entrapment

Child entrapment and suffocation are not 

problems of the past. Junked or abandoned 

appliances are still dangerous – even if they 

will sit for “just a few days”. If you are getting 

rid of your old appliance, please follow the 

instructions below to help prevent accidents. 
We strongly encourage responsible 

appliance recycling/disposal methods. Check 

with your utility company or visit www.

recyclemyoldfridge.com for more information 

on recycling your old appliance.

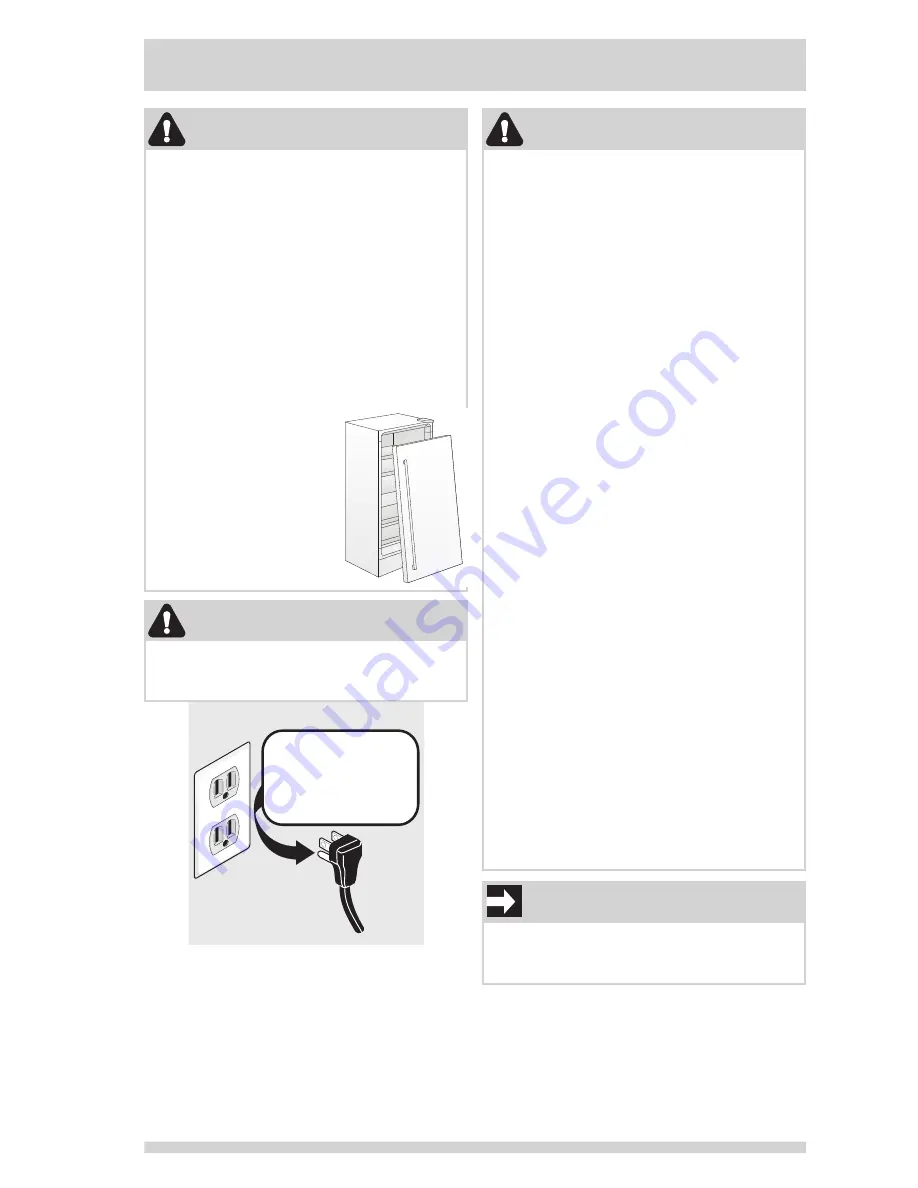
Before you throw away 


your old appliance:

•  Remove door.
•  Leave shelves in place  

so children may not  

easily climb inside.

•  Have the refrigerant  

removed by a  

qualified technician.

IMPORTANT

To disconnect power to the unit, unplug 

the unit or switch the breaker that supplies 

power to the unit to the off position.

IMPORTANT SAFETY INSTRUCTIONS

WARNING

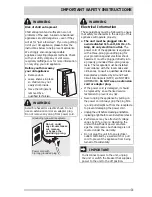
Electrical Information

These guidelines must be followed to ensure 

that safety mechanisms in the design of this 

appliance will operate properly. 

• 

The unit must be plugged into its 

own dedicated 115-volt, 60-Hz., 15-

Amp, AC only electrical outlet.

 The 

power cord of the appliance is equipped 

with a three-prong grounding plug for 

your protection against electrical shock 

hazards. It must be plugged directly into 

a properly grounded three-prong recep-

tacle. The receptacle must be installed 

in accordance with the local codes and 

ordinances. Consult a qualified electrician. 

Receptacles protected by Ground Fault 

Circuit Interrupters (GFCI) are NOT REC-

OMMENDED. 

Do NOT use an extension 

cord or adapter plug.

•  If the power cord is damaged, it should 

be replaced by an authorized service 

technician to prevent any risk.

•  Never unplug the appliance by pulling on 

the power cord. Always grip the plug firm

-

ly, and pull straight out from the receptacle 

to prevent damaging the power cord.

•  Unplug the unit before cleaning and before 

replacing a light bulb to avoid electrical shock.

•  Performance may be affected if voltage  

varies by 10% or more. Operating the 

unit with insufficient power can dam

-

age the compressor. Such damage is not 

covered under the warranty. 

•  Do not plug the unit into an electrical 

outlet controlled by a wall switch or pull 

cord to prevent the appliance from being 

turned off accidentally.

Grounding type wall receptacle

Power cord with 

3-prong grounded plug

Do not, under

any circumstances,

cut, remove,

or bypass the 

grounding prong.

WARNING

Avoid fire hazard or electric shock. Do not 

use an extension cord or an adapter plug. 

Do not remove any prong from power cord.

Содержание FPFU19F8RF

Страница 1: ...portant Safety Instructions 2 Feature Overview 4 Installation 5 Door Removal 8 Electronic Control 8 SabbathMode 10 Alerts 10 Changing The Filter 11 A01060902 January 2015 Connecting Water Supply 12 Ice Service 14 Interior Lighting 15 Storage Features 16 Energy Saving Tips 16 Care Cleaning 17 Before you Call 19 Major Appliance Warranty 21 ...

Страница 2: ...zardous situation which if not avoided may result in minor or moderate injury IMPORTANT IMPORTANT indicates installation operation or maintenance information which is important but not hazard related WARNING Child Safety Destroy carton plastic bags and any exte rior wrapping material immediately after the unit is unpacked Children should never use these items for play Cartons covered with rugs bed...

Страница 3: ...ing plug for your protection against electrical shock hazards It must be plugged directly into a properly grounded three prong recep tacle The receptacle must be installed in accordance with the local codes and ordinances Consult a qualified electrician Receptacles protected by Ground Fault Circuit Interrupters GFCI are NOT REC OMMENDED Do NOT use an extension cord or adapter plug If the power cor...

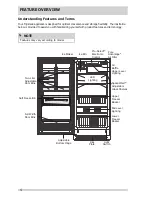
Страница 4: ...lf with product features and terminology NOTE Features may vary according to model Kick Plate Upper Level Lighting Two Liter Adjustable Door Bins Upper Freezer Basket Lower Freezer Basket Light Switch Pure Advantage Air Filter Adjustable Bottom Hinge Mid Level Lighting Pro Select Electronic Control Ice Maker SpaceWise Adjustab le Glass Shelves Full Width Door Bins Ice Bin Air Baffle Soft Freeze Bi...

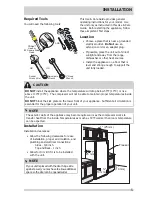
Страница 5: ...CAUTION DO NOT install the appliance where the temperature will drop below 55 F 13 C or rise above 110 F 43 C The compressor will not be able to maintain proper temperatures inside the unit DO NOT block the kick plate on the lower front of your appliance Sufficient air circulation is essential for the proper operation of your unit Installation Installation clearances Allow the following clearances...

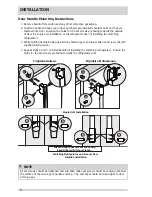
Страница 6: ... if a single unit installation or the refrigerator door if installing the matching refrigerator 3 While holding handle firmly against door fasten upper and lower Allen set screws B with supplied Allen wrench 4 Repeat steps 2 and 3 to install handle if installing the matching refrigerator Ensure the holes for the set screws are facing towards the refrigerator door A B Single Unit Installation A B E...

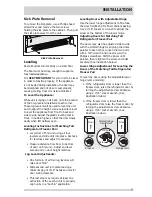
Страница 7: ...turn of all four leg levelers will raise door 5 32 Slide second unit into place leaving a minimum gap of 3 16 between units for door swing clearance This last step may require at least one extraction of the second unit to properly align units in a built in application Leveling Door with Adjustable Hinge Use the lower hinge adjustment to fine tune the door height and for final cabinet spacing Use a...

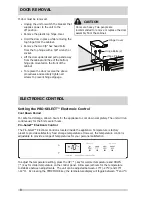
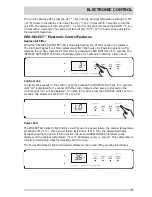
Страница 8: ... between adjustments The unit can be adjusted between 10 F 23 C and 10 F 12 C By pressing the TEMP MODE key the temperature display will toggle between F and C DOOR REMOVAL If door must be removed Unplug the unit or switch the breaker that supplies power to the unit to the off position Remove the plastic top hinge cover Hold the door in place while removing the top hinge from the cabinet Remove th...

Страница 9: ...or 3 seconds The display will show UL for 1 second F To turn the appliance OFF press the UP key until the warmest temperature setting of 10 F 12 C shows in the display Then press the UP key 3 times within 3 seconds to turn the unit OFF The display will then show OF To turn the unit back ON press the DOWN key 3 times within 3 seconds The control will then display 10 F 12 C and may be adjusted to th...

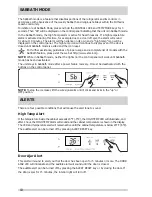
Страница 10: ...this time for example due to a door left ajar the alarm will sound for about 10 minutes The alarm will then silence on its own and a high temp icon will be displayed on the control panel The high temp icon will continue to display even if the door is closed until Sabbath mode is exited and the icon reset For further assistance guidelines of proper usage and a complete list of models with the Sabba...

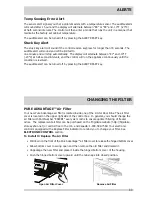
Страница 11: ...AGE Air Filter Your new Pure Advantage air filter is located inside one of the 2 Liter Door Bins The air filter cover is located on the upper right side of the control box In general you should change the air filter with Part Number EAFCBF every six months to ensure optimal filtering of freezer odors The replacement air filter can be purchased on the Frigidaire website http frigidaire stores yahoo...

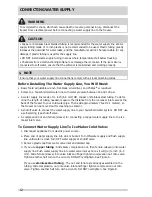
Страница 12: ... deter mine the length of tubing needed measure the distance from the ice maker inlet valve at the back of the freezer to your cold water pipe Then add approximately 7 feet 2 1 meters so the freezer can be moved out for cleaning as shown A shutoff valve to connect the water supply line to your household water system DO NOT use a self piercing type shutoff valve A compression nut and ferrule sleeve...

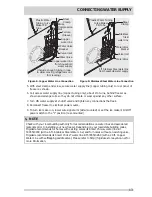
Страница 13: ...om household water supply Include enough tubing in loop to allow moving refrigerator out for cleaning Figure A Copper Water Line Connection Steel Clamp Stainless Steel water Line Water Valve Bracket Valve Inlet Water Valve 6 ft Stainless Steel water line from household water supply Plastic Water Tubing to Ice Maker Fill Tube Figure B Stainless Steel Water Line Connection NOTE Check with your local...

Страница 14: ...alve to the closed position Ice cubes stored too long may develop an odd flavor Empty the ice container and ensure that the wire signal arm is in its down or ON position The ice maker will then produce more ice Occasionally shake the ice container to keep ice separated Keep the wire signal arm in its up or OFF position until the freezer is connected to the water supply or whenever the water supply...

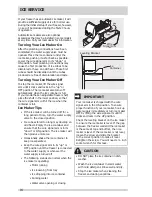
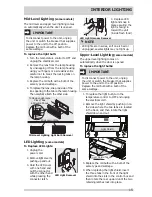
Страница 15: ...eaker that supplies power to the unit to the off position Replace the old bulb with a bulb of the same wattage 1 To replace the light bulb turn the temperature control to OFF and unplug the electrical cord 2 Remove the light shield by pushing in on the sides where the two tabs are located in the back and then rotate the light shield down and out LED Lighting some models To Replace LED Lights 1 Unp...

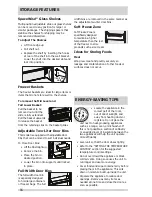
Страница 16: ...n or dishwasher If this is not possible a section of cabinetry or an added layer of insulation between the two appliances will help the unit operate more efficiently Level unit so that the door closes tightly Refer to the SETTING THE TEMPERATURE CONTROL section for the suggested temperature control settings Do not overcrowd the appliance or block cold air vents Doing so causes the unit to run long...

Страница 17: ...sary to prevent odor and mold growth Moving When moving the unit follow these guidelines to prevent damage Disconnect the power cord plug from the wall outlet Remove foods then defrost and clean the appliance Secure all loose items such as base panel baskets and shelves by taping them securely in place to prevent damage In the moving vehicle secure unit in an upright position to prevent movement A...

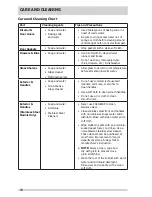
Страница 18: ...ss Cleaner Do not use commercial household cleaners ammonia or alcohol to clean handles Use a soft cloth to clean smooth handles Do not use a dry cloth to clean smooth doors Exterior Handles Stainless Steel Models Only Soap and water Ammonia Stainless Steel Cleaners Never use CHLORIDE to clean stainless steel Clean stainless steel front and handles with non abrasive soapy water and a dishcloth Rin...

Страница 19: ...ed Warm air entering the appliance causes it to run more Open door less often See DOOR PROBLEMS Turn control knob to a warmer setting Al low several hours for the temperature to stabilize Clean or change gasket See Care and Cleaning Chart Worn cracked or poorly fitting gaskets should be replaced APPLIANCE TEMPERATURES Interior ap pliance tem perature is too cold Temperature control is set too low ...

Страница 20: ...fer to Leveling in the INSTALLATION section Ensure floor can adequately support the ap pliance Level the appliance by putting wood or metal shims under part of the appliance Re level appliance or move appliance slightly Refer to Leveling in the IN STALLATION section WATER MOISTURE FROST INSIDE APPLIANCE Moisture forms on inside appli ance walls Weather is hot and humid which increases internal rat...

Страница 21: ...ts or parts obtained from persons other than authorized service companies or external causes such as abuse misuse inadequate power supply accidents fires or acts of God DISCLAIMER OF IMPLIED WARRANTIES LIMITATION OF REMEDIES CUSTOMER S SOLE AND EXCLUSIVE REMEDY UNDER THIS LIMITED WARRANTY SHALL BE PRODUCT REPAIR OR REPLACEMENT AS PROVIDED HEREIN CLAIMS BASED ON IMPLIED WARRANTIES INCLUDING WARRANT...

Отзывы: