background image

20

General Cleaning

To Remove and Replace Oven Door

To Remove Oven Door:

1. Open the door.

2. Remove screws located on the inside of the oven door near the hinges 

A

(one on each side.)

3. Close the door to the quarter-open position. Grasp the door firmly on both

sides and lift up and off the hinges.

4. To clean oven door, follow the instructions provided in the cleaning chart

under 

General Cleaning

To Replace Oven Door:

1. Be sure the hinge arms are in the quarter-open position. Be careful if pulling

the hinges open by hand. The hinges may snap back against the oven frame

and could pinch fingers.

2. Hold the door at the sides near the top. Insert the hinge arms into slots at

the bottom of the door.

3. Hinge arms must go into the range slots evenly. The hinge arms should be

inserted into the bottom corners of the door as far as they can go.

4. If the door is not in line with the oven frame, remove it and repeat the above

steps.

  The  door  is  heavy.  For

safe, temporary storage, lay the door

flat with the inside of the door facing

down.

To Remove and Replace Warmer Drawer 

(if equipped)

To Remove Warmer Drawer:

1.

 Turn power off before removing the warmer drawer.

2. Open the drawer to the fully opened position.

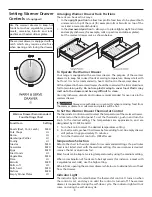
3. On the right glide you will find a shield attached with a hex-head screw (see

figure 1). Using a 1/4” socket and ratchet remove the shield.

4. Locate glide lever on each side of drawer, pull up on the left glide lever and

push down on the right glide lever.

5. Pull the drawer away from the range.

To Replace Warmer Drawer:

1. Replace shield on the right glide of the drawer body.

2.

Pull the bearing glides to the front

 of the chassis glide (see figure 2).

3. Align the glide on each side of the drawer with the glide slots on the range.

4. Push the drawer into the range until levers “click” (approximately 2”). Pull

the drawer open again to seat bearing glides into position. 

If you do not

hear the levers “click” or the bearing glides do not feel seated remove

the drawer and repeat steps 2-4.

 This will minimize possible damage to

the bearing glides.

 Electrical Shock Hazard can occur and result in

serious  injury  or  death.  Disconnect  appliance  from  electric

power before cleaning and servicing the warmer drawer.

Figure 1

Figure 2

Содержание FEFS68CJTC

Страница 1: ... 12 15 Self Cleaning 16 17 General Cleaning 18 20 Customizing Your Oven Performance 21 Changing Cooktop and or Oven Lights 21 Avoid Service Checklist 22 23 Warranty 24 OWNER S GUIDE Ceramic Glass Cooktop Radiant Surface Elements Electronic Oven Control ES III Self Cleaning Oven Feature READ AND SAVE THESE INSTRUCTIONS ELECTRIC RANGE This Owner s Guide contains general operating instructions for yo...

Страница 2: ...g instructions for your range and feature information for several models Your range may not have all the described features The graphics shown are representational The graphics on your range may not look exactly like those shown Note The instructions appearing in this Owner s Guide are not meant to cover every possible condition and situation that may occur Common sense and caution must be practic...

Страница 3: ...dren to climb or play around the range The weight of a child on an open door may cause the range to tip resulting in serious burns or other injury Do not use the oven or warmer drawer if equipped for storage Do not store items of interest to children in the cabinets above a range or on the backguard of a range Children climbing on the range to reach items could be seriously injured Never Use Your ...

Страница 4: ... The oven vent is located under the left rear surface element if your model is equipped with coil elements The oven vent is located below the backguard for models equipped with ceramic glass cook tops Touching the surfaces in this area when the oven is operating may cause severe burns Also do not place plastic or heat sensitive items on or near the oven vent These items could melt or ignite Placem...

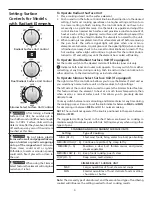
Страница 5: ... residual heat to complete the cooking process The amount of residual heat depends on the type and quality of cooking utensil the quantity of food being cooked and the selected heat setting Dual Radiant Surface Units If equipped The dual radiant surface unit is made up of an inner and outer coil within the same surface unit A control knob and rocker switch is used for operating the different coils...

Страница 6: ...to high settings The left side of the control knob is used to operate the Simmer Select feature This feature allows the element to heat at a much lower temperature than when used as a normal surface unit This allows you to precisely simmer delicate foods You may switch between normal cooking and Simmer Select at any time during the cooking process Be sure to set the knob indicator between MAX and ...

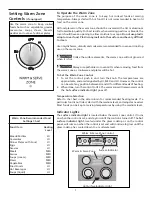
Страница 7: ...fferent levels of heating 2 When done turn the control to OFF The warm zone will remain warm until the hot surface indicator light goes off Temperature Selection Refer to the chart in the side column for recommended heating levels If a particular food is not listed start with the medium level and adjust as needed Most foods can be kept at serving temperatures by using the medium level Indicator Li...

Страница 8: ...e and are designated by HI MED and LO 1 Turn the knob to select the desired temperature setting 2 For best results preheat the drawer before adding food An empty drawer will preheat in approximately 15 minutes 3 Turn the thermostat control to OFF after use Temperature Selection Refer to the chart in the side column for recommended settings If a particular food is not listed start with the medium s...

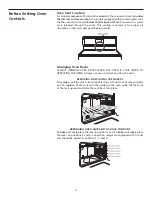
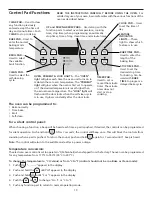
Страница 9: ...ng Oven Racks ALWAYS ARRANGE OVEN RACKS WHEN THE OVEN IS COOL PRIOR TO OPERATING THE OVEN Always use oven mitts when using the oven REMOVING REPLACING OVEN RACKS To remove pull the rack forward until it stops Lift up front of rack and slide out To replace fit the rack onto the guides on the oven walls Tilt the front of the rack upward and slide the rack back into place ARRANGING OVEN RACKS WITH 5 ...

Страница 10: ...cel the minute timer The minute timer does not start or stop cooking FEATURE INDICATOR LIGHTS These light to show which feature is in use CLOCK PAD Used to set the time of day The oven can be programmed to Bake normally Time bake Broil Self clean For a silent control panel When choosing a function a beep will be heard each time a pad is pushed If desired the controls can be programmed for silent o...

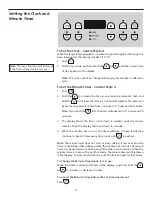
Страница 11: ...splay shows the timer count down in minutes until one minute remains Then the display will count down in seconds 4 When the set time has run out the timer will beep 3 times It will then continue to beep 3 times every 60 seconds until is pushed Note The minute timer does not start or stop cooking It serves as an extra timer in the kitchen that will beep when the set time has run out The minute time...

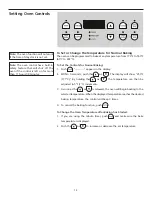
Страница 12: ...the oven will begin heating to the selected temperature When the displayed temperature reaches the desired baking temperature the control will beep 3 times 4 To cancel the baking function push To Change the Oven Temperature after Baking has Started 1 If you are using the minute timer push and make sure the bake temperature is displayed 2 Push the or to increase or decrease the set temperature Note...

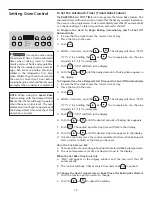
Страница 13: ...g two racks at the same time place in positions 2 and 5 for the best results 4 When baking cakes with S p e e d B a k e s e t temperature 25F 13 C degrees lower than the recommended setting for best results To Set Speed Bake Cooking System 1 Program the oven as you normally would for baking Speed Bake may be used with Bake Time Bake and Delayed Time Bake modes 2 Push and release Speed Bake switch ...

Страница 14: ... To Program Oven for a Delayed Start Time and to Shut Off Automatically 1 Be sure that the clock shows the correct time of day 2 Place the food in the oven 3 Push 4 Within 5 seconds push the or The display will show 350 F 177 C By holding the or the temperature can then be adjusted in 5 F 1 C increments 5 Push 0 00 will flash in the display 6 Push the or until the desired amount of baking time app...

Страница 15: ...r pan without the grid or cover the grid with aluminum foil The exposed fat could ignite 5 Place the pan on the oven rack Open the oven door to the broil stop position when broiling 6 Broil on one side until food is browned turn and cook on the second side Note Always pull the rack out to the stop position before turning or removing food 7 When broiling is finished push Should an oven fire occur c...

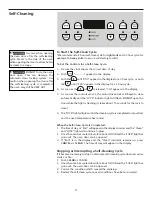
Страница 16: ... racks glide easier into the rack position 4 Remove any excess spillovers in the oven cavity before starting the self cleaning cycle To clean use hot soapy water and a cloth Large spillovers can cause heavy smoke or fire when subjected to high temperatures DO NOT allow food spills with a high sugar or acid content such as milk tomatoes sauerkraut fruit juices or pie filling to remain on the surfac...

Страница 17: ...ime of day or End will appear in the display window and the Clean and LOCK light will continue to glow 2 Once the oven has cooled down for about 1 HOUR and the LOCK light has gone out the oven door can be opened 3 If End is in the display and the Clean indicator remains on press CANCEL or CLEAR The time of day will appear in the display Stopping or Interrupting a Self Cleaning Cycle If it becomes ...

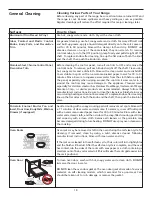
Страница 18: ...tains may occur during heating and cannot be removed To replace knobs after cleaning line up the flat sides of both the knob and the shaft then push the knob into place Gentle scouring with a soapy scouring pad will remove most spots Rinse with a 1 1 solution of clear water and ammonia If necessary cover difficult spots with an ammonia soaked paper towel for 30 to 40 minutes Rinse with clean water...

Страница 19: ...zor blade scraper at a 30 angle to the cooktop 3 Remove loosened soil with a clean paper towel 4 Apply cooktop cleaning cream as described for normal soil 5 If any soil remains repeat the steps listed above After all soil has been removed polish the entire surface with the cooktop cleaning cream For sugary spillovers Sugary spills can cause pitting of your cooktop surface Therefore you must begin ...

Страница 20: ... the door facing down To Remove and Replace Warmer Drawer if equipped To Remove Warmer Drawer 1 Turn power off before removing the warmer drawer 2 Open the drawer to the fully opened position 3 On the right glide you will find a shield attached with a hex head screw see figure 1 Using a 1 4 socket and ratchet remove the shield 4 Locate glide lever on each side of drawer pull up on the left glide l...

Страница 21: ...he range back in 6 The clock if equipped will then need to be reset To reset see Setting the Clock and Minute Timer in this Owner s Guide Note The adjustments made will not change the self cleaning temperature Customizing Your Oven Performance The temperature in the oven has been set at the factory When first using the oven be sure to follow recipe times and temperatures If you think the oven is t...

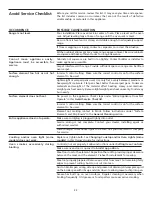
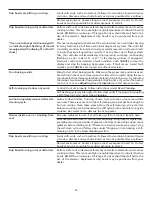
Страница 22: ...aning section Make sure cord plug is plugged tightly into outlet Service wiring is not complete Contact your dealer installing agent or authorized servicer Power outage Check house lights to be sure Call your local electric company for service Replace or tighten bulb See Changing Cooktop and or Oven Lights some models in this Owner s Guide for instructions Control s not set properly Follow instruc...

Страница 23: ...re the proper rack position is used Center food in the oven and space pans to allow air to circulate Allow the oven to preheat to the set temperature before placing food in the oven Try adjusting the recipe s recommended temperature or baking time If you feel the oven is too hot or cool see Adjusting Oven Temperature in this Owner s Guide Control s not set properly Follow instructions under Oven C...

Страница 24: ...r limitation of incidental or consequential damages so this limitation or exclusion may not apply to you 2 Service calls which do not involve malfunction or defects in workmanship or material or for appliances not in ordinary household use The consumer shall pay for such service calls 3 Damages caused by services performed by servicers other than Electrolux Home Products North America or its autho...

Отзывы: