manualshive.com logo in svg
background image

bremer VIVA

Operating Instructions

Franke Coffee Systems

Automatic Coffee & Cappuccino/Espresso Machine

Содержание bremer VIVA

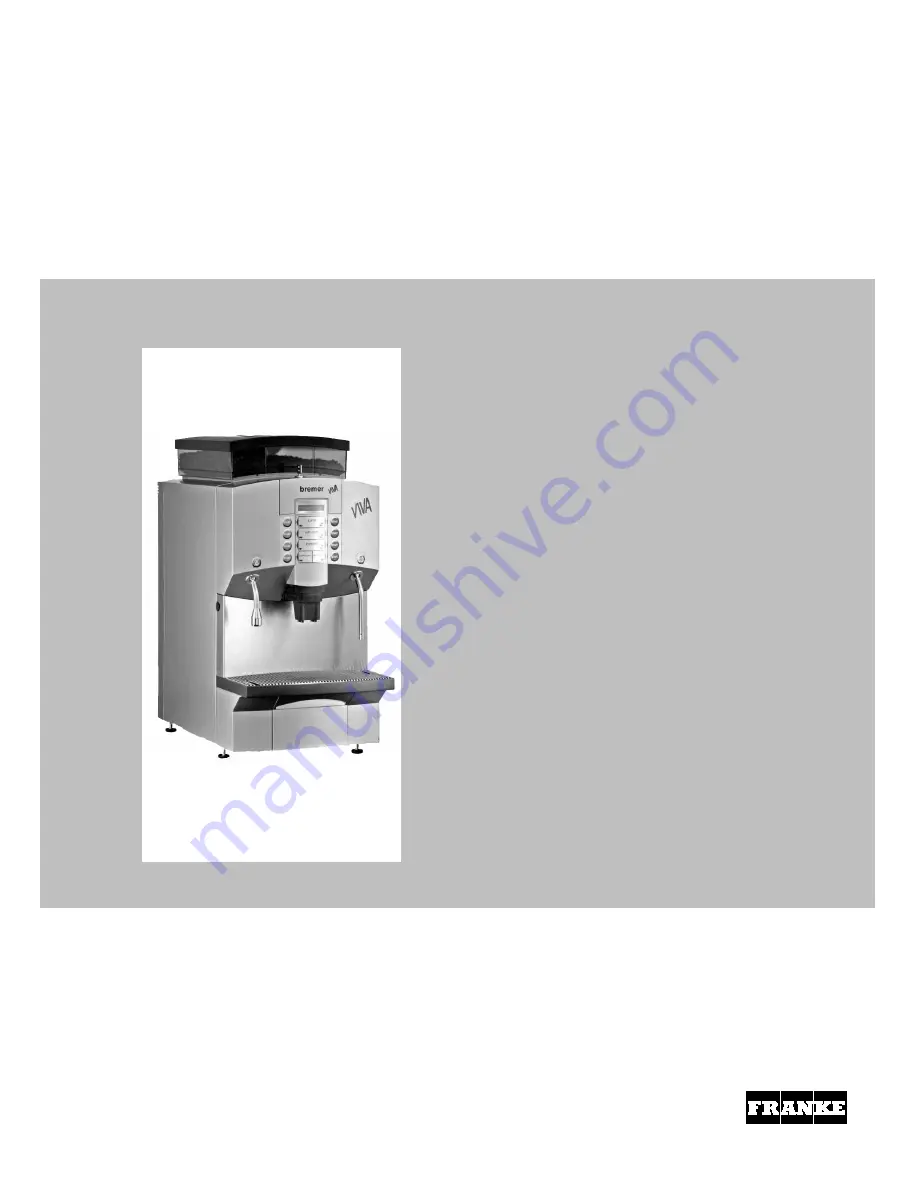
Страница 1: ...bremer VIVA Operating Instructions Franke Coffee Systems Automatic Coffee Cappuccino Espresso Machine...

Страница 2: ...coffee products with milk special coffee by adding the ground coffee to the coffee chute tea dispensing of hot water or steam depends on the unit type for the commercial use only Please use the coffe...

Страница 3: ...ortions Multiple Selection 13 3 4 Manual ground coffee metering 14 3 5 Manually add milk or milk froth bremer VIVA with milk frother 15 3 6 Emptying the grounds container 16 4 Take hot water additiona...

Страница 4: ...usting article control multiple selection 36 8 8 Changing to turbo operation 37 8 9 Enter a secret code PIN to change settings 38 8 10 Setting the dispensing sequence 39 9 Faults and remedies 40 10 Te...

Страница 5: ...cover the ventilation vents D The unit may only be operated outdoors if covered and if there is sufficient wind protection Protect the unit from moisture and direct sunlight D The ambient temperature...

Страница 6: ...justable Unit switch On OFF STANDBY Scroll backwards in the main menu Start cleaning program Confirm loading cleaning tablet dosage ground coffee Article keys 1 cup Making the settings adding milk fro...

Страница 7: ...44 English 049 German 081 Japanese 095 Russian add feature Confirm set country code with key D Subsequently the setted language is shown Summenz hler Summing counter in the display Go to Men verlassen...

Страница 8: ...heated up approx 5 minutes D The coffee machine is ready for operation when the green indicator lamps on the buttons light up and when Ready is displayed in the display panel Close the keypad cover a...

Страница 9: ...e display panel e g Refil coffee container to centre D The corresponding article keys are blocked D If this message appears during a brewing operation it is possible that this brewing operation took p...

Страница 10: ...on of the consumption date on the packing Please observe that no foreign bodies must come into the milk tank Non cooled milk will be very hot when being doses this can result in dosage fluctuations an...

Страница 11: ...merse the suction hose for milk into the milk D Make sure that the suction nozzle at the suction hose stands on the bottom of the milk container Do not bend the suction hose D Clean the suction hose t...

Страница 12: ...et rocker or push the coffee dispenser up or down D When using coffee pots fold the outlet rocker to the rear till stop engages 3 3 1Preparing single portions factory setting Place cup under the coffe...

Страница 13: ...in the display panel for example 9 times D The number of portions is shown in the display panel and will be counted down during operation preparation Notes for multiple selection D The first brewing o...

Страница 14: ...p approx 9 gr for 2 cups approx 14 gr VIVA Barista for 3 cups approx 20 gr Start the required brewing process by pressing the corresponding article key D The brewing process is displayed in the displa...

Страница 15: ...ing Key for milk froth Key for milk Keep key or pressed until desired quantity of milk or milk froth is dispensed D Consider the time of approx 5 seconds for milkdosage after releasing the key D After...

Страница 16: ...container D NOTE The grounds container must have been removed for at least 10 seconds so that clearing can occur Insert the grounds container D The message Insert grounds container disappears If requ...

Страница 17: ...hot water dispensing D The metered hot water dispensing is set at the factory If you wish to reset this setting to unmetered hot water dispensing inform your Customer Service representative Place the...

Страница 18: ...ing or steam is distributed until steam distribution is disabled by pressing the steam button repeatedly Heating beverages Immerse the steam dispenser deep into the beverage to be heated Place the cup...

Страница 19: ...cool During the cleaning program do not pull out the grounds container and coffee outlet dispenser block otherwise malfunctions may happen Clean the bremer VIVA coffee machine daily after the end of...

Страница 20: ...e into the pot with approx 300 ml hot water Unlock the keypad cover with the key and open it Press the key and keep it pressed until the cup is completely empty Preparation for the automatic cleaning...

Страница 21: ...6 Liter cold clear water Go on with cleaning the brewing unit see page 22 bremer VIVA coffee machine with milk coolbox Tetrapack add feature Place the vessel on the drip tray Insert the suction pipe...

Страница 22: ...if milk metering is adjusted Rinsing the milk pipe with special cleaner bremer VIVA with Milk frother Press key D Interval rinsing starts duration approx 3 minutes After that there is to rinse the mil...

Страница 23: ...ute Confirm the tablet has been inserted press D The automatic cleaning program is starting D After the cleaning program is finished the coffee machine switches off itself STANDBY is displayed D When...

Страница 24: ...e coffee dispenser Remove the cover from the dispenser block only with bremer VIVA with milk frother Remove the dispenser rocker from the dispenser block Precleaning the dispenser block Clean the dirt...

Страница 25: ...ow to react After the cleaning always rinse the cover dispenser block and dispenser rocker dry it with a lint free cloth Cleaning the nozzles of the guidance Clean thoroughly all plug in connections o...

Страница 26: ...e stopper is reached bremer VIVA with milk froth D If the cover is not closed completely the milk will be heated up too much Please put the dispenser rocker onto the dispenser block on both sides Asse...

Страница 27: ...cone with hot water nozzle outlet with screen gasket on the right hand side steam nozzle Remove these parts manually D Use a needle nosed pliers to remove the hot water nozzle Except the gasket and O...

Страница 28: ...remove coffee oil and fats whenever necessary or once per week when empty inside using a damp not wet lintfree cloth e g microfibre cloth Thoroughly dry the coffee bean container whenever it has been...

Страница 29: ...electronic water monitor is not installed to guard against water damage Switch off the electrical mains switch if the coffee machine will not be used for a longer time Check the water softener after...

Страница 30: ...g article names to the article key or blocking keys Page 35 Adjusting article prices no longer availa ble starting from software version 6 12 Switching external billing systems on or off Page 36 Makin...

Страница 31: ...required article by pressing the corresponding article key Summing counter Coffee cup Total 0000000012 1 espresso Del Sum count Request delete Confirm and execute delete Abort the delete pro cedure 1...

Страница 32: ...er centre 1 espresso Grinder left E g 1 Espresso selected The article Cup of coffee related to this key is used for neutralization after automatic cleaning Therefore do not use this article for manual...

Страница 33: ...f 290 E g 1 Espresso selected 1 espresso Water quant 120 1 espresso Brew press ON_ Brewing with or without pump pressure Adjustment range OFF ON Depending on the article Brewed water quantity Adjustme...

Страница 34: ...d Adjustment to metered unmetered hot water dispensing can be performed by Customer Service Metered hot water dispensing is activated at the factory Ready Adjust dosage quantity Exit menu Coffee cup G...

Страница 35: ...ection possibilities Coffee cup Coffee pot 1 espresso 2 espresso 1 cafe creme 2 cafe creme 1 cappuccino 2 cappuccino Latte macchiato 2 Coffee cup 1 Ristretto 2 Ristretto 1 Sch mli 2 Sch mli Milk Espre...

Страница 36: ...enu Select the required article by pressing the corresponding article key Coffee cup Release key ON Without external billing system OFF Article key blocked ON Article key released With external billin...

Страница 37: ...y This function can only be set for one item key This setting blocks allother item keys Ready Articel control Exit menu Select required item by pressing corresponding item key i e selected 1cup of cof...

Страница 38: ...0 9 The whole secret code is dis played at this menu point Remember the digits well After entering the secret code there is noaccess to the main menu wi thout entering the right code If the secret co...

Страница 39: ...ng sequence for brewing milk foam 1 2 3 or Off Example Coffee and milk or foam can be dispensed simultaneously Bre wing on 1 milk foam on 1 Milk and foam cannot be dispen sed simultaneously Brewing on...

Страница 40: ...ing without milk or milk froth is possible 04 Indicator lamps on the article keys do not light up Brewing is not possible No water is delivered Open the water valve Switch the coffee machine off and o...

Страница 41: ...must be replaced Faults without indication text Example Fault Possible cause Remedy No display in the display field display Main switch upstream of the unit not switched on Switch on main switch The m...

Страница 42: ...g off and on the machine Switch off the coffee machine with the on off switch and disconnect it from the electrical mains with the mains switch Close the water valve Call the Franke customer service a...

Страница 43: ...tering quantity 0 to 500 ml Mains voltage 230V AC 1N 50 60Hz 400V AC 3N 50Hz Total connected load Fuses 3 5 kW 1 x 16 ampere 6 8 kW 9 5 kW for higher output of steam and hot water 5 6 kW hot water ste...

Страница 44: ...rance at the side between the coffeemachine and the wall Leave sufficient space above in order to be able to fill with coffee beans D Do not set up next to source of heat Maintain a sufficient safety...

Страница 45: ...dd feature Table opening for supply lines 240 80 560 92 468 360 80 setting up impactable door equipotenitial 56 466 176 on the left or 1055 bonding system water supply water outlet waste mains cable c...

Страница 46: ...approx 5 mm Remove the beans container Remove the protection Styropor piece Open the bolt Insert beans container into the rubber bands of the grinders Push beans container to the back Close the front...

Страница 47: ...let hose D Use a fabric pressure hose which does not corrupt taste to extend the supply hose The diameter must not be smaller than the supply hose fitted at the factory D Before connecting rinse throu...

Страница 48: ...egulations D An electrical mains switch must be connected in series on the installation side in an easily accessible place The switch must disconnect the unit from the mains effectively and at all pol...

Страница 49: ...atives D Have your bremer VIVA coffee machine serviced regularly after every 60 000 products at least once per year by an authorized Franke bremer Customer Service D According to the pressure vessel r...

Страница 50: ...50 12 1Maintenance notes Datum Name des Kundendienstes Bemerkungen...

Страница 51: ...51 Datum Name des Kundendienstes Bemerkungen...

Страница 52: ...52 Datum Name des Kundendienstes Bemerkungen...

Страница 53: ...53 Datum Name des Kundendienstes Bemerkungen...

Страница 54: ...ion WARNING Beware of electric shocks Disposal of used electrical appliances for Europe only Franke Kaffeemaschinen AG provides for the return and recycling of used electrical appliances at the end of...

Страница 55: ...erd toute validit en cas de modification des machi nes effectu e sans notre accord Machine types Fully automatic coffee machine bremer Type VIVA KM Type VIVA XXL Type VIVA 24 Maschinentypen Gewerblich...

Страница 56: ...ating Instructions bremer VIVA KM Rev 06 06 C Print 2006 08 Art no 659800 Franke Kaffeemaschinen AG Franke Strasse 9 CH 4663 Aarburg Switzerland Phone 41 62 787 37 37 Fax 41 62 787 30 10 www franke cs...

Отзывы: