background image

In all circumstances the lamp manufacturer’s data should be referred to when dealing with 

lamps. 
When fitting the lamp: 


-


Always isolate the equipment from the supply when inserting a lamp; 

-


Ensure the circuit is suitably fused; 

-


Ensure the lamp is of the correct power rating and type; 

-


Check lampholder is in good condition. If the contacts show any sign of corrosion, replace the 
lampholder; 

-


Check the lampholder is in a good dry condition. Never allow water to collect in the lamp fitting 
or come into contact with the lamp. 

 
To fit the lamp: 


-


Loosen all the thumbscrews on the front of the searchlight, remove the bezel and glass and 

store in a safe place; 

-


For easier access the light shield/spill ring may be removed by undoing the fasteners; 

-


Cut open one end of the protective sleeve surrounding the lamp; 

-


Using the sleeve to prevent the fingers coming into contact with the lamp, position the two pins 

above the holes in the lampholder; 

-


Gently push the lamp into the lampholder and remove the protective sleeve; 

-


Replace the light shield/spill ring and front bezel assembly, ensuring the thumbscrews are 
securely fastened.  

 
Testing 

 
Upon correct installation and connection to an electrical supply, the equipment can be tested in 

order to ensure its’ correct performance. A competent person with some knowledge of electrical 
equipment must carry out this work. 

 
Equipment required: 

Multi-meter with leads 


Ammeter 


Using the equation P=VI, the approximate power output of the equipment can be calculated in the 
following way: 


-


Using the multi-meter, take a voltage reading; 

-


Using the ammeter, take an amps reading from the live cable to the lamp; 

-


Multiply these figures together to give an approximate wattage (Power output). 

 
For example: 

 
Using a 24v 150w Tungsten halogen lamp: 

Voltage reading = 24v; Amps reading = 6 amps 
 

Therefore, Wattage = 24 x 6 = 144 watts 


Back To Top

Содержание FH380

Страница 1: ...ght Product Reference Number A6076 FH380RC Twin Head 1200w 220v Manufacturer s details Distributor details Francis Searchlights Ltd Union Road Bolton Lancashire BL2 2HJ UK Tel 44 0 1204 558960 Fax 44 0 1204 558979 http www francis co uk E mail sales francis co uk Manual Part Number C24945 23 11 11 Issue 4 ...

Страница 2: ...ety Precautions 3 Technical Information 4 Unpacking and Installation Instructions 5 Electrical Installation 6 Operating Instructions 7 Fault Finding 8 Maintenance and Servicing 9 Wiring Diagram General Assembly 10 Spare Parts List ...

Страница 3: ...optimum performance and service life The Francis FH range combines features proven over many years service in the most hazardous conditions in both marine and land installations In order to prolong the life and performance of your product we recommend that you only specify Francis Searchlights spare parts This will also ensure that any warranties on your equipment will not be invalidated Informati...

Страница 4: ...re a safe working environment Never attempt to clean a lamp whilst in use Searchlights get hot Never touch the unit when lit and always allow 15 to 20 minutes for cooling down after turning the searchlight off Never place anything on or cover the searchlight when in use Ensure the lamp has cooled sufficiently before removal If undue force appears necessary to remove the lamp the equipment should b...

Страница 5: ... R P control gear protected to IP66 Colour Temperature 5 400K Luminous Flux 105 00 The 240v searchlight also performs to the following optical data Metal Halide light source G38 Lamp Wattage 1200 Watts Supply voltage 220 240V Peak Beam Candlepower 28 500 000 lux with standard Glass Peak Beam Candlepower 22 800 000 lux with UV Glass Range 5343 metres Range UV 4274 metres Divergence 2 5 Temperature ...

Страница 6: ...eing installed Installation procedures should be adhered to in order to ensure a safe working environment and reduce the risk of damage or personal injury Preparing the Mounting Position Mark out and drill the fixing holes through the deck 4 Holes Ø12 5mm on a 350 PCD If anti vibration mounts are to be fitted the fixing holes for the mounts should also be marked out and drilled Prior to manoeuvrin...

Страница 7: ...al supply using suitably sized cable 3 If the searchlight is located a considerable distance from the supply provision must be made in the cable size in order to overcome the voltage drop The following table should be used for indication purposes only Searchlight 240v 1 2Kw Cable Size mm Distance Max 1 5 62 MTRS 2 5 101 MTRS 4 0 160 MTRS 6 0 249 MTRS 10 0 417 MTRS 4 Whenever possible cable termina...

Страница 8: ...d to the motor gearbox control panel and the searchlight The searchlight has been pre wired with 3 meters of cable from the gearbox to junction box to the Control Gear Enclosure Cables required to be connected by the customer 8 core 1 5mm cable from the Junction Box to the Control Panel 12 core 0 5mm cable from the Junction Box to the Control Panel The searchlight head is pre wired along with the ...

Страница 9: ...andling lamps Eye protection must be worn when handling lamps that have been removed from their packaging materials The protective jacket should not be removed from the lamp for safety reasons as there is a remote possibility of the lamp shattering violently especially if it is subjected to mechanical shock or vibration Always isolate the equipment from the supply before inserting a lamp Before in...

Страница 10: ...prevent the fingers coming into contact with the lamp position the two pins above the holes in the lampholder Gently push the lamp into the lampholder and remove the protective sleeve Replace the light shield spill ring and front bezel assembly ensuring the thumbscrews are securely fastened Testing Upon correct installation and connection to an electrical supply the equipment can be tested in orde...

Страница 11: ... the lamp If noticeable damage to filament is present the lamp will have failed The lamp can also be checked for continuity using a multi meter Replace lamp ensuring all precautions and instructions previously outlined in this manual are adhered to Failure of Remote Focus Causes 1 Power not supplied 2 Faulty connections 3 Failed motor Remedy 1 Check voltage at supply If no supply present fault is ...

Страница 12: ... inside and out using a proprietary glass cleaner or metal polish Clean the reflector if required Check the reflector mounting gaskets If signs of corrosion or damage are evident replace as necessary Ensure that the lampholder is free from corrosion or other damage It is advisable to check all seals and gaskets for signs of degradation Renew if necessary The searchlight is fitted with a breather u...

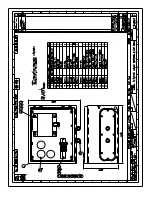
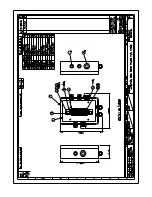
Страница 13: ...General Assembly Drawing Number Description A6076 FH380RC 1200w 240v Twinhead Searchlight G A C24946 FH380RC 1200w Twinhead Wiring Diagram C24947 Control Gear Assembly C24949 Junction Box Assembly Control Panel Back To Top ...

Страница 14: ......

Страница 15: ......

Страница 16: ......

Страница 17: ......

Страница 18: ......

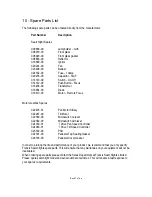
Страница 19: ... Assy C22287 00 Tilt Motor C22380 00 Microswitch no lever C22382 00 Microswitch with lever C24030 01 I Drive Pan Speed Controller C24060 01 I Drive Tilt Speed Controller C23530 00 PSU C22301 00 Pedestal Top Sealing Gasket C26185 00 Pedestal Cover Gasket In order to prolong the life and performance of your product we recommend that you only specify Francis Searchlights spare parts This will ensure ...

Отзывы: