background image

Setup Instructions

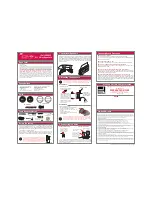
Figure 1

Figure 2

Center of the tweeter

Center of the woofer

Mid-point of the woofer and tweeter

Reference listening position

B:  loudspeaker base width

D:  monitoring distance

Left

Right

B

30˚

D = B

= B

After carefully unpacking the PM-2 MK

Monitoring Distance = 1 to 2 meters

acoustic performance in your studio.

The PM-2 MK

 was designed to be used

Professional Studio Monitor, it is now

time to setup the monitors for the best

at a monitoring distance of 1 to 2 meters,

located in such a way that the acoustic

center is located at, or about, seated ear

typically referred to as the near-field.

It is recommended that the PM-2 MK

 be

height (see Figure 1). If this is not

The monitoring angle between the left

and right monitors and the listening

possible, it may be necessary to tilt/aim

the monitor at the listeners ears.

Monitoring Height = the acoustic

center aimed at seated ear height

Monitoring Angle = 60 Degrees

easiest way to determine this is to place

the speakers in such a way that the

position should equal 60 degrees. The

distance between the left and right

monitor is equal to the monitoring

distance / listening position (see Figure

speakers be "toed-in" towards the

The PM-2 MK

 was designed to be mounted

2).  It is also recommended that both
listening position.

vertically. This provides for the most

accurate frequency response, reduces

Additional Information

acoustic boundary interference and

provides optimum cooling performance

for the heat sink that is located on the

back of the studio monitor. If it is not

possible to mount the monitors vertically,

then the monitors should be placed with

the woofers inside and the monitors

"toed-in" towards the listening area.

p-4

Содержание PM-2 MKII

Страница 1: ...Introduction Unpacking Setup Instructions continued Product Cleaning Instructions Setup Instructions Back Panel Overview Safety Instructions Cable and Wiring Information Product Specifications Declaration of EC Directive p 3 p 5 p 7 p 4 p 6 p 2 p 7 p 7 p 8 p 1 PM 2MK ...

Страница 2: ...8 19 20 21 22 23 NO USER SERVICEABLE PARTS INSIDE REFER SERVICING TO QUALIFIED SERVICE PERSONNEL SHOCK DO NOT EXPOSE THIS APPLIANCE TO RAIN OR MOISTURE manufacturer 10 11 Power Sources The appliance should be connected to a power supply only of the type described in the operating instructions or as marked on the appliance Grounding or Polarization The precautions that should be taken so that the g...

Страница 3: ...ead this manual so that you may take full advantage of all the benefits of the Fostex PM 2 MKⅡ Professional Studio Monitor manufacturing techniques Prior to unpacking your Fostex PM 2 MKⅡ Studio Monitor carefully inspect the packing material for excessive damage Once it has been determined that the packing material has not been compromised carefully unpack the PM 2 MKⅡ Studio Monitor and inspect i...

Страница 4: ...he listening possible it may be necessary to tilt aim the monitor at the listeners ears Monitoring Height the acoustic center aimed at seated ear height Monitoring Angle 60 Degrees easiest way to determine this is to place the speakers in such a way that the position should equal 60 degrees The distance between the left and right monitor is equal to the monitoring distance listening position see F...

Страница 5: ...p 2 Confirm that all gain controls on the monitor and the source are set to the minimum setting Step 3 Connect the source to the PM 2 MKⅡ monitor Step 4 Power up the all source equipment and then turn on the PM 2 MKⅡ last Step 5 Set the gain of both monitors at medium setting and slowly bring up the gain of the console Step 6 Adjust the gain of both monitors for balance and for best signal to nois...

Страница 6: ... High Frequency Adjustment The High Frequency adjustment tailors the overall high frequency response by 3dB above 6kHz This control is a variable knob with no preset position In the extreme positions a full 3dB can be achieved Leave this adjustment in the normal 0dB position unless You want to subtly brighten or darken the sound of the speakers You want to compensate for any HF hearing loss If you...

Страница 7: ...ng your systems susceptibility to external interference Another important tip to keep in mind when wiring your system is to route all line level cables away from the AC and other power sources this will reduce the probability of having AC hum emanating from your studio monitors 254mm W 411mm H 300mm D includes heatsink 271mm D cabinet only no heatsink 10 W 16 1 8 H 11 4 5 D includes heatsink 10 3 ...

Страница 8: ...87 0300 FAX 33 1 4987 0324 FRANCE Cedex France NAME Noretron Oy Audio ADD P O Box 22 FIN 02631 Espoo Finland TEL 358 9 5259330 FAX 358 9 52593352 FINLAND NAME Mega Audio GmbH ADD Stromberger Str 32 D 55411 Bingen Germany TEL 49 6721 94330 FAX 49 6721 32046 GERMANY NAME Bon Studio S A ADD 6 Zaimi Street Exarchia 106 83 Athens Greece TEL 30 210 3809 605 606 607 608 FAX 30 210 3845 755 210 3827 868 G...

Отзывы: