SD card is inserted to the SD card jack, in different mode will run the program in the
SD card.
Computer will be connected by the Ethernet jack using the a Ethernet cable.
For firmware be updated use following sequence of operations:
1. Take SD card, make folder Firmware, put into this folder the firmware file-firmware.fb4
2. Insert the card into FB4. You will see four LEDs in ON state. After update FB4 will
restart automatically.
3. After that, check menu of FB4, there are new and important items.
3.1. Turn off the Safe Guard located in main menu of FB4.
3.2. Operational mode has BEYOND/QS Streaming, DMX, Test, Autostart and a
few other. It is important to set mode correctly.
For export the content to file use main menu Tools – FB4 workspace export. The SD
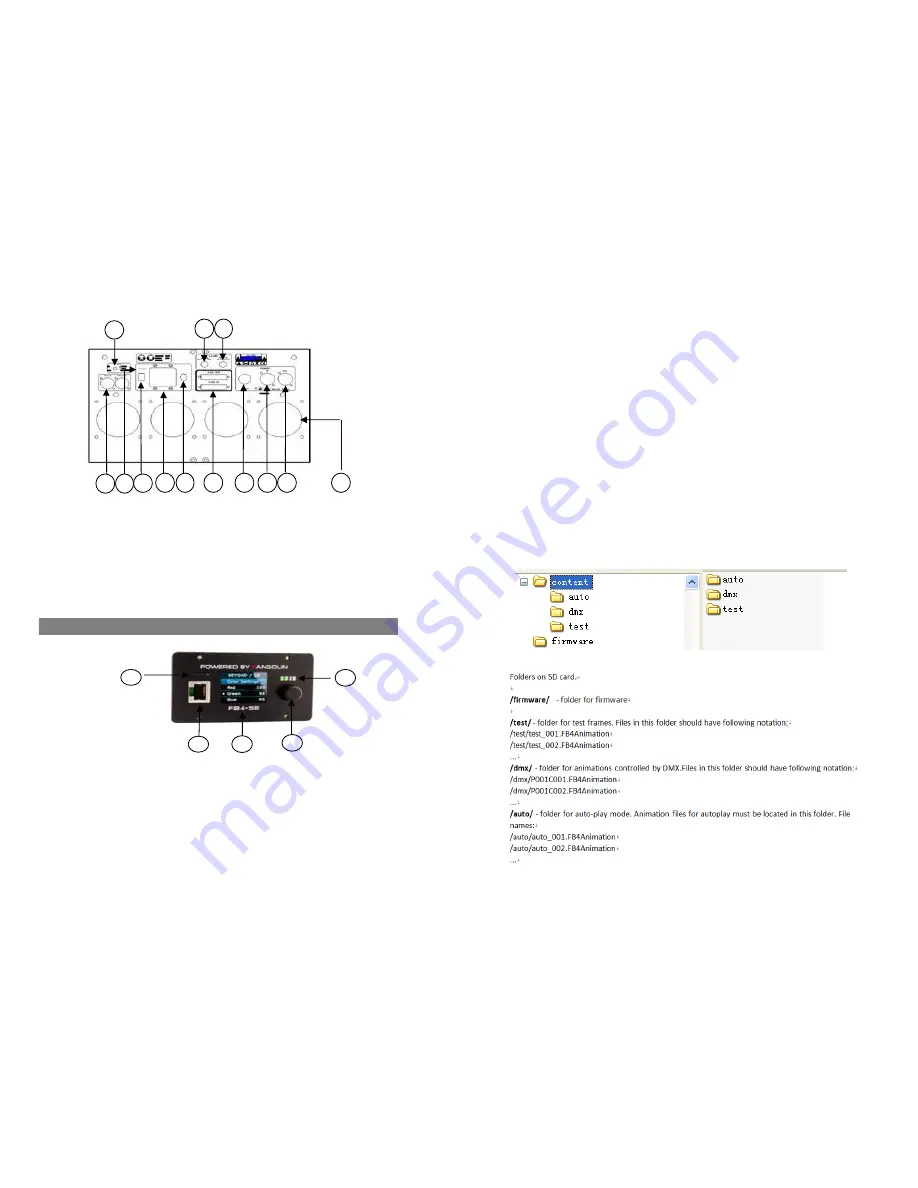
Rear Panel
Project window is a bit complex now and require some fine tuning. But it works.Click
1. SFS Control: Scanner fail safety control ON/OFF
2. Laser key switch
on Export button will start export of all cues in the SD Project as .FB4Animation files.
3. Laser remote interlock
4. DMX jack
5. SD card slot
Output files located in: BEYOND folder / Project / name of Project / Serial of FB4 /....
6. Ethernet jack for BEYONG/QS
7. FB4 Panel
8. Function setting with key
Before down load, SD card has only three empty folders , as follow:
9. ILDA interface with DB25 jack
10. Power switch
11. Power jack input
12. Power jack output
13. Fun (4 PCS)
Function & Setting
FB4 Operation:
After export files and then down load to SD card, the program as follw:
FB4 Panel
1. SD card jack
2. LCD
3. Ethernet jack for BEYONG/QS
4. Function setting with key
5. Status indicator lights
Function setting key
1. Rotate the Funciton key to select the mode and parameter, the information on LCD will
be changed.
2. Press the Function key to enter the sub-menu, enter the sub-menu.
Page 6
Page 7
4
3
1
1
7
9
2
11
10
8
12
3
4
5
13
6
2
5


