


Video wall monitor controller
17
1.3.2 Video Wall onfiguration example
In the following picture you can see an example of a 3x3 video wall. In order for the image to be displayed correctly, the values must
be entered in the Video Wall menu in the OSD.
X Axix/ MAx X=3
ID 1
SetX=1
Set Y=1
ID 2
SetX=2
Set Y=1
ID 3
SetX=3
Set Y=1
ID 4
SetX=1
Set Y=2
ID 5
SetX=2
Set Y=2
ID 6
SetX=3
Set Y=2
ID 7
SetX=1
Set Y=3
ID 8
SetX=2
Set Y=3
ID 9
SetX=3
Set Y=3
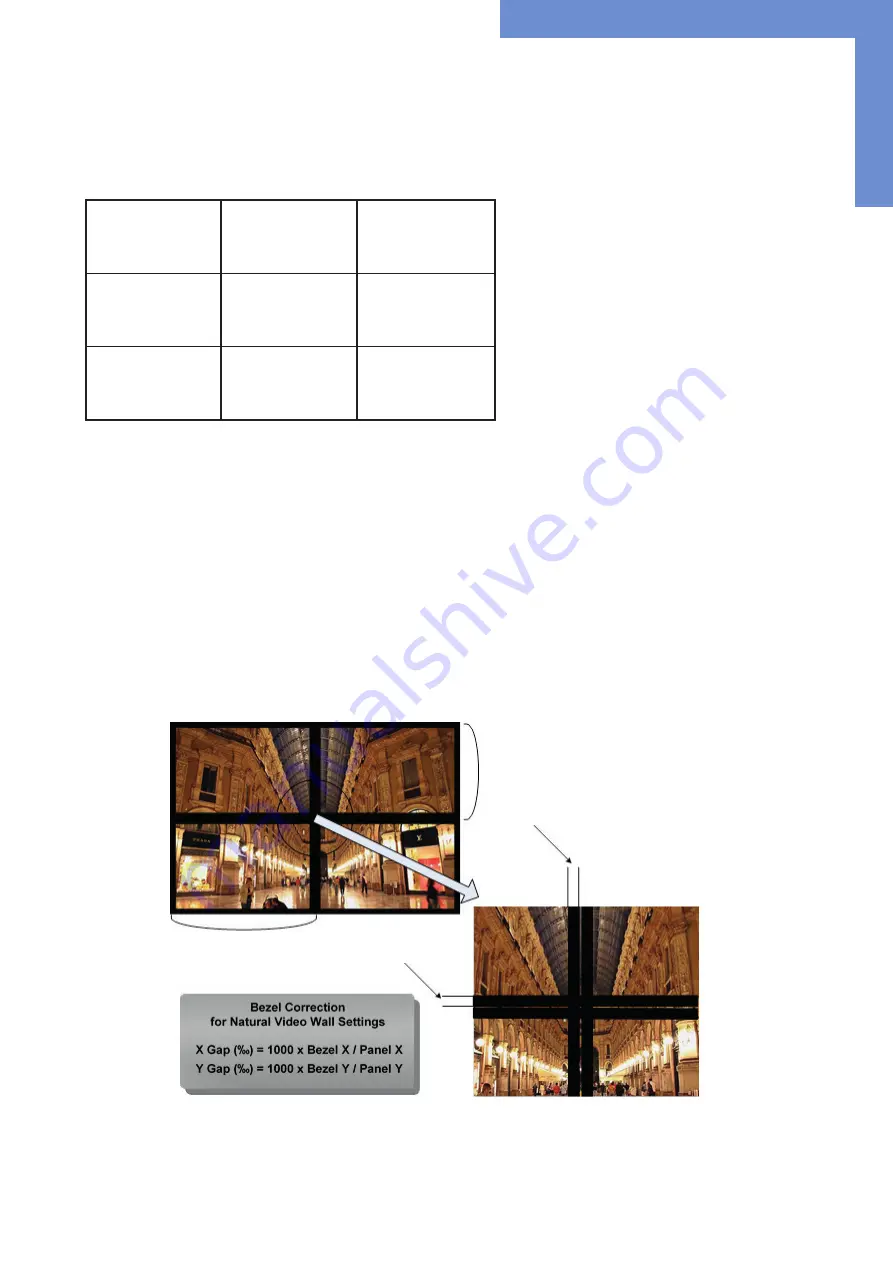
1.3.3 Calculate and set the X Gap and Y Gap
In order to achieve the perfect visual impression of an image across several screens, the pixels must be calculated or adjusted at the
respective edge of the picture. This adjustment can be set via the X / Y-GAP value in the OSD menu.
The procedure is shown in the following picture.
For a classic video wall setup, the following values must be set in the OSD menu.
X Gap = 6 Y Gap = 10
If the display still looks distorted or you have realized your own layout with larger distances between the monitors, you can calculate
the gap with the following formula.
Panel X
Panel Y
Bezel Y
Bezel X
Y Axis/ Max Y=3


