- 2 -
i
460 ip intercom
Installation manual
doc.
K42
4 Configuring the panel
The iPSO panel can make a WiFi connection to the router, or can be
wired with an Ethernet cable (for which an adaptor is provided). The
panel uses the standard 2.4GHz WiFi band. Be sure the panel antenna
is connected. Check router frequency and range if there’s a problem.
Restoring factory settings
The panel needs to returned to factory setting if a router is changed.
Power down the panel, press and hold the call button, then power up
again. Keep holding the call button for around 45 seconds, until the
LED flashes and you hear a short beep, then release the button.
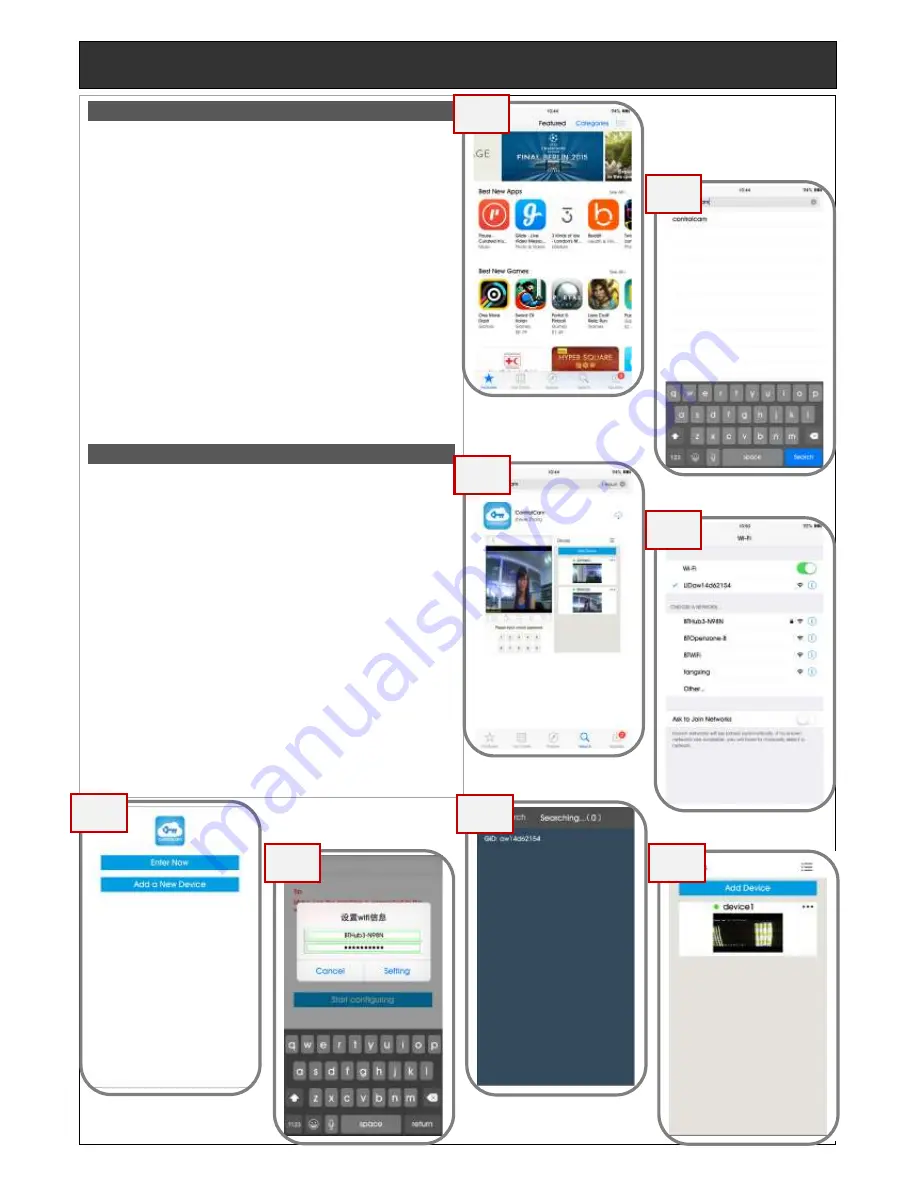
Download the APP
The “ControlCam” APP can be downloaded from either the Apple or
Android store. Search for it (4.2). It is free to download.
Find the iPSO WiFi signal
Open the phone system settings, then select the WiFi menu. Look for
a WiFi signal on the screen starting LIDxxxx, and then click on it.
5a
… by an iOS device
Search for the panel WiFi (5.1 & 5.2)
Open the ControlCam APP on you phone. Select “Add a New Device”
followed by “Start Configuring”. Select your router’s WiFi network
and enter the password normally printed on the back of the router.
Select the panel to be configured (5.3)
Click on the GID number of the panel on the search list. This number
is also printed and as a QR code on the rear of the panel. It can be
entered manually. Enter user name & password, then click OK.
Device ID
“Front Door”
a name chosen by user
GID
aw14d62154
copied from label or paired
User
admin
default is admin, change later
Password
1234
default is 1234, change later
Enabling calls (5.4)
Click
‘
●●●
’ on the top right corner and click ‘ON’ for call panel
call-in options.
This device is ready.
4.1
4.2
4.3
4.5
5.2
5.1
5.3
5.4


