background image

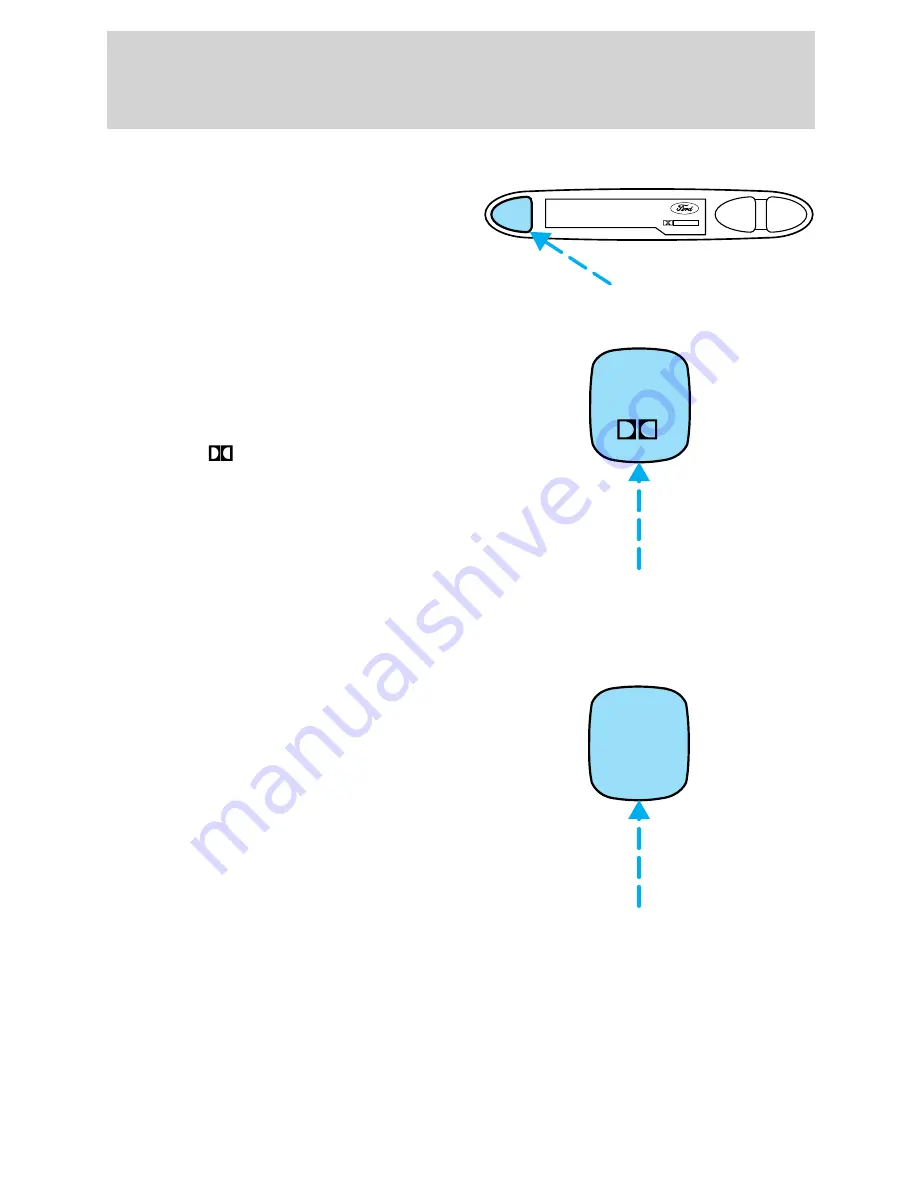
Eject function

Press the control to stop and eject a
tape.

Dolby

T

noise reduction

Dolby

t

noise reduction operates

only in tape mode. Dolby

t

noise

reduction reduces the amount of
hiss and static during tape playback.

Press the

control to activate

(and deactivate) Dolby

t

noise

reduction.

Dolby

t

noise reduction is

manufactured under license from
Dolby

t

Laboratories Licensing

Corporation. “Dolby

t

” and the double-D symbol are registered

trademarks of Dolby

t

Laboratories Licensing Corporation.

Compression adjust

Compression adjust works in CD
mode (if equipped), and brings soft
and loud CD passages together for a
more consistent listening level.

Press the COMP control to activate
and deactivate compression adjust.

EJ

REW

FF

DOLBY B   NR

2

COMP 

Controls and features

32

Содержание Escort 2001

Страница 1: ...2 20 AM www carburetor manual com Would you like some Free Manuals http carburetor manual com free shop manual club t 13 html Also visit http freeshopmanual com for more Free Manuals Also Visit my web...

Страница 2: ...Customer assistance 196 Reporting safety defects 208 Index 209 All rights reserved Reproduction by any means electronic or mechanical including photocopying recording or by any information storage an...

Страница 3: ...birth defects or other reproductive harm ICONS Indicates a safety alert Read the following section on Warnings Indicates vehicle information related to recycling and other environmental concerns will...

Страница 4: ...HIS GUIDE The information found in this guide was in effect at the time of printing Ford may change the contents without notice and without incurring obligation EMISSION WARRANTY The New Vehicle Limit...

Страница 5: ...ild Seat Installation Warning Child Seat Tether Anchorage Brake System Anti Lock Brake System Brake Fluid Non Petroleum Based Traction Control Master Lighting Switch Hazard Warning Flasher Fog Lamps F...

Страница 6: ...ngine Oil Engine Coolant Engine Coolant Temperature Do Not Open When Hot Battery Avoid Smoking Flames or Sparks Battery Acid Explosive Gas Fan Warning Power Steering Fluid Maintain Correct Fluid Level...

Страница 7: ...8 30 40 80 90 100 60 80 100 120 140 160 0 0 0 1 1 3 MIRROR L Headlamp turn signal control pg 44 Power side view mirrors pg 18 Instrument cluster pg 8 Foglamp control pg 45 Driver air bag pg 79 Speed...

Страница 8: ...M 1 SIDE 1 2 2 3 4 5 6 COMP SHUF EJ REW FF PREMIUM SOUND TAPE CD H M BAL FADE BASS TREB DOLBY B NR VOL PUSH ON MIST OFF F IN Audio system pg 19 Passenger air bag pg 80 Windshield wiper washer control...

Страница 9: ...sition for this lamp to illuminate The lamp will also illuminate for several seconds after the ignition is turned to the ON position regardless of the fuel level to ensure your bulb is working THEFT S...

Страница 10: ...Service Engine Soon light illuminates Light turns on solid This means that the OBD II system has detected a malfunction Temporary malfunctions may cause your Service Engine Soon light to illuminate Ex...

Страница 11: ...d immediately Safety belt Momentarily illuminates when the ignition is turned to the ON position to remind you to fasten your safety belts For more information refer to the Seating and safety restrain...

Страница 12: ...ed Turn signal Illuminates when the left or right turn signal or the hazard lights are turned on If one or both of the indicators stay on continuously or flash faster check for a burned out turn signa...

Страница 13: ...n the fuel filler cap is properly re installed the light s will turn off after a period of normal driving This period will vary depending on driving conditions It may take a long period of time for th...

Страница 14: ...pened GAUGES Base instrument cluster gauges ZX2 coupe instrument cluster gauges THEFT SERVICE ENGINE SOON CHECK FUEL CAP P BRAKE ABS MPH 20 50 60 70 FUEL FILL E F C H 1 2 30 40 80 90 100 110 120 10 20...

Страница 15: ...reserve fuel Engine coolant temperature gauge Indicates the temperature of the engine coolant At normal operating temperature the needle remains within the normal area the area between the H and C If...

Страница 16: ...rs the total kilometers miles of the vehicle 20 30 40 50 60 70 80 90 100 110 120 10 20 40 60 80 100 120 140 160 180 MPH km h 0 0 0 0 0 0 0 0 0 0 20 30 40 50 60 70 80 90 100 110 120 10 20 40 60 80 100...

Страница 17: ...chometer if equipped Indicates the engine speed in revolutions per minute Driving with your tachometer pointer in the red zone may damage the engine 0 0 0 0 20 30 40 50 60 70 80 90 100 110 120 10 20 4...

Страница 18: ...instrument panel during headlamp and parklamp operation Coupe Rotate up to brighten Rotate down to dim Sedan Rotate left to brighten Rotate right to dim The dome lamp will not illuminate if the contro...

Страница 19: ...he left mirror or R to adjust the right mirror 2 Move the control in the direction you wish to tilt the mirror 3 Return to the center position to lock mirrors in place TRUNK REMOTE CONTROL Press the r...

Страница 20: ...ess the control to turn the audio system on or off Turn control to raise or lower volume OFF R DEF A C MAX A C HI LO TUNE SEEK SCAN AM FM 1 SIDE 1 2 2 3 4 5 6 EJ REW FF TAPE H M BAL FADE BASS TREB DOL...

Страница 21: ...th the power control before switching off the ignition AM FM select The AM FM select control works in radio modes AM FM select in radio mode This control allows you to select AM or FM frequency bands...

Страница 22: ...r quick movement Seek function The seek function control works in radio or tape mode Seek function in radio mode Press to find the next listenable station down the frequency band Press to find the nex...

Страница 23: ...on memory preset controls These controls can be used to select up to six preset AM stations and twelve FM stations six in FM1 and six in FM2 Setting memory preset stations 1 Select the frequency band...

Страница 24: ...edge to the right A cassette deck loading mechanism pulls the tape in the rest of the way You can switch from radio to tape play by inserting a tape into the cassette deck Tape play select Insert a ta...

Страница 25: ...lbyT noise reduction Dolbyt noise reduction operates only in tape mode Dolbyt noise reduction reduces the amount of hiss and static during tape playback Press the control to activate and deactivate Do...

Страница 26: ...ol and press to increase minutes and to decrease minutes Premium AM FM Stereo Cassette Premium Sound Radio Controlled CD Changer Compatible H M 12 H M 01 OFF R DEF A C MAX A C HI LO TUNE DISCS SEEK TR...

Страница 27: ...switch is turned back on If you wish to maintain your preset volume level turn the audio system off with the power control before switching off the ignition AM FM select The AM FM select control work...

Страница 28: ...he tune control works in radio or CD mode if equipped Tune adjust in radio mode Press the to move to the next frequency down the band whether or not a listenable station is located there Hold the cont...

Страница 29: ...l works in radio tape or CD mode if equipped Seek function in radio mode Press to find the next listenable station down the frequency band Press to find the next listenable station up the frequency ba...

Страница 30: ...everses to the opposite side of the tape To stop on a particular selection press the control again Scan function in CD mode if equipped Press the SCAN control to hear a short sampling of all selection...

Страница 31: ...r balance fade adjust Speaker sound distribution can be adjusted between the right and left speakers Speaker sound can be adjusted between the front and rear speakers Inserting a tape Push only slight...

Страница 32: ...pressing the REW control for less than three seconds results in slow rewind Pressing the control for more than three seconds results in fast rewind Fast forward The fast forward control works in tape...

Страница 33: ...n Dolbyt noise reduction is manufactured under license from Dolbyt Laboratories Licensing Corporation Dolbyt and the double D symbol are registered trademarks of Dolbyt Laboratories Licensing Corporat...

Страница 34: ...all tracks are played Press the SHUFFLE control to start this feature Random order play will continue until the SHUFFLE control is pressed again Setting the clock To set the hour press the hour h cont...

Страница 35: ...e door to access the CD changer magazine Press to eject the magazine Make sure only one disc is inserted in each slot Each disc must be inserted with the label surface upward You may insert up to six...

Страница 36: ...zed discs or discs with removable labels into the CD player as jamming may occur Troubleshooting the CD changer if equipped The laser beam used in the compact disc player is harmful to the eyes Do not...

Страница 37: ...discs or discs with removable labels into the CD player as jamming may occur Cleaning cassette player if equipped Clean the tape player head with a cassette cleaning cartridge after 10 to 12 hours of...

Страница 38: ...stations Terrain Hills mountains and tall buildings between your vehicle s antenna and the radio station signal can cause FM reception problems Static can be caused on AM stations by power lines elec...

Страница 39: ...the vehicle Panel Distributes outside air through the instrument panel registers OFF Outside air is shut out and the fan will not operate For short periods of time only use this mode to prevent undesi...

Страница 40: ...le is parked This allows the climate control system to be free from contamination of outside pollutants Do not place objects under the front seat that will interfere with the airflow to the rear seats...

Страница 41: ...moves considerable moisture from the air during operation it is normal if clear water drips on the ground under the air conditioner drain while the system is working and even after you have stopped th...

Страница 42: ...h the floor ducts However the air will not be cooled below the outside temperature because the air conditioning does not operate in this mode Floor and defrost Distributes outside air through the wind...

Страница 43: ...of outside pollutants If your vehicle has been parked with the windows closed during warm weather conditions the air conditioner will perform more efficiently in cooling the vehicle if driven for two...

Страница 44: ...ot place objects on top of the instrument panel as these objects may become projectiles in a collision or sudden stop REAR WINDOW DEFROSTER Clears the rear window of thin ice and fog To operate 1 Turn...

Страница 45: ...control to the first position to turn on the parking lamps Rotate to the second position to also turn on the headlamps Daytime running lamps DRL if equipped Turns the headlamps on with a reduced outpu...

Страница 46: ...forward to activate Pull toward you to deactivate Flash to pass Pull toward you to activate and release to deactivate Foglamp control if equipped Rotate forward to activate OFF OFF OFF OFF Controls a...

Страница 47: ...hicle is traveling at or above 48 km h 30 mph Do not shift the gearshift lever into N Neutral with the speed control on Do not use the speed control in heavy traffic or on roads that are winding slipp...

Страница 48: ...it increases above the set speed on a downhill If your vehicle speed is faster than the set speed while driving on a downhill you may want to shift to the next lower gear or apply the brakes to reduce...

Страница 49: ...n accelerate with the accelerator pedal at any time during speed control usage Releasing the accelerator pedal will return your vehicle to the previously programmed set speed To set a lower set speed...

Страница 50: ...le speed is reached press SET ACC To disengage speed control Depress the brake pedal or Depress the clutch pedal if equipped Disengaging the speed control will not erase the previously programmed set...

Страница 51: ...hicle speed must be faster than 48 km h 30 mph TILT STEERING IF EQUIPPED Pull the tilt steering control down to move the steering wheel up or down Hold the control while adjusting the wheel to the des...

Страница 52: ...HIELD WIPER AND WASHER For intermittent wiping move the control down one position and rotate the wiper switch to the desired position For low speed wiping move the control down two positions For high...

Страница 53: ...oof to the vent position Press OPEN again to fully open the moon roof Press the opposite end of the toggle control to close the moon roof from either position Sliding shade The moon roof has a sliding...

Страница 54: ...OFF position the lamp will not come on at all The map lamps and controls are located on the dome lamp Press the controls on either side of each map lamp to activate the lamps Map lamps if equipped The...

Страница 55: ...The rear doors can be opened from the outside when the doors are unlocked The childproof locks are located on rear edge of each rear door and must be set separately for each door Setting the lock for...

Страница 56: ...e rocker switch to close Press the bottom portion of the rocker switch to open Express down To make the driver window open fully without holding the window control press the top portion of the driver...

Страница 57: ...ovides a means of escape for children and adults in the event they become locked inside the luggage compartment Adults are advised to familiarize themselves with the operation and location of the rele...

Страница 58: ...S 210 of Industry Canada Operation is subject to the following two conditions 1 This device may not cause harmful interference and 2 This device must accept any interference received including interfe...

Страница 59: ...K position If there is any potential remote keyless entry problem with your vehicle ensure ALL key fobs remote entry transmitters are brought to the dealership to aid in troubleshooting Unlocking the...

Страница 60: ...f any of the doors are open or ajar the horn will make two quick chirps reminding you to properly close the doors This process will also arm your anti theft system if equipped For more information on...

Страница 61: ...conditions nearby radio towers structures around the vehicle other vehicles parked next to the vehicle To replace the battery 1 Twist a thin coin between the two halves of the transmitter near the ke...

Страница 62: ...ithin 10 seconds with the eighth turn ending in the 3 ON position The doors will lock unlock to confirm that programming mode has been entered Within 20 seconds program a remote transmitter by pressin...

Страница 63: ...r for the illuminated entry system to operate ANTI THEFT SYSTEM IF EQUIPPED When armed the anti theft system will help prevent your vehicle from unauthorized entry If there is any potential perimeter...

Страница 64: ...authorized entry occurs the activated system will flash the parking lamps and the THEFT light sound the horn The flashing parking lamps and the honking horn automatically shut off after about three mi...

Страница 65: ...the ignition key to unlock doors trunk will not disarm the anti theft system Disarming a triggered anti theft system Press either the unlock or panic control to disarm the system A triggered system ma...

Страница 66: ...p limit head motion in the event of a rear collision To properly adjust your head restraints lift the head restraint so that it is located directly behind your head or as close to that position as pos...

Страница 67: ...k of injuring people in a collision or sudden stop Always drive and ride with your seatback upright and the lap belt snug and low across the hips Reclining the seatback can reduce the effectiveness of...

Страница 68: ...adjust seatback To retain selected seatback position release seatback by moving memory recliner control forward to release seatback Push seatback rearward until the seatback latches This will be the f...

Страница 69: ...to see that the seat and seatback is latched securely in position Keep floor area free of objects that would prevent proper seat engagement Never attempt to adjust the seat while the vehicle is in mot...

Страница 70: ...including the driver should always properly wear their safety belts even when an air bag SRS is provided It is extremely dangerous to ride in a cargo area inside or outside of a vehicle In a collisio...

Страница 71: ...r in the back seat and always properly use appropriate child restraints Combination lap and shoulder belts 1 Insert the belt tongue into the proper buckle the buckle closest to the direction the tongu...

Страница 72: ...In this mode the shoulder belt is automatically pre locked The belt will still retract to remove any slack in the shoulder belt The automatic locking mode is not available on the driver safety belt Wh...

Страница 73: ...ation is noted Disconnect the combination lap shoulder belt and allow it to retract completely to disengage the automatic locking mode and activate the vehicle sensitive emergency locking mode After a...

Страница 74: ...our shoulder To lower the shoulder belt height push the button and slide the height adjuster down To raise the height of the shoulder belt slide the height adjuster up Pull down on the height adjuster...

Страница 75: ...til it fits snugly across the hips Shorten and fasten the belt when not in use Safety belt extension assembly If the safety belt is too short when fully extended there is a 20 cm 8 inch safety belt ex...

Страница 76: ...r feature is a supplemental warning to the safety belt warning function This feature provides additional reminders to the driver that the driver s safety belt is unbuckled by intermittently sounding a...

Страница 77: ...Belt Minder reminds us to take a few seconds to buckle up Seat belts don t work Safety belts when used properly reduce risk of death to front seat occupants by 45 in cars and by 60 in light trucks Tra...

Страница 78: ...hat The parking brake is set The gearshift is in P Park automatic transmission or the neutral position manual transmission The ignition switch is in the OFF position All vehicle doors are closed The d...

Страница 79: ...e deactivation activation procedure is complete Safety belt maintenance Inspect the safety belt systems periodically to make sure they work properly and are not damaged Inspect the safety belts to mak...

Страница 80: ...Your vehicle is equipped with a crash sensing and diagnostic module which records information about the air bag and sensor systems In the event of a collision this module may save information related...

Страница 81: ...cupants of the vehicle including the driver should always properly wear their safety belts even when an air bag SRS is provided Always transport children 12 years old and under in the back seat and al...

Страница 82: ...inflation area may cause those objects to be propelled by the air bag into your face and torso causing serious injury Do not attempt to service repair or modify the air bag supplemental restraint syst...

Страница 83: ...e a forward facing child seat in the front seat move the seat all the way back How does the air bag supplemental restraint system work The air bag SRS is designed to activate when the vehicle sustains...

Страница 84: ...es facial and eye injuries or internal injuries particularly to occupants who are not properly restrained or are otherwise out of position at the time of air bag deployment Thus it is extremely import...

Страница 85: ...wing The readiness light will either flash or stay lit The readiness light will not illuminate immediately after ignition is turned on A series of five beeps will be heard The tone pattern will repeat...

Страница 86: ...a collision Always follow the instructions and warnings that come with any infant or child restraint you might use When possible always place children under age 12 in the rear seat of your vehicle Acc...

Страница 87: ...e used if the shoulder belt rests in front of the child s face or neck or if the lap belt does not fit snugly on both thighs or if the thighs are too short to let the child sit all the way back on the...

Страница 88: ...ental unbuckling Place seat back in upright position Put the safety belt in the automatic locking mode Refer to Automatic locking mode passenger side front and outboard rear seating positions if equip...

Страница 89: ...e air bag If you must use a forward facing child seat in the front seat move the seat all the way back 1 Position the child safety seat in a seat with a combination lap and shoulder belt Children 12 a...

Страница 90: ...ction the tongue is coming from for that seating position until you hear a snap and feel the latch engage Make sure the tongue is latched securely by pulling on it 5 To put the retractor in the automa...

Страница 91: ...belt and repeat steps two through nine Check to make sure the child seat is properly secured before each use Attaching child safety seats with tether straps Most new forward facing child safety seats...

Страница 92: ...than the correct tether anchor 1 Position the child safety seat on the seat cushion 2 Route the child safety seat tether strap over the back of the seat For vehicles with adjustable head restraints r...

Страница 93: ...ons to secure the child safety seat refer to the Installing child safety seats in combination lap and shoulder belt seating positions section of this chapter 6 Tighten the child safety seat tether str...

Страница 94: ...compartment and exhaust system which can start a fire Do not start your vehicle in a closed garage or in other enclosed areas Exhaust fumes can be toxic Always open the garage door before you start th...

Страница 95: ...sories are off 3 Make sure the parking brake is set If starting a vehicle with an automatic transaxle Make sure the gearshift is in P Park If starting a vehicle with a manual transaxle Push the clutch...

Страница 96: ...efly If a light fails to illuminate have the vehicle serviced If the driver s safety belt is fastened the light may not illuminate L O C K A C C ON S T A R T 0 I II I I I 4 3 2 1 THEFT SERVICE ENGINE...

Страница 97: ...tion 4 When the engine starts release the key then release the accelerator pedal gradually as the engine speeds up 5 After idling for a few seconds apply the brake and release the parking brake Using...

Страница 98: ...ngine exhaust some of its constituents and certain vehicle components contain or emit chemicals known to the State of California to cause cancer and birth defects or other reproductive harm In additio...

Страница 99: ...ystem ABS a noise from the hydraulic pump motor and pulsation in the pedal may be observed during ABS braking events Pedal pulsation coupled with noise while braking under panic conditions or on loose...

Страница 100: ...y from the four wheel ABS is required apply continuous force on the brake The four wheel ABS will be activated immediately thus allowing you to retain full steering control of your vehicle and providi...

Страница 101: ...e or in 1 First manual transaxle Push the button on the end of the parking brake and push the handle down as far as possible to release the brake Driving with the parking brake on will cause the brake...

Страница 102: ...ift interlock This vehicle is equipped with a brake shift interlock feature that prevents the gearshift lever from being moved from P Park unless the brake pedal is depressed If you cannot move the ge...

Страница 103: ...may be rocked out by shifting from forward and reverse gears stopping between shifts in a steady pattern Press lightly on the accelerator in each gear Do not rock the vehicle for more than a few minut...

Страница 104: ...Park Make sure that the gearshift lever is securely latched in P Park This locks the transaxle and prevents the front wheels from rotating Always set the parking brake fully and make sure the gearshi...

Страница 105: ...D Drive but shifts to a fourth gear an overdrive gear when your vehicle cruises at a constant speed for any length of time This fourth gear will increase your fuel economy when you travel at cruising...

Страница 106: ...ascend any grade without any need to shift to L Low Do not go faster than 61 km h 38 mph when in this gear You can upshift from L Low to overdrive at any time When parking do not use the gearshift in...

Страница 107: ...pedal 3 Depress the clutch pedal 4 Turn the ignition key to 4 START then let the engine idle for a few seconds 5 Release the brake pedal then slowly release the clutch pedal while pressing down slowl...

Страница 108: ...Parking your vehicle 1 Apply the brake and shift into the neutral position 2 Set the parking brake 3 Shift into 1 First 1 2 4 R 3 5 1 2 4 R 3 5 Driving 107...

Страница 109: ...hifts when accelerating recommended for best fuel economy 1 2 21 km h 13 mph 2 3 40 km h 25 mph 3 4 53 km h 33 mph 4 5 70 km h 44 mph Coupe Upshifts when cruising recommended for best fuel economy 1 2...

Страница 110: ...The payload equals the gross vehicle weight rating minus base curb weight GVW Gross Vehicle Weight Base curb weight plus payload weight The GVW is not a limit or a specification GVWR Gross Vehicle Wei...

Страница 111: ...ginals because they may lower the vehicle s GVWR and GAWR limitations Replacement tires with a higher limit than the originals do not increase the GVWR and GAWR limitations The Safety Certification La...

Страница 112: ...railer and make sure it is properly attached to your vehicle See your dealer or a reliable trailer dealer if you require assistance Hitches Do not use hitches that clamp onto the vehicle bumper Use a...

Страница 113: ...for towing a trailer Use a lower gear when towing up or down steep hills This will eliminate excessive downshifting and upshifting for optimum fuel economy and transaxle cooling Anticipate stops and...

Страница 114: ...r especially if the depth is unknown Traction or brake capability may be limited and if the ignition system gets wet your engine may stall Water may also enter your engine s air intake and severely da...

Страница 115: ...lated tows like accidents or getting stuck in the mud or snow are covered some exclusions apply such as impound towing or repossession Using roadside assistance Complete the roadside assistance identi...

Страница 116: ...e at www ford ca HAZARD FLASHER Use only in an emergency to warn traffic of vehicle breakdown approaching danger etc The hazard flashers can be operated when the ignition is off Slide the hazard flash...

Страница 117: ...liner Driver s foot well behind the kick panel The fuel pump shut off switch depending on application is located on the right side of the trunk behind the trunk liner or in the driver s foot well behi...

Страница 118: ...rn the key to the OFF position 5 Make a further check for leaks in the fuel system FUSES AND RELAYS Fuses If electrical components in the vehicle are not working a fuse may have blown Blown fuses are...

Страница 119: ...Fuse link cartridge 2A Grey Grey 3A Violet Violet 4A Pink Pink 5A Tan Tan 7 5A Brown Brown 10A Red Red 15A Blue Blue 20A Yellow Yellow Yellow Blue Blue 25A Natural Natural 30A Green Green Green Pink P...

Страница 120: ...r ENGINE 15A Electronic Automatic Transaxle Ignition System Constant Control Relay Module PCM Relay RADIO 5A Power Mirrors Radio RAP System DOOR LOCK 30A Power Door Locks HORN 15A Horn Shift Lock AIR...

Страница 121: ...5A Exterior Lamps Instrument Illumination SUN ROOF 15A Power Moonroof ASC 10A Speed Control P WINDOW 30A CB Power Windows CIGAR 20A Cigar Lighter AIR BAG 10A Air Bags FOG 10A Fog Lamps Daytime Running...

Страница 122: ...Warning Chime ENGINE 15A Air Bag Engine Controls TR Sensor MIRROR 5A Power Mirrors Radio Remote Keyless Entry RKE DOOR LOCK 30A Power Door Locks HORN 15A Horn AIR COND 15A A C Heater ABS METER 10A Ba...

Страница 123: ...nsor P WINDOW 30A CB Power Windows BLOWER 30A CB A C Heater Power distribution box The power distribution box is located in the engine compartment The power distribution box contains high current fuse...

Страница 124: ...Tail Room and Horn Fuses of the I P Fuse Panel ABS 60A ABS Main Relay COOLING FAN 40A Constant Control Relay Module Cooling Fan OBD II 10A Data Link Connector DLC Instrument Cluster FUEL PUMP 20A Con...

Страница 125: ...ABS Fuses Ignition Switch Headlamps BTN 40A Hazard ABS 60A ABS Main Relay COOLING FAN 40A Constant Control Relay Module OBD II 10A Data Link Connector DLC Instrument Cluster FUEL PUMP 20A Engine Cont...

Страница 126: ...esigned for emergency use only If you use the temporary spare tire continuously or do not follow these precautions the tire could fail causing you to lose control of the vehicle possibly injuring your...

Страница 127: ...Reverse manual transaxle To prevent the vehicle from moving when you change a tire be sure the parking brake is set then block in both directions the wheel that is diagonally opposite other side and e...

Страница 128: ...Automatic Manual 3 Remove the jack jack handle lug wrench and spare tire P R N D D L 1 2 4 R 3 5 Roadside emergencies 127...

Страница 129: ...h 7 Replace the flat tire with the spare tire making sure the valve stem is facing outward Reinstall the lug nuts until the wheel is snug against the hub Do not fully tighten the lug nuts until the wh...

Страница 130: ...mal and will not affect function or durability of the transmission Over time the adaptive learning process will fully update transmission operation to its optimum shift feel 1 Use only a 12 volt suppl...

Страница 131: ...to the positive terminal of the discharged battery Note In the illustrations lightning bolts are used to designate the assisting boosting battery 2 Connect the other end of the positive cable to the p...

Страница 132: ...etor fuel injection system Do not use fuel lines engine rocker covers or the intake manifold as grounding points Do not connect the end of the second cable to the negative terminal of the battery to b...

Страница 133: ...itional three minutes before disconnecting the jumper cables Removing the jumper cables Remove the jumper cables in the reverse order that they were connected 1 Remove the jumper cable from the ground...

Страница 134: ...everal minutes so the engine computer can relearn its idle conditions When the battery is disconnected or a new battery is installed the transmission must relearn its adaptive strategy As a result of...

Страница 135: ...ed a slingbelt towing procedure If your vehicle is to be towed from the rear using wheel lift equipment the front wheels drive wheels must be placed on a dolly to prevent damage to the transmission If...

Страница 136: ...hicle PRECAUTIONS WHEN SERVICING YOUR VEHICLE Be especially careful when inspecting or servicing your vehicle Do not work on a hot engine When the engine is running keep loose clothing jewelry or long...

Страница 137: ...le from moving unexpectedly Manual transaxle 1 Set the parking brake depress the clutch and place the gearshift in 1 First 2 Turn off the engine and remove the key 3 Block the wheels to prevent the ve...

Страница 138: ...n P Park 2 Block the wheels to prevent the vehicle from moving unexpectedly NOTE Do not start your engine with the air cleaner removed and do not remove it while the engine is running Manual transaxle...

Страница 139: ...E Do not start your engine with the air cleaner removed and do not remove it while the engine is running OPENING THE HOOD 1 Inside the vehicle pull the hood release handle located under the bottom lef...

Страница 140: ...2 Go to the front of the vehicle and release the auxiliary latch that is located under the front center of the hood 3 Lift the hood and secure it with the prop rod Maintenance and care 139...

Страница 141: ...l dipstick 2 Brake fluid reservoir 3 Transmission fluid dipstick automatic transaxle 4 Battery 5 Air filter assembly 6 Engine oil filler cap 7 Power steering fluid reservoir 8 Engine coolant reservoir...

Страница 142: ...matic transaxle 2 Battery 3 Air filter assembly 4 Engine oil filler cap 5 Engine oil dipstick 6 Power steering fluid reservoir 7 Engine coolant reservoir 8 Windshield washer fluid reservoir 9 Brake fl...

Страница 143: ...und 2 Turn the engine off and wait a few minutes for the oil to drain into the oil pan 3 Set the parking brake and ensure the gearshift is securely latched in P automatic transaxle or 1st manual trans...

Страница 144: ...he oil level is acceptable DO NOT ADD OIL If the oil level is below the ADD mark add enough oil to raise the level within the ADD FULL range Oil levels above the F in FULL may cause engine damage Some...

Страница 145: ...le oil loss DO NOT operate the vehicle with the engine oil level indicator and or the engine oil filler cap removed Engine oil and filter recommendations Look for this certification trademark SAE 5W 2...

Страница 146: ...s 1 Clean the reservoir cap before removal to prevent dirt or water from entering the reservoir 2 Visually inspect the fluid level 3 If necessary add brake fluid from a clean un opened container until...

Страница 147: ...are part of the same system both are refillable through the brake master cylinder with brake fluid For more information on brake fluid maintenance refer to Brake fluid in this chapter Brake fluid is...

Страница 148: ...y use a washer fluid that meets Ford specifications Refer to Lubricant specifications in the Capacities and specifications chapter State or local regulations on volatile organic compounds may restrict...

Страница 149: ...such as the Rotunda Battery and Antifreeze Tester 014 R1060 The level of coolant should be maintained at the cold full of cold fill range level in the coolant reservoir If the level falls below add co...

Страница 150: ...plication Refer to the Scheduled Maintenance Guide for service interval schedules Be sure to read and understand Precautions when servicing your vehicle in this chapter If the engine coolant has not b...

Страница 151: ...M97B51 A1 To determine your vehicle s coolant type color check your coolant reservoir Add Motorcraft Premium Engine Coolant green colored VC 4 A U S or CXC 10 Canada or Motorcraft Premium Gold Engine...

Страница 152: ...p The cooling system is under pressure steam and hot liquid can come out forcefully when the cap is loosened slightly 1 Before you begin turn the engine off and let it cool 2 When the engine is cool w...

Страница 153: ...h coolant may harm the engine and cooling system components Ford Motor Company does NOT recommend the use of recycled engine coolant in vehicles originally equipped with Motorcraft Premium Gold Engine...

Страница 154: ...creased engine coolant concentrations below 40 will decrease the freeze protection characteristics of the engine coolant and may cause engine damage Refer to the chart on the coolant container to ensu...

Страница 155: ...p back on the reservoir TRANSMISSION FLUID Checking automatic transmission fluid Refer to your scheduled maintenance guide for scheduled intervals for fluid checks and changes Your transaxle does not...

Страница 156: ...k and inspect the fluid level The fluid should be in the designated areas for normal operating temperature Low fluid level Do not drive the vehicle if the fluid level is at the bottom of the dipstick...

Страница 157: ...may cause internal transaxle component damage If necessary add fluid in 250 mL 1 2 pint increments through the filler tube until the level is correct If an overfill occurs excess fluid should be remo...

Страница 158: ...temperature climates check the battery electrolyte level Refer to the scheduled maintenance guide for the service interval schedules Keep the electrolyte level in each cell up to the level indicator D...

Страница 159: ...eries out of reach of children Batteries contain sulfuric acid Avoid contact with skin eyes or clothing Shield your eyes when working near the battery to protect against possible splashing of acid sol...

Страница 160: ...fully update transmission operation to its optimum shift feel If the battery has been disconnected or a new battery has been installed the clock and the preset radio stations must be reset once the ba...

Страница 161: ...cure the clamp WINDSHIELD WIPER BLADES Check the wiper blades at least twice a year or when they seem less effective Substances such as tree sap and some hot wax treatments used by commercial car wash...

Страница 162: ...on the tire sidewall between tread shoulder and maximum section width For example Treadwear 200 Traction AA Temperature A These Tire Quality Grades are determined by standards that the United States D...

Страница 163: ...s based on straight ahead braking traction tests and does not include acceleration cornering hydroplaning or peak traction characteristics Temperature A B C The temperature grades are A the highest B...

Страница 164: ...the Tire Label located on the right hand door frame Improperly inflated tires can affect vehicle handling and can fail suddenly possibly resulting in loss of vehicle control Tire rotation Because you...

Страница 165: ...ns recommended on the label If you do not follow these precautions your vehicle may not drive properly and safely Make sure that all replacement tires are of the same size type load carrying capacity...

Страница 166: ...used on P185 65R14 tires Do not use tire chains with 38 cm 15 inch wheel tire options Using chains on this size tire may cause damage to steering suspension and or body components Install chains secur...

Страница 167: ...wait until it stops before completely removing the fuel filler cap Otherwise fuel may spray out and injure you or others If you do not use the proper fuel filler cap excessive pressure or vacuum in t...

Страница 168: ...nd seek medical attention Failure to seek proper medical attention could lead to permanent injury Fuels can also be harmful if absorbed through the skin If fuel is splashed on the skin and or clothing...

Страница 169: ...ntil it stops 3 Pull to remove the cap from the fuel filler pipe 4 To install the cap align the tabs on the cap with the notches on the filler pipe 5 Turn the filler cap clockwise 1 8 of a turn until...

Страница 170: ...l system components Your vehicle was not designed to use fuel or fuel additives with metallic compounds including manganese based compounds containing MMT Repairs to correct the effects of using a fue...

Страница 171: ...e World wide Fuel Charter that recommends gasoline specifications to provide improved performance and emission control system protection for your vehicle Gasolines that meet the World wide Fuel Charte...

Страница 172: ...uel capacity of the fuel tank on your vehicle is equal to the rated refill capacity of the fuel tank as listed in the Refill capacities section of the Capacities and specifications chapter The adverti...

Страница 173: ...al odometer reading from the current odometer reading 5 Follow one of the simple calculations in order to determine fuel economy Multiply liters used by 100 then divide by total kilometers traveled Di...

Страница 174: ...hile driving may reduce fuel economy Combine errands and minimize stop and go driving Maintenance Keep tires properly inflated and use only recommended size Operating a vehicle with the wheels out of...

Страница 175: ...STEM Your vehicle is equipped with various emission control components and a catalytic converter which will enable your vehicle to comply with applicable exhaust emission standards To make sure that t...

Страница 176: ...rol Information Decal located on or near the engine This decal identifies engine displacement and gives some tune up specifications Please consult your Warranty Guide for complete emission warranty in...

Страница 177: ...Brakelamps Backup lamps License plate lamp Hazard flashers Do not remove lamp bulbs unless they will be replaced immediately If a bulb is removed for an extended period of time contaminants may enter...

Страница 178: ...he bulb s plastic base facing upward Turn the bulb slightly to align the grooves in the plastic base with the tabs in the lamp assembly 8 Install the bulb retaining ring over the plastic base and lock...

Страница 179: ...ush pins in to release tension 2 Pull the push pins out of the cover and slide the cover away from the package tray 3 Remove the bulb by rotating it counterclockwise and pulling it out of the lamp ass...

Страница 180: ...p has hidden fasteners which can be disengaged by hitting the lamp with the side of your hand toward the side of the vehicle 3 Pull lamp assembly away from vehicle for access to bulbs 4 Remove the bul...

Страница 181: ...p bulbs For bulb replacement see a dealer or qualified technician INTERIOR BULBS Dome lamp 1 Remove the lamp lens by applying pressure to both tabs at the top of the lamp and pulling lens downward 2 P...

Страница 182: ...panel lights see your dealer AIMING THE HEADLAMPS Your vehicle is equipped with a Vehicle Headlamp Aim Device VHAD on each headlamp Each headlamp may be properly aimed in the vertical up down and the...

Страница 183: ...eadlamp assembly 3 The L and R under the viewing window on the top of the headlamp refer to the directional change left or right of the horizontal aim 4 Use a 4 mm wrench or socket to turn the horizon...

Страница 184: ...e of the headlamp below the headlamp upper attachment 3 The UP and DN on the bubble indicate the directional change up or down of the vertical aim 4 Use a 4 mm wrench or socket to turn the vertical ad...

Страница 185: ...to the vehicle Any gasoline spilled on the vehicle or deposits such as bird droppings should be washed and sponged off as soon as possible Deposits not removed promptly can cause damage to the vehicl...

Страница 186: ...nstructions on the products Remove particles such as bird droppings tree sap insect remains tar spots road salt and industrial fallout immediately Cleaning the wheels Wash with the same detergent as t...

Страница 187: ...ercial car washes Clean the outside of the windshield or rear window with a non abrasive cleaner such as Ford Ultra Clear Spray Glass Cleaner E4AZ 19C507 AA available from your Ford Dealer Do not use...

Страница 188: ...from undesirable windshield reflection Do not use chemical solvents or strong detergents when cleaning the steering wheel or instrument panel to avoid contamination of the air bag system Cleaning the...

Страница 189: ...section in the Seating and safety restraints chapter Cleaning leather seats if equipped To clean simply use a soft cloth dampened with water and a mild soap Wipe the leather again with a damp cloth to...

Страница 190: ...lve EV 244 EV 224 Spark plugs AGSF 34EE AZFS 32FE Refer to Vehicle Emissions Control Information VECI decal for spark plug gap information If a spark plug is removed for inspection it must be reinstal...

Страница 191: ...rts Engine oil includes filter change Motorcraft SAE 5W 20Super Premium Motor Oil ZX2 4 25L 4 5 quarts Sedan 3 8L 4 0 quarts Fuel tank capacity N A All 48 5L 12 8 gallons Power steering fluid Motorcra...

Страница 192: ...nt XL 1 none Automatic transaxle Motorcraft MERCONt ATF XT 2 QDX MERCONt Manual transaxle Motorcraft MERCONt ATF XT 2 QDX MERCONt Engine oil Motorcraft SAE 5W 20 Super Premium Motor Oil XO 5W20 QSP WS...

Страница 193: ...ing Ford specification WSS M97B44 D orange in color Refer to Adding engine coolant in the Maintenance and Care chapter ENGINE DATA Engine 2 0L SOHC I4 engine 2 0L DOHC Zetec engine Cubic inches 121 12...

Страница 194: ...ns Coupe mm in 1 Overall length 4 451 0 175 2 2 Overall width 1 712 0 67 4 3 Overall height 1 328 4 52 3 4 Wheelbase 2 499 0 98 4 5 Track Front 1 435 1 56 5 5 Track Rear 1 435 1 56 5 Coupe model 2 5 5...

Страница 195: ...fic Safety Administration Regulations require that a Certification label be affixed to a vehicle and prescribe where the Certification label may be located The Certification label is located on the fr...

Страница 196: ...driver side instrument panel Please note that in the graphic XXXX is representative of your vehicle identification number Engine number The engine number the last eight numbers of the vehicle identifi...

Страница 197: ...a network of more than 5 000 participating Ford or Lincoln Mercury and Ford of Canada dealers If you did not take advantage of the Ford Extended Service Plan at the time of purchasing your vehicle yo...

Страница 198: ...p Center to find an authorized dealership to help you In the United States Ford Motor Company Customer Relationship Center 16800 Executive Plaza Drive P O Box 6248 Dearborn Michigan 48121 1 800 392 36...

Страница 199: ...ntact the Dispute Settlement Board U S or the Canadian Motor Vehicle Arbitration Plan CAMVAP available in all of Canada except Quebec In some states in the U S you must directly notify Ford in writing...

Страница 200: ...ord dealership sales disputes between customer and dealer except those associated with warranty repairs or concerns with the vehicle s performance as designed a request for reimbursement of consequent...

Страница 201: ...your application the toll free phone number of the DSB s independent administrator Your dealership and a Ford Motor Company representative will then be asked to submit statements To properly review yo...

Страница 202: ...a month it may take longer for the Board to consider some cases After a case is reviewed the Board mails you a decision letter and a form on which to accept or reject the Board s decision The decisio...

Страница 203: ...re fast fair and final the arbitrator s award is binding both to you and Ford of Canada CAMVAP services are available in all territories and provinces except Quebec For more information without charge...

Страница 204: ...rect Market Operations FORD CAR CARE PRODUCTS FOR YOUR VEHICLE Ford has many quality products available from your dealer to clean your vehicle and protect its finishes These quality products have been...

Страница 205: ...rigorous engineering and safety specifications Ford Motor Company will repair or replace any properly dealer installed Ford accessory found to be defective in factory supplied materials or workmanship...

Страница 206: ...mirror with compass and temperature display Highway safety kit First aid kit Removable luggage rack Removable luggage rack adapters bike ski and snowboard Speed control Protection and appearance equi...

Страница 207: ...systems may harm the operation of your vehicle particularly if they are not properly designed for automotive use or are not properly installed When operated such systems may cause the engine to stumb...

Страница 208: ...receive a refund or replacement vehicle California Civil Code Section 1793 22 b presumes that the manufacturer has had a reasonable number of attempts to conform the vehicle to its applicable express...

Страница 209: ...it finds that a safety defect exists in a group of vehicles it may order a recall and remedy campaign However NHTSA cannot become involved in individual problems between you your dealer or Ford Motor...

Страница 210: ...7 acid treating emergencies 157 charging system warning light 11 jumping a disabled battery 129 maintenance free 157 replacement specifications 189 servicing 157 Belt minder 75 Brakes 98 anti lock 98...

Страница 211: ...ring additional owner s literature 206 The Dispute Settlement Board 199 Utilizing the Mediation Arbitration Program 202 D Daytime running lamps see Lamps 44 Defrost rear window 43 Dipstick automatic t...

Страница 212: ...G Gas cap see Fuel cap 12 168 Gas mileage see Fuel economy 171 Gauges 13 engine coolant temperature gauge 14 fuel gauge 14 odometer 15 speedometer 15 tachometer 16 trip odometer 16 GAWR Gross Axle Wei...

Страница 213: ...ior lamps 53 180 replacing bulbs 176 178 180 Lane change indicator see Turn signal 46 Lights warning and indicator 8 air bag 10 anti lock brakes ABS 11 99 anti theft 11 brake 10 charging system 11 fue...

Страница 214: ...73 Safety defects reporting 208 Safety restraints 69 73 belt minder 75 cleaning the safety belts 78 188 extension assembly 74 for adults 70 72 for children 85 lap belt 74 warning light and chime 10 1...

Страница 215: ...91 Trip odometer 16 Trunk 56 remote release 18 59 Turn signal 11 46 V Vehicle dimensions 193 Vehicle Identification Number VIN 195 Vehicle loading 109 Ventilating your vehicle 97 W Warning chimes 12 1...

Страница 216: ...215...

Страница 217: ...er Premium Motor Oil Ford specification WSS M2C153 H Coolant capacity 1 Automatic transaxle 6 0L 6 3 quarts Manual transaxle 5 0L 5 3 quarts Power steering fluid capacity Fill to line on reservoir Aut...

Отзывы: