background image

297

*

[SV13600( ALL)02/95]

Engine Oil Recommendations

*

[SV13610( ALL)05/95]

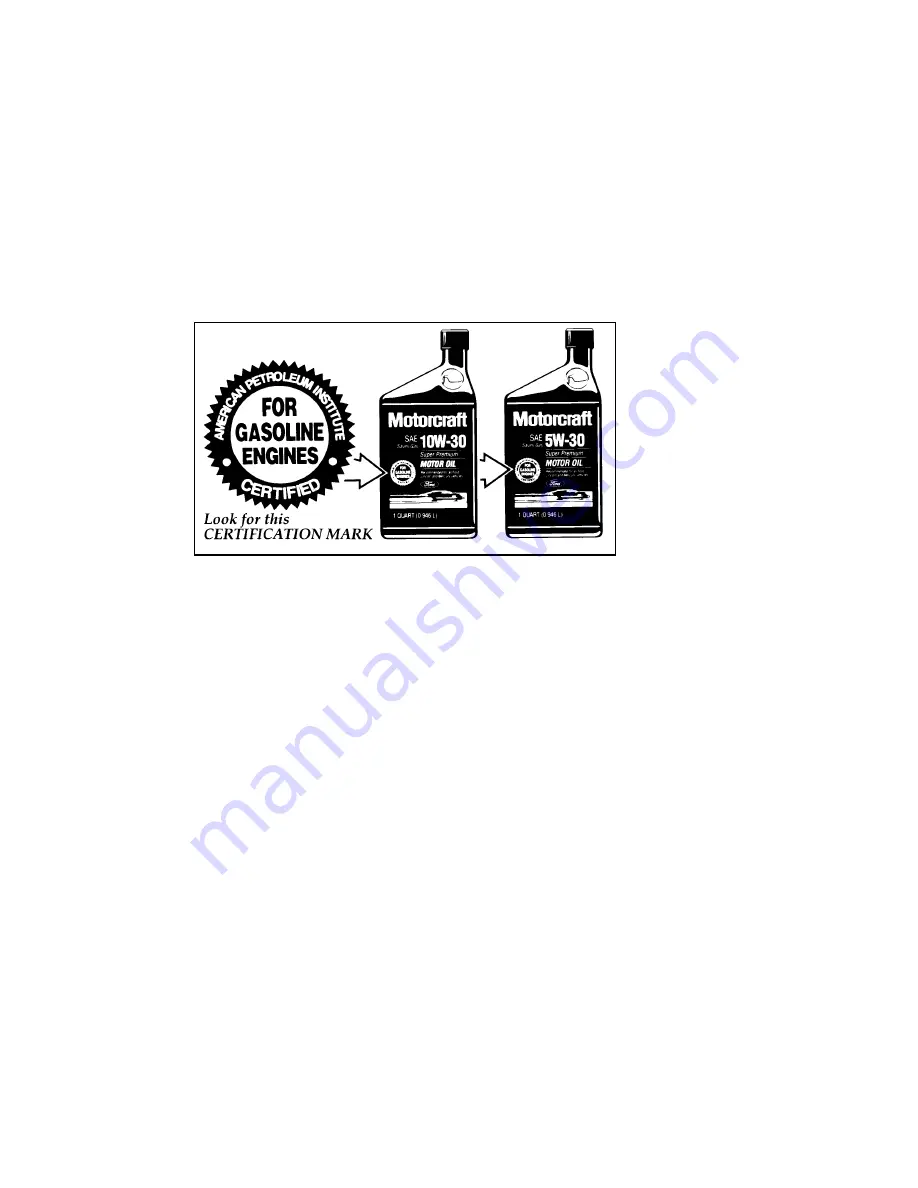
We recommend using Motorcraft oil or an
equivalent oil meeting Ford Specification
WSS-M2C153-F and displaying the American
Petroleum Institute CERTIFICATION MARK on
the front of the container.

*

[SV13655( ALL)03/95]

one third page art:0060020-D

The API Certification Mark

*

[SV13670( ALL)01/95]

Never

use:

*

[SV13680( ALL)01/95]

“Non-Detergent” oils

*

[SV13690( ALL)04/95]

Oils labeled API SA, SB, SC, SD, SE, SF or SG

%

*

[SV13700( ALL)01/95]

Additional engine oil additives, oil treatments
or engine treatments

[SV13705( EF )04/95]

For vehicles with 5.8L engines

%

*

[SV13710( ALL)06/95]

Engine oils with an SAE 5W-30 viscosity are
PREFERRED

for your vehicle. They provide the

best engine performance, fuel economy and
engine protection for all climates down to -15˚F
(-25˚C).

%

*

[SV13725( ALL)03/95]

Synthetic engine oils which are CERTIFIED and
of the preferred viscosity may be used in your
engine. The engine oil and oil filter must still be
changed according to the maintenance schedule.

File:14ltsve.ex

Update:Wed Apr 17 08:40:13 1996

Содержание 1996 E150

Страница 1: ......

Страница 2: ......

Страница 3: ...ng Lights and Gauges 67 Instrument Panel Controls 81 Steering Column Controls 99 Features 113 Electronic Sound Systems 149 Driving Your Econoline 195 Roadside Emergencies 243 Customer Assistance 259 R...

Страница 4: ...products and services must be our number one priority You are the focus of everything we do Our work must be done with you in mind providing better products and services than our competition Continuou...

Страница 5: ...o not know which information applies to your vehicle talk to your dealer This guide describes equipment and gives specifications for equipment that was in effect when this guide was approved for print...

Страница 6: ...ok and search in the alphabetical listing for the word that best describes the information you need If the word you chose is not listed think of other related words and look them up We have designed t...

Страница 7: ...s owner guide Buying a Ford Extended Service Plan If you bought your vehicle in the U S you can buy a Ford Extended Service Plan for your vehicle This optional contract provides service protection for...

Страница 8: ...rd Ambulance Preparation Package voids the Ford New Vehicle Limited Warranty and may void the Emissions Warranties In addition ambulance usage without the preparation package could cause high underbod...

Страница 9: ...le Identification Number is attached to your vehicle in the following places Complete Ford Built Vehicles on the metal tag attached to the top of the instrument panel on the driver s side you can see...

Страница 10: ...or more stages by two or more separate manufacturers with the manufacture of the completed vehicle occurring at a later date than the manufacture of the incomplete vehicle Consequently the model year...

Страница 11: ...in advance Apply the brakes gradually The break in period for new brake linings lasts for 100 miles 160 km of city driving or 1 000 miles 1 600 km of highway driving Wheel lug nuts must be retightene...

Страница 12: ...le is exposed to chemical industrial fallout Paint damage resulting from fallout is not related to a defect in paint materials or workmanship and therefore is not covered by warranty Ford however beli...

Страница 13: ...wheelcovers aluminum wheels bumpers or anodized aluminum parts Cleaning Plastic Parts Some of your vehicle s exterior trim parts are plastic Clean with a tar and road oil remover if necessary Use a v...

Страница 14: ...st the knees are straight forward To help you remember to fasten your safety belt a warning light may come on and a chime may sound See Safety Belt Warning Light and Chime in the Warning Lights and Ga...

Страница 15: ...otect the child from injury in a collision RWARNING To reduce the risk of serious injury in a collision children should always ride with the seatback upright RWARNING Never wear the shoulder belt unde...

Страница 16: ...g tight only on hard braking hard cornering or impacts of approximately 5 mph 8 km h or more The front seat belt retractor can also be made to lock by pulling jerking on the belt Automatic Locking Mod...

Страница 17: ...ic locking mode NOTE When the combination lap shoulder belt is unbuckled and allowed to retract completely the retractor will switch back to the vehicle sensitive emergency locking mode See the detail...

Страница 18: ...until you hear a snap and feel it latch Make sure the tongue is securely fastened to the buckle by pulling on tongue RWARNING Use the shoulder belt on the outside shoulder only Never wear the shoulde...

Страница 19: ...ct of 5 mph 8 km h or more the lap and shoulder belt will become locked and help reduce your forward movement All Three Passenger Bench Bed Seat or Captain s Chair In addition to anchorages in the flo...

Страница 20: ...17 Proper stowage of shoulder safety belt...

Страница 21: ...18 Location of the stowage hook caution label on safety belt...

Страница 22: ...ty belt In order to remove the rear seat the safety belt must be disengaged from the seat To disengage the safety belt from the seat insert a key or small screwdriver into the slot provided on the det...

Страница 23: ...20 Whenever a rear seat has been removed the tongue end of the detachable anchor must be correctly stowed See the following illustrations Rear seat shoulder safety belt stowage with seat removed...

Страница 24: ...RWARNING When reinstalling a rear seat in your vehicle it must be placed in its original position Improper installation of the seat will prevent correct use of the safety belts and could increase the...

Страница 25: ...ch seat and both inboard seats of the four passenger bench seat you will find a lap belt without a retractor but does have a locking adjustable tongue Shorten and fasten these belts when you are not u...

Страница 26: ...nd repeat the procedure above If you need to shorten the belt pull on the loose end of the webbing Safety Belt Bed Seat Pocket Location of the safety belt bed seat pockets To unfasten the belt 1 Push...

Страница 27: ...isted you can free the webbing with this procedure 1 Pull on the belt with both hands to tighten it on the retractor spool 2 Feed the belt back into the retractor until it is completely retracted Repe...

Страница 28: ...nd or Rear Outboard Seating Positions NOTE The restraint system shown in the following figures may be different than the restraint system in your vehicle However use these figures and this procedure t...

Страница 29: ...26 1 Grasp the belt webbing at the D ring See Figure 2 2 Rotate and fold the belt webbing over itself as required to remove the twist 3 Feed the folded portion of the belt through the D ring...

Страница 30: ...ety belt extension assembly part number 611C22 Safety belt extensions are available at no cost from your dealer Use only extensions manufactured by the same supplier as the safety belt Manufacturer id...

Страница 31: ...assemblies slide bar if so equipped child safety seat tether bracket assemblies if so equipped and attaching hardware should be inspected after any collision Ford recommends that all safety belt assem...

Страница 32: ...on to the driver lap shoulder belt and is designed to supplement the protection provided to a properly belted driver in moderate to severe frontal collisions The supplemental air bag system does not p...

Страница 33: ...rom your vehicle The Importance of Being Properly Seated In a collision the air bag must inflate extremely fast to help provide additional protection for you In order to do this the air bag must infla...

Страница 34: ...the steering wheel The second part is the electrical system which has impact sensors and a diagnostic module and backup power supply The diagnostic module monitors its own internal circuits and the su...

Страница 35: ...ermittently have the air bag system serviced at your Ford or Lincoln Mercury dealer immediately Tone generator The air bag readiness light indicates the air bag system condition However a series of fi...

Страница 36: ...rd deceleration of your vehicle can be great enough to deploy your air bag The following four steps show how the air bag system works 1 Sensors in the vehicle will detect the degree of severity of a f...

Страница 37: ...is not toxic Right after air bag inflation you may notice smoke from the powder and dust and smell the burnt propellant This is normal RWARNING Air bag system components get hot after inflation Do not...

Страница 38: ...side air bag RWARNING If the air bag is inflated THE AIR BAG WILL NOT FUNCTION AGAIN AND MUST BE REPLACED IMMEDIATELY If the air bag is not replaced the unrepaired area will increase the risk of inju...

Страница 39: ...al Information on how to order a service manual is available at an authorized Ford or Lincoln Mercury dealer You can also order a service manual using the order form in the Accessories chapter of your...

Страница 40: ...SR14000 BEF 05 95 full page art 0020847 D File 03ltsre ex Update Wed Apr 17 08 51 22 1996...

Страница 41: ...ildren who are four years old or younger and who weigh 40 pounds 18 kg or less you must put them in safety seats that are made specially for children Safety belts alone do not provide maximum protecti...

Страница 42: ...you put in your vehicle If you do not install and use the safety seat properly the child may be injured in a sudden stop or collision When possible put children in the rear seat of your vehicle Accide...

Страница 43: ...belts can be positioned so that it does not cross or rest in front of the child s face or neck the child should wear the lap and shoulder belt Moving the child closer to the center of the vehicle may...

Страница 44: ...seating position making sure the tongue is securely fastened in the buckle and for a shoulder lap belt combination with a sliding tongue make sure the retractor is in the automatic locking mode Most c...

Страница 45: ...in the automatic locking mode Toddlers one to four years Install forward facing convertible safety seats only in vehicle seating positions equipped with lap shoulder belts Forward facing convertible s...

Страница 46: ...er s instructions included with the safety seat you put in your vehicle If you do not install and use the safety seat properly the child may be injured in a sudden stop or collision RWARNING Seatbacks...

Страница 47: ...utboard passengers If you choose to install a forward facing child safety seat or infant carrier in the front seating positions move vehicle seat as far back as possible For seating positions equipped...

Страница 48: ...le holding the shoulder and lap belt portions together route the tongue through the child seat according to the child seat manufacturer s instructions See Figure 2 Be sure that the belt webbing is not...

Страница 49: ...g the lap shoulder belt 4 Insert the belt tongue into the buckle for that seating position until you hear and feel the latch engage Figure 3 Make sure tongue is latched securely to buckle by pulling o...

Страница 50: ...ull downward until all of the belt is extracted and a click is heard At this time the retractor is in the automatic locking mode child seat restraint mode Figure 4 NOTE The dual locking mode retractor...

Страница 51: ...lt to retract Pull up on the shoulder webbing A clicking sound will be heard as the belt retracts This indicates the retractor is in the automatic locking mode Push down on the child seat while you pu...

Страница 52: ...49...

Страница 53: ...0 7 Before placing the child in the child seat forcibly tilt the seat from side to side and tug it forward to make sure that the seat is securely held in place Figure 7 Checking that the seat is secur...

Страница 54: ...e 8 Checking the retractor 9 Check to make sure that the child seat is properly secured prior to each use If the retractor is not locked repeat steps 4 through 7 To remove the retractor from automatic...

Страница 55: ...cturer s instructions 4 Insert the belt tongue into the proper buckle for the center seating position until you hear a snap and feel it latch Make sure the tongue is securely fastened to the buckle by...

Страница 56: ...acket to the back of the seat by using a tether anchor kit 613D74 available at no charge from any Ford dealer Read and follow the instructions provided with the kit carefully for installation of the c...

Страница 57: ...y use the tether attachment hole locations shown in the illustrations The tether anchor may not perform properly if the wrong mounting location is used RWARNING Failure to follow these precautions cou...

Страница 58: ...sition while the engine runs START cranks the engine Release the key once the engine starts so that you do not damage the starter The key should return to ON when you release it The START position als...

Страница 59: ...the ignition Never leave your vehicle unattended with the key in the ignition Removing the Key From the Ignition Procedures for removing your key from the ignition are as follows Your vehicle s gears...

Страница 60: ...t thing to remember is to avoid pressing down on the accelerator before or during starting Only use the accelerator when you have problems getting your vehicle started See Starting Your Engine in this...

Страница 61: ...xhaust Fumes in this chapter for more instructions Before you start your vehicle do the following 1 Make sure you and all your passengers buckle your safety belts See Safety Restraints in the Index fo...

Страница 62: ...gine has started If you have difficulty in turning the key rotate the steering wheel slightly because it may be binding For a cold engine At temperatures 10 F 12 C and below If the engine does not sta...

Страница 63: ...on the brake pedal and put the gearshift lever in gear Release the parking brake Slowly release the brake pedal and drive away in the normal manner NOTE Your vehicle is equipped with a brake shift in...

Страница 64: ...ts 1 Turn the ignition key to the OFF position 2 Press the accelerator all the way to the floor and hold it 3 Turn the ignition key to the START position 4 Release the ignition key when the engine sta...

Страница 65: ...our vehicle in dry grass or other dry ground cover The emission system heats up the engine compartment and exhaust system which can start a fire If you consistently start your vehicle in subzero tempe...

Страница 66: ...ur vehicle If the Engine Cranks but Does Not Start or Does Not Start After a Collision Fuel Pump Shut off Switch If the engine cranks but does not start or does not start after a collision the fuel pu...

Страница 67: ...on or substantial jolt 1 Turn the ignition key to the OFF position 2 Check under the vehicle for leaking fuel 3 If you do not see or smell fuel push the red reset button down If the button is already...

Страница 68: ...rea Never sit in a stopped vehicle for more than a short period of time with the engine running Exhaust fumes are toxic See Guarding Against Exhaust Fumes in this chapter for more instructions RWARNIN...

Страница 69: ...g while you are stopped in an open area for long periods of time open the windows at least one inch 2 5 cm Also adjust the heating or air conditioning to bring in outside air HEATING Set fan speed on...

Страница 70: ...illustrations on the following pages show the major parts of the instrument panel that are described in this chapter Some items shown may not be on all vehicles In your vehicle the warning lights and...

Страница 71: ...LG02600 E 05 95 full page art 0020042 J File 05ltlge ex Update Wed Apr 17 08 49 15 1996...

Страница 72: ...ot fully released that the brake fluid level is low in the master cylinder reservoir or the vacuum pressure is low on diesel engine vehicles If the fluid level is low the brake system should be checke...

Страница 73: ...o flash in a repeatable flash sequence check the rear anti lock system continuous power fuse and brake lights for proper operation Antilock warning light symbol RWARNING If the anti lock brake system...

Страница 74: ...ng both the light and chime turn off If the safety belt is buckled before the ignition is turned to the ON position neither the light nor the chime will come on Safety belt warning light symbol Check...

Страница 75: ...ignition to ON or if it comes on and stays on when you are driving have your vehicle serviced as soon as possible This indicates a possible problem with one of the vehicle s emission control systems Y...

Страница 76: ...perating temperature On the fourth engine start up the Check Engine Warning Light will turn off as soon as the engine begins to crank It is not necessary to have the engine serviced Under certain cond...

Страница 77: ...ition to the ON or START position engine off The light should go off when the engine starts and the alternator begins to charge Supplemental Air Bag Readiness Light and Tone Generator This light illum...

Страница 78: ...the engine is off or idling at a low speed the pointer may move toward the lower end of the normal band If it stays outside the normal band area have your vehicle s electrical system checked as soon a...

Страница 79: ...ure 1 Pull off the road as soon as safely possible 2 Shut off the engine immediately or severe engine damage could result 3 Check the engine s oil level following the instructions on checking and addi...

Страница 80: ...t Chime This chime will sound if you open the door while the headlamps or parklamps are on Fuel Gauge The fuel gauge displays approximately how much fuel is in the fuel tank only when the ignition swi...

Страница 81: ...conditions Under certain driving conditions such as heavy stop and go traffic or driving up hills in hot weather the pointer may indicate at the top of the Normal band If under any circumstances the...

Страница 82: ...speedometer which receives its input from the Anti Lock brake sensor The speedometer is also used to provide a speed signal for correct operation of the vehicle s Powertrain Control Module PCM electro...

Страница 83: ...dometer The Liquid Crystal Display LCD odometer is a combination trip odometer and total odometer The total odometer is normally displayed To see the trip odometer press and release the SELECT BUTTON...

Страница 84: ...ntrols NOTE The following section does not apply to Stripped Chassis vehicles See your Body Builder s instructions for location and operation of controls for climate control systems lamps radio and wi...

Страница 85: ...IP00495 E 05 94 full page art 0020030 G File 06ltipe ex Update Wed Apr 17 08 48 31 1996...

Страница 86: ...ent Panel Registers There are four registers in the instrument panel Each of these registers contains a louver assembly which can be manually adjusted to direct airflow up down left and right An illus...

Страница 87: ...an ON and allow air flow into the vehicle To turn your Heater off move the lower lever to OFF This will turn the fan off and stop air flow from coming into the vehicle Temperature selection The temper...

Страница 88: ...e VENT to bring outside air through the instrument panel registers You can heat the air in this position by moving the top lever into the RED area The air CANNOT be cooled below the outside temperatur...

Страница 89: ...air flow position To prevent humidity buildup inside your vehicle always drive with the heater system turned on Do not put objects under the front seats unless your vehicle is equipped with an unders...

Страница 90: ...your vehicle interior depending on the Function lever position and temperature you select The bottom lever is the Function Selector lever which allows you to select heating or cooling and determine w...

Страница 91: ...a temperature between the two extreme temperatures H Fan speed adjustment The H knob upper left on the control is the fan speed knob which controls the volume of air flow Rotate the H knob to the righ...

Страница 92: ...er area and then refrigerated again instead of using warmer outside air Using inside air will also make the fan sound louder which is normal when using MAX A C The air flow will be from the instrument...

Страница 93: ...id weather select V DEFROST This will help to prevent windshield fogging After a few minutes of operation you may select another air flow position To prevent humidity buildup inside your vehicle alway...

Страница 94: ...dliner at a location between the front and rear seats To control the auxiliary fan with this switch the rear fan switch on the front control must be in the REAR CONTROL position NOTE The air flow from...

Страница 95: ...he steering column 1 Pull the headlamp control knob toward you to the first position Parking lamps tail lamps and marker lamps are now on 2 Pull the headlamp control knob toward you to the outer posit...

Страница 96: ...mps as these may cause scratches or crack the lamps Daytime Running Light System Canadian vehicles only The Daytime Running Light DRL system turns the high beam headlamps on with a reduced light outpu...

Страница 97: ...ts can be turned on by pulling the headlamp switch toward you to either the first or outer position You can brighten or dim the instrument panel lights by rotating the headlamp switch knob Cargo Court...

Страница 98: ...the cargo lamp switch if so equipped is in the OFF position it will not turn on when you open the doors or turn the headlamp switch knob Rear cargo lamp with rear headliner Cargo lamp without rear he...

Страница 99: ...ourtesy reading lamps located at the front center mid center and rear center of the headliner roof The right lamps are for the right side passengers and the left lamps are for the driver and rear left...

Страница 100: ...eaner such as Ford Ultra Clear Spray Glass Cleaner or equivalent Do not use paper towel or an abrasive cleaner to clean the lens as these may cause scratches Cleaning the Interior Lamps Your interior...

Страница 101: ...t side of the steering column to operate the turn signals and cornering lamps turn the high beams on off flash the lamps turn the windshield wipers and washer on off Turn Signals Move the lever up to...

Страница 102: ...as possible but make sure that you use the accepted hand signals in the meantime High Beams To turn on the high beams turn the headlamp control knob to the headlamp ON position and push the turn sign...

Страница 103: ...lease it The headlamps will flash whether the headlamp knob is in the on or off position Windshield Wipers and Washer To turn on the windshield wipers the ignition key must be turned to the ON or ACC...

Страница 104: ...urn signal lever toward or away from the instrument panel to the interval operation you desire Windshield Washer To clean the windshield push in the end of the wiper knob For a constant spray keep the...

Страница 105: ...drivers to hazardous situations The flashers will flash and the high mount brakelamp will stay on steadily not flash with the brake pedal depressed The flashers work whether your vehicle is running or...

Страница 106: ...104 Hazard flasher Horn To sound the horn press either horn pad Horn location with speed control option...

Страница 107: ...o change the position of the steering column wheel pull the release lever on the column toward you Tip the steering wheel to the desired position Release the lever to lock the steering wheel in place...

Страница 108: ...proved may cause the speed control to malfunction Therefore use only properly installed FCC CRTC in Canada approved radio transmitting equipment in your vehicle The speed control switches To set the s...

Страница 109: ...ed control cannot reduce the vehicle speed if it goes above your set speed on a downhill grade For the best fuel economy during normal driving conditions leave the shift select in j Overdrive or resum...

Страница 110: ...ion control switch and Indicator light Accelerating With the Speed Control Operating You can use the accelerator pedal to speed up momentarily When you take your foot off the accelerator the vehicle w...

Страница 111: ...ap of the SET ACCEL switch Multiple taps of the SET ACCEL switch will increase your vehicle speed 1 mph 1 6 km h for each tap For example if you are currently set at 60 mph 96 km h and tap the SET ACC...

Страница 112: ...order to maintain the speed you desire Frequent shifting of an automatic transmission or speed loss during speed control operation can be eliminated by shifting out of overdrive into drive or by pres...

Страница 113: ...d not press the OFF switch To resume the speed you had before you must be driving at least 30 mph 50 km h Press and release the RESUME switch Your vehicle gradually returns to the previously set speed...

Страница 114: ...type lock knob To unlock and open the front door from the inside of the vehicle pull on the inside door handle Side Double Doors If equipped To open the forward door of the side double door from the i...

Страница 115: ...rear or by pulling the outside handle outward Now slide the door back until the catch at the bottom of the door engages To close pull the inside handle forward or pull the outside handle forward and s...

Страница 116: ...d pull the release handle inward Open the right rear door from the outside by pulling on the door handle The left rear door cannot be opened until the right rear door is open With the right rear door...

Страница 117: ...e the power door lock controls Power door lock controls Remote Entry System If equipped If your vehicle has the remote entry system you can lock or unlock the vehicle doors without using a key The rem...

Страница 118: ...e driver s door Locking the doors with the remote entry system To lock all the doors press the LOCK button This will also arm the optional factory installed Anti Theft system Remote entry personal ala...

Страница 119: ...ocked and automatically disarm it when the doors are unlocked The remote will also reset the anti theft alarm when the driver s door is unlocked if it was triggered The remote entry system may not arm...

Страница 120: ...g range will allow you to be up to 33 feet 10 meters away from your vehicle Opening the remote transmitter The transmitter can be snapped apart to replace the batteries by twisting a thin coin between...

Страница 121: ...feature that does not require the sliding door or the 60 40 cargo doors to be closed before using the power locks If you lock your doors with the power lock switch or the Remote Transmitter while the...

Страница 122: ...e system 1 Remove the key from the ignition 2 Open any door The alarm indicator light will start flashing to remind you to arm the system 3 Lock the doors by using the power door lock switch The alarm...

Страница 123: ...end of travel or the system will not disarm You can also disarm the system by unlocking the driver s door by using the UNLOCK button of the remote entry transmitter If the system is armed and you rem...

Страница 124: ...pull inward then press down on the latch to lock the levers Window latch RWARNING Rear doors rear door flipper windows and van conversion windows should be closed while driving This will prevent exha...

Страница 125: ...not let children play with the power windows They may seriously hurt themselves Make sure occupants are clear of the window s before closing Master control switch Seats Adjusting the Front Seat Manual...

Страница 126: ...p belt snug and low across the hips RWARNING To reduce the risk of serious injury in a collision children should always ride with the seatback upright Reclining Bucket Seats You can tilt the seat back...

Страница 127: ...ey or similar device into the slot in the detachable anchor and lifting upward Stow the tongue end of the detachable anchor as shown 2 Pull the seat latch handle located on the right hand side of the...

Страница 128: ...e rear captains chair 3 Push the seat latch handle downward to a full stop This locks the seat in position 4 Before you engage the safety belt be sure it is not twisted Remove any twist then insert th...

Страница 129: ...128...

Страница 130: ...Three Passenger and Four Passenger Bench and Bed Seats To remove the seat assembly 1 Disengage the lap shoulder safety belt from the seat by inserting a key or screwdriver into the slot in the detacha...

Страница 131: ...130 Location of the detachable anchor warning label on safety belt...

Страница 132: ...131 Rear seat shoulder safety belt stowage with seat removed...

Страница 133: ...132 Location of the stowage hook caution label on safety belt...

Страница 134: ...h rod hook ends out of the locking holes in the front strikers 4 Move slide the seat rearward and lift the seat s rear stanchion hooks away from the rear latch strikers in the floor prior to lifting t...

Страница 135: ...holes 4 Rotate the LH RH latch handles forward and at the same time slide the seat assembly forward to engage the floor strikers Continue forward movement until it reaches the end of its travel 5 Befo...

Страница 136: ...135 Quick seat release bench seat...

Страница 137: ...WARNING Keep striker area free of foreign objects that would prevent front and rear retainers from engaging the strikers properly RWARNING Before using the seat make sure that the latch hooks are secu...

Страница 138: ...bolts and washers 2 Remove striker 3 Apply a bead of Ford Caulking Cord Part No D6AZ 19560 A or an equivalent to the floor pan side of the washers 4 Ensure proper sealing by installing the bolts and...

Страница 139: ...nd up until flat 2 Tuck the safety belts into the pockets on the seat cushion while in the bed position To convert the bed to a seat 1 While in front of the seat pull the release lever up and at the s...

Страница 140: ...139 RWARNING The seat bed should not be occupied while the vehicle is moving unless it is in the upright fully latched position Seat bed conversion...

Страница 141: ...sing the Power Seats If equipped If your vehicle has the power seat option you can adjust it in several directions The controls are on the outboard side of the seat The power controls on the driver s...

Страница 142: ...wipe the surface with a soft damp cloth For more thorough cleaning wipe the surface with a leather and vinyl cleaner or a mild soap Wipe the surface with a damp soft cloth then dry and buff with a dr...

Страница 143: ...wer it can be opened by moving the latch lever upward and pulling the drawer toward the center of the vehicle The drawer can be removed by pulling it to the full open position and lifting the tab on t...

Страница 144: ...s are not equipped with a rearview mirror RWARNING Make sure you can see clearly through the rearview mirror at all times Do not allow anything to block your vision If you can t see through the mirror...

Страница 145: ...djusted for comfort and proper vehicle control Move the mirrors for best view by tilting up or down left or right On vehicles equipped with fold away mirrors the mirrors should be folded rearward into...

Страница 146: ...van without rear door windows and all Econolines equipped with the swing out recreational mirrors the right hand side mirror is a flat glass mirror All other right hand side view mirrors used on the...

Страница 147: ...elect the right or left mirror by moving the selector switch to R or L 3 Move the control knob in the direction you want to move the mirror 4 Return the selector switch to the middle position to keep...

Страница 148: ...have a full console The full console has the features shown in the illustration below The features on the console 1 To install the table locate the tabs into the slots on the engine cover and push 2 T...

Страница 149: ...rter panel next to the rear ashtray This outlet should be used in place of the cigarette lighter for optional electrical accessories NOTE Do not use the cigarette lighter in place of the power point P...

Страница 150: ...AS01100 BEF 04 95 full page art 0060648 B File 09ltase ex Update Wed Apr 17 08 44 51 1996...

Страница 151: ...increase decrease the volume Bars illuminate in the display to show the relative volume level NOTE If the volume level is set above a certain listening level when the ignition switch is turned off whe...

Страница 152: ...one increment at a time FM changes in increments of 200kHz AM changes in increments of 10kHz by first pressing the SCAN TUNE button twice display shows TUNE then within approximately five seconds pres...

Страница 153: ...ters the scan mode display will indicate SCN Pushing the top a half of the SEEK button will begin the scan mode up the frequency band stopping on each listenable station for approximately five seconds...

Страница 154: ...mory Load feature by pressing and holding the AUTO PRESET button for approximately three seconds Auto Memory Load sets all memory buttons in AM FM1 and FM2 sequentially by seeking out the first five s...

Страница 155: ...trong station detected on the band After all stations have been filled the radio will begin playing the station stored on memory button 1 To deactivate the Auto Memory Store mode and return to the man...

Страница 156: ...f the VOL button to shift the sound to the right speakers and push the side to shift the sound to the left speakers Adjusting speaker fader Fade control allows you to adjust the sound distribution bet...

Страница 157: ...in the clock or elapsed time mode the new track number will be displayed for approximately ten seconds and then revert back to the previous mode The clock can also be viewed with the ignition off Push...

Страница 158: ...d operation of the CD player will override that of the radio NOTE The volume bass treble balance and fader controls on the radio are also used with the CD player Refer to earlier operating instruction...

Страница 159: ...OP button or the AM FM button The stop indicator X in the display illuminates and operation returns to the radio mode To resume CD play press the PLAY STOP button once again NOTE If the ignition key i...

Страница 160: ...D player will begin playing When you have reached the end of the disc by keeping the fast forward button pressed the display will show END and the player will go into pause mode Push the PLAY STOP but...

Страница 161: ...Storage If the disc is ejected from the CD player but is not removed from the disc opening within approximately 10 seconds the player will automatically reload the disc for storage unless the disc is...

Страница 162: ...he center out to the edges Do not use a circular motion to clean Do not clean discs with solvents such as benzine thinner commercially available cleaners or antistatic spray intended for analog record...

Страница 163: ...enly interpreted as mechanical malfunctions of the disc player A disc is already loaded The disc is inserted with the label surface downward The disc is dusty or defective The player s internal temper...

Страница 164: ...Moisture may have condensed on the lenses within the unit If this occurs remove the disc and wait approximately an hour until the moisture evaporates If the sound skips Badly scratched discs or extrem...

Страница 165: ...AS10300 E 06 95 AS10325 E 05 94 full page art 0060631 B File 09ltase ex Update Wed Apr 17 08 44 51 1996...

Страница 166: ...turned off with the POWER button the volume will remain in the position it was set at when radio power is switched back on Selecting the AM or FM frequency band Push the AM FM button to select the de...

Страница 167: ...of the SEEK button Manual tuning adjusts your radio to any allowable broadcast frequency whether or not a station is present on that frequency See All About Radio Frequencies in this section Using the...

Страница 168: ...ess the SCAN TUNE button again Setting the Station Memory Preset buttons Your radio is equipped with 5 station memory buttons These buttons can be used to select up to 5 preset AM stations and 10 pres...

Страница 169: ...is especially handy while traveling Your radio will automatically set your memory buttons to the strong local stations so you don t have to continually manually tune to existing stations Activate Aut...

Страница 170: ...ing bass response Push the AUDIO button repeatedly until the display reads BASS Push the side of the VOL button to increase bass more lows and push the side to decrease bass less lows Increasing or de...

Страница 171: ...level set Using the Controls of Your Cassette Tape Player How to insert a tape Your cassette tape player is equipped with power loading Once you insert a tape and push slightly with the open edge to t...

Страница 172: ...mode push the right a side of the SEEK button to seek forward to the next selection on the tape Push the left b side to seek the previous tape selection NOTE If you want to restart a currently playing...

Страница 173: ...e selected anytime by pressing the PLAY PROG button How to eject the tape To stop the tape and eject the cassette press the EJCT button The radio will resume playing if the radio power is on The tape...

Страница 174: ...ress the CLOCK button to alternate the frequency and time in the display In the clock mode pressing any radio function will automatically display the radio frequency for approximately ten seconds befo...

Страница 175: ...try a different cartridge Error 2 Tape eject or load failure Your cassette tape player will go into the pause mode Push EJCT to eject the tape If the tape doesn t eject refer the problem to qualified...

Страница 176: ...lodged in the mechanism Remove any loose label material before inserting cassette Do not leave a tape in the cassette tape player High heat in the vehicle can cause the cassette to warp Rear Seat Radi...

Страница 177: ...ker switch to increase volume and push the left side to decrease the volume of the rear speakers NOTE Rear seat control volume can be set no higher than current radio setting unless speakers are turne...

Страница 178: ...e right a side of the SEEK rocker switch to seek to the next radio station Press the left b side of the SEEK rocker switch to seek to the previous radio station NOTE When using the rear seat controls...

Страница 179: ...AS21300 BEF 05 95 AS21400 BEF 06 95 AS21415 BEF 04 95 full page art 0060586 C File 09ltase ex Update Wed Apr 17 08 44 51 1996...

Страница 180: ...AS21420 BEF 04 95 full page art 0032394 A File 09ltase ex Update Wed Apr 17 08 44 51 1996...

Страница 181: ...cate the station by using Automatic Music Search AMS SEEK the station SCAN to the station or select the station by using the memory buttons which you can set to any desired frequency Using the TUNE fu...

Страница 182: ...ide of the SEEK button to select the next listenable station up the frequency band Press the left b side of the button to select the next listenable station down the frequency band By holding the butt...

Страница 183: ...connected the clock and station memory preset buttons if programmed in auto mode will need to be reset Adjusting the tone balance and speaker output of your radio Push the AUDIO button repeatedly unti...

Страница 184: ...t the sound to the left speakers Adjusting speaker fader Fade control allows you to adjust the sound distribution between the front and rear speakers Push the AUDIO button repeatedly until the display...

Страница 185: ...AMS Press and hold the AMS button AMS will appear in the display Then push the left h button to rewind to the beginning of the current selection or press the right g button to fast forward to the begi...

Страница 186: ...o view the clock mode Press the CLOCK button to alternate the frequency and time in the display In the clock mode pressing any radio function will automatically display the radio frequency for approxi...

Страница 187: ...t to breakage or may jam the tape player mechanism Protect cassettes from exposure to direct sunlight high humidity and extreme heat or cold If they are exposed to extreme conditions allow them to rea...

Страница 188: ...AS32400 EF 07 90 AS32450 EF 05 94 full page art 0060508 C File 09ltase ex Update Wed Apr 17 08 44 51 1996...

Страница 189: ...ons There are two ways for you to tune to a particular station You can manually locate a station using the TUNE button or select a station using the MEMORY PRESET buttons which you can set to any desi...

Страница 190: ...TE If the vehicle s battery is disconnected the clock and station memory preset buttons if programmed in auto mode will need to be reset Adjusting the tone balance and speaker output of your radio The...

Страница 191: ...he FM signal is directly related to the distance the signal must travel The listenable range of an average FM signal is approximately 25 miles 40 kilometers Beyond this distance the radio is operating...

Страница 192: ...ystem This feature automatically switches a weak stereo signal to a clearer monaural signal which improves the quality of reception Several sources of static are normal conditions on AM frequencies Th...

Страница 193: ...equencies are AM 530 540 1600 1610 kHz in 10 kHz steps FM 87 9 88 1 107 7 107 9 MHz in 0 2 MHz steps Not all frequencies will be assigned to a given area This radio will tune to each of these frequenc...

Страница 194: ...warranty booklet for further information Ask your dealer for a copy of this limited warranty Service At Ford Electronics we stand behind our audio systems with a comprehensive service and repair progr...

Страница 195: ...vehicle is equipped with an Electronic Powertrain Control Module that limits engine and or vehicle speeds with a cut out mode to promote durability Automatic Transmission Operation C 6 Putting Your V...

Страница 196: ...ly into position gradually release the brake pedal and use the accelerator as necessary NOTE Your vehicle is equipped with a brake shift interlock feature This feature prevents you from shifting from...

Страница 197: ...DRIVE YOUR VEHICLE UNTIL YOU VERIFY THAT THE BRAKELAMPS ARE WORKING R Reverse With the gearshift in the R Reverse position the vehicle will move backward You should always come to a complete stop befo...

Страница 198: ...h in this gear P Park Always come to a complete stop before you shift into P Park This position locks the transmission and prevents the rear wheels from turning To securely latch the gearshift in the...

Страница 199: ...ic Transmission Operation E4OD and 4R70W The E4OD and 4R70W transmissions are electronically controlled four speed automatic transmissions with overdrive Transmission operation is controlled by the Po...

Страница 200: ...s on the electronic control system and if any faults are detected will store them in memory The Transmission Control Indicator Light TCIL which is located on the gearshift lever may flash steadily if...

Страница 201: ...t lever RWARNING Hold the brake pedal down while you move the gearshift lever from position to position If you do not hold the brake pedal down your vehicle may move unexpectedly and injure someone On...

Страница 202: ...he vehicle is shifted to P Park you must repeat the previous steps 5 Start the vehicle If you need to shift out of P Park by using the alternate procedure described above it is possible that a fuse ha...

Страница 203: ...When to use Drive You will note that there isn t a drive position on your gearshift indicator However you will find a Transmission Control Switch and an indicator light labeled Overdrive located on t...

Страница 204: ...e management mode and may have harsh engagements firm shift feel or abnormal shift schedule If this condition persists damage to the transmission could occur Contact your dealer as soon as possible Wh...

Страница 205: ...RWARNING Always set the parking brake fully and make sure the gearshift is securely latched in P Park RWARNING Never leave your vehicle unattended while it is running Forced Downshifts To gain extra...

Страница 206: ...ering wheel to the extreme right or left for more than five seconds if the engine is running This can damage the power steering pump NOTE After any severe impact such as striking large potholes slidin...

Страница 207: ...lubrication of the caliper slide rails and inspection for pad wear Hydraulic Power Brakes The hydraulic brake system is made up of two independent hydraulic circuits One hydraulic circuit supplies fl...

Страница 208: ...ng control Heavy braking on roads with loose surfaces such as snow or gravel or severe pavement irregularities could also cause you to lose steering control of your vehicle RWARNING If the anti lock b...

Страница 209: ...rol of your vehicle Using anti lock brakes The operation of a vehicle with 4WABS is not similar to the operation of normal brakes Some differences exist and are listed below Apply the brake steadily I...

Страница 210: ...is normal Should a malfunction in the 4WABS system occur the amber ABS light on the instrument cluster will come on and stay on indicating that the antilock system has been shut down and the vehicle n...

Страница 211: ...e stops does not affect the function of the brake system and is normal However if the squeal becomes annoyingly loud or increases significantly in frequency of occurrence return the vehicle to your de...

Страница 212: ...ING Do not drive with your foot resting on the brake pedal This will increase your vehicle s stopping distance and may also cause brake damage RWARNING If you are driving down a long or steep hill shi...

Страница 213: ...and hold it while you push the parking brake pedal down firmly with your left foot Parking brake Commercial stripped chassis only To release the parking brake for Commerical Stripped Chassis vehicles...

Страница 214: ...n an emergency if the normal brakes fail However since the parking brake applies only the rear brakes the stopping distance will increase greatly and the handling of your vehicle will be adversely aff...

Страница 215: ...the vehicle High Speed Driving Ford Motor Company recommends obeying posted speed limits RWARNING Driving too fast for conditions creates the possibility of loss of vehicle control Driving at very hig...

Страница 216: ...slippery roads do not downshift into 1 First when you are moving faster than 20 mph 32 km h RWARNING The Anti Lock Brake System may not prevent brake lock up on extremely slippery surfaces Traction L...

Страница 217: ...et brakes so allow extra stopping distance because your vehicle will not stop as quickly as usual After you drive through the standing water apply your brakes gently several times as your vehicle move...

Страница 218: ...es may fail and injure a passenger or bystander Driving With a Heavy Load There are limits to the amount of weight your vehicle can carry or tow The total weight of your vehicle plus the weight of the...

Страница 219: ...nal loads on your vehicle s engine transmission axle brakes tires and suspension For your safety and for the good of your vehicle use the right equipment for the type of trailer you tow Your trailer t...

Страница 220: ...abel is located on the left front door lock facing or the door latch post pillar Trucks unlike passenger cars are basically custom vehicles designed to carry a load Most owners start with a base vehic...

Страница 221: ...vice concerns may arise The following is a typical example of a Safety Compliance Certification Label and an explanation of how this information should be used Safety Compliance Certification Label Do...

Страница 222: ...Weight Range Base Curb Weight The Base Curb Weight is the weight of the vehicle including fuel coolants lubricants emergency tools spare wheel and tire It also includes any equipment that is standard...

Страница 223: ...ufacturer s specified Gross Vehicle Weight Rating The GVWR is the maximum total weight of base vehicle passengers optional components and cargo that a particular vehicle was designed to carry Gross Ax...

Страница 224: ...10 lower load carrying capacity due to the differences in vehicle usages The vehicle must not be loaded to both the front and rear GAWR because the GVWR will be exceeded The GAWR of the front and rear...

Страница 225: ...rmined by subtracting the weight of the loaded towing vehicle including passengers and cargo from the GCWR for the towing vehicle Trailer Weight Range The trailer weight range is a specified range by...

Страница 226: ...termine how much cargo weight you can carry Sample label If you suspect that your payload is excessive have your vehicle weighed at a highway weigh station or appropriate commercial facility Weigh the...

Страница 227: ...fusion Front Axle Reserve Capacity in Pounds kgs On the sample label this value is given as 83 pounds 38 kgs Does this mean that you are limited to adding only 83 pounds 38 kgs of accessories to the f...

Страница 228: ...ectly reflects on the amount of accessory weight that can be carried In the case of both these numbers 83 and 112 pounds 38 and 51 kgs the important thing to remember is that for safe operation an own...

Страница 229: ...structural damage loss of control and personal injury Use the Safety Compliance Certification Label to find the axle code number and the engine type for your vehicle Use the appropriate Maximum Gross...

Страница 230: ...230 K...

Страница 231: ...231...

Страница 232: ...232 Automatic Transmissions K...

Страница 233: ...233 L...

Страница 234: ...234 H...

Страница 235: ...235...

Страница 236: ...236...

Страница 237: ...Ford or Lincoln Mercury dealer Hitches For towing trailers up to 2 000 lb 907 kg use a weight carrying hitch and ball which uniformly distributes the trailer tongue loads through the underbody struct...

Страница 238: ...e holes may be used for safety chain attachment when towing with a step bumper Always use safety chains when towing Safety chains are used to retain connection between the towing and towed vehicle in...

Страница 239: ...re wire damage and could start a fire Driving While You Tow Be especially careful when driving while you tow a trailer Never drive faster than 45 mph 70 km h when you tow in hilly country on hot days...

Страница 240: ...t the rear of the trailer to swing Slight movement of the steering wheel results in a much larger movement of the rear of the trailer Allow more room for stopping with a trailer attached Trailer brake...

Страница 241: ...time Vehicles with trailers should not be parked on a grade However if you must park on a grade place wheel chocks under the trailer s wheels as follows Apply the brake pedal and hold Have another pe...

Страница 242: ...he engine Shift transmission into gear and release the parking brake Release the foot service brakes and move the vehicle uphill to free the wheel chocks Apply the brake pedal and hold while another p...

Страница 243: ...be able to jump start from a booster battery to start your vehicle RWARNING The gases around the battery can explode if exposed to flames sparks or lit cigarettes An explosion could result in injury...

Страница 244: ...Cables in the Index To avoid damaging your vehicle or your battery and to avoid injury to yourself follow these directions for preparing your vehicle to jump start and connecting the jumper cables in...

Страница 245: ...nnecting the jumper cables 1 Connect one end of the first jumper cable to the positive terminal of the discharged battery You can connect either jumper cable to the positive terminal as long as you us...

Страница 246: ...cables are not in the way of moving engine parts then start the booster vehicle Run the engine at a moderate speed 2 Let the discharged battery charge for a few minutes and then start the disabled veh...

Страница 247: ...ories turned off to let the battery recharge You may need to use a battery charger to fully recharge the battery If you need to replace your battery see Battery in the Servicing Your Vehicle chapter C...

Страница 248: ...e is stowed at the rear under the frame except cutaway and stripped chassis models To remove the spare tire 1 Open both of the rear doors Remove the access cover from the rubber strip found behind the...

Страница 249: ...stow spare tire 1 Insert the jack handle or lug nut wrench into the actuator hole and turn counterclockwise until the cable retainer is extended for insertion into the wheel 2 Install the retainer thr...

Страница 250: ...a wide contact surface 1 Make sure that your vehicle will not move or roll Put the gearshift in P Park Set the parking brake and block the wheel that is diagonally opposite the tire that you are chang...

Страница 251: ...that is diagonally opposite to the wheel that is being lifted If the vehicle slips off the jack someone could be seriously injured 2 Get out the spare tire and jack The jack jack handle and lug nut wr...

Страница 252: ...handle to slide the jack under the vehicle RWARNING To avoid injury never run the engine with one wheel off the ground such as when changing a tire RWARNING To lessen the risk of personal injury do no...

Страница 253: ...253 Jacking point All models except E Super Duty Jacking point E Super Duty Instructions for jacking a wheel All models...

Страница 254: ...wheel back on make sure the pins are lined up with the proper holes If your vehicle has single rear wheels thread the lug nuts on the wheel studs with the beveled face toward the wheel Use the lug nu...

Страница 255: ...eel nut Dual rear wheel nut 5 Lower the vehicle by turning the jack handle counterclockwise 6 Remove the jack and fully tighten the lug nuts in the order shown in the following illustration Lug nut ti...

Страница 256: ...age of a full size tire in the spare tire carrier may damage the tire or the vehicle The flat full size tire should be stowed securely in the vehicle until it can be repaired 9 Unblock the wheels On v...

Страница 257: ...ut does not start or if you have had a collision the fuel pump shut off switch may have been triggered The shut off switch is a device that stops the fuel pump when your vehicle has been involved in a...

Страница 258: ...tbed or wheel lift equipment However slingbelt towing is acceptable On vehicles equipped with an air dam the towbar will deform the rubber air dam RWARNING Never use a tow bar that attaches to the bum...

Страница 259: ...dside Assistance coverages beyond this period available through Ford Auto Club in the United States or Ford and Lincoln Mercury dealers in Canada contact your Ford or Lincoln Mercury dealer Roadside A...

Страница 260: ...Company has authorized Ford and Lincoln Mercury dealerships that can service your vehicle for you This chapter tells you how to get service or maintenance for your vehicle Service Maintenance Concern...

Страница 261: ...nd have any questions or concerns that the dealership cannot answer contact the Customer Assistance Centre Please have the following information available when contacting Ford Customer Assistance your...

Страница 262: ...ange eligibility limitations modify procedures and or to discontinue this process at any time without notice and without incurring obligations What Kind of Cases Does the Board Review The Board review...

Страница 263: ...e brochure for California purchasers lessees How Does the Board Work The Board has four members three consumer representatives a Ford or Lincoln Mercury dealer Consumer candidates for Board membership...

Страница 264: ...our case has been reviewed the Board will mail you its decision in writing It will also provide you with a form to indicate your acceptance or rejection of an award decision The decisions of the Board...

Страница 265: ...nance or repair orders that relate to the case the year make model and vehicle identification number the date you bought your vehicle the date of repair and the mileage at the time of repair the curre...

Страница 266: ...mediately inform the National Highway Traffic Safety Administration NHTSA in addition to notifying Ford Motor Company If NHTSA receives similar complaints it may open an investigation and if it finds...

Страница 267: ...that is lower than your vehicle needs contact a district or owner relations office before you leave the U S or Canada Use of leaded fuel in your vehicle without a proper conversion may damage the effe...

Страница 268: ...y your vehicle in North America and then relocate outside of the U S or Canada register your Vehicle Identification Number and new address with Ford Motor Company Export Operations Ford of Canada Cust...

Страница 269: ...ve failed This procedure is without cost to you and is designed to eliminate the need for lengthy and expensive legal proceedings In the CAMVAP program impartial third party Arbitrators conduct hearin...

Страница 270: ...are custom designed to complement the style and aerodynamic appearance of your Ford built vehicle In addition each accessory is made from high quality materials and meets or exceeds Ford s rigid engi...

Страница 271: ...essories equipment passengers and luggage to your vehicle do not exceed the total weight capacity of the vehicle or of the front or rear axle GVWR GAWR as shown on the Safety Compliance Certification...

Страница 272: ...our vehicle particularly if they are not properly designed for automotive use or are not properly installed For example when operated such systems may cause the engine to stumble or stall In addition...

Страница 273: ...274...

Страница 274: ...276 B...

Страница 275: ...277...

Страница 276: ...278...

Страница 277: ...dule that makes tracking routine service for your vehicle easy The maintenance schedule is located in the Maintenance Schedule and Record booklet This chapter tells you about the basic parts that you...

Страница 278: ...e running avoid wearing loose clothing or jewelry that could get caught in moving parts Take appropriate precautions with long hair Do not work on a vehicle in an enclosed space with the engine runnin...

Страница 279: ...the wheels This will prevent your vehicle from moving unexpectedly RWARNING Do not start your engine with the air cleaner removed and do not remove it while the engine is running Opening the Hood 1 P...

Страница 280: ...es away from the slotted hole in the hood Place the support rod in its retaining clip and close the hood with enough force to make it latch Be sure to oil the hood latch every six months to maintain s...

Страница 281: ...I V 8 engine or A 5 8 Liter EFI V 8 engine or A 7 5 Liter EFI V 8 engine NOTE Read the 7 3L Diesel Engine Owner Guide Supplement for information regarding correct service points for your diesel powere...

Страница 282: ...SV05650 E 05 94 full page art 0020341 H File 14ltsve ex Update Wed Apr 17 08 40 13 1996...

Страница 283: ...SV05700 E 04 95 full page art 0020342 H File 14ltsve ex Update Wed Apr 17 08 40 13 1996...

Страница 284: ...SV05750 E 05 94 full page art 0020343 G File 14ltsve ex Update Wed Apr 17 08 40 13 1996...

Страница 285: ...te sealed parts and assemblies causing damage or malfunctions In order to avoid possible cracking of the engine block or fuel injection pump do not spray a hot engine or injection pump with cold water...

Страница 286: ...til the hissing sound stops and then continue rotating counterclockwise to remove the fuel cap Make sure that you follow the above fuel cap removal instructions and use caution Such caution will minim...

Страница 287: ...vy load on hot days or at high altitudes Extended periods of idling with the engine RPM increased above the normal idle range Parking vehicle in full sunlight for extended periods on extremely hot day...

Страница 288: ...ome parts of the country regular grade fuels are sold with octane ratings of 86 or even less especially in high altitude areas We recommend that you do not use these fuels Always use a fuel with an oc...

Страница 289: ...ch causes the engine to hesitate or stall and makes restarts difficult minimizing deposits in fuel injectors combustion chambers and on intake valves preventing your fuel system from gumming up when y...

Страница 290: ...ueling your vehicle Keep sparks and other sources of ignition away from fuels Automotive fuels can be harmful or fatal if swallowed Further gasoline may be blended with methanol Even small amounts of...

Страница 291: ...to splash fuel on yourself or your clothing If fuel is splashed on the skin promptly remove contaminated clothing and wash the skin thoroughly with soap and water Fuels can cause severe eye irritation...

Страница 292: ...the instructions above under Removing the Fuel Cap in this chapter Proceed to add fuel to the tank only if your vehicle is on level ground 2 Make sure that you pump unleaded fuel and put the nozzle al...

Страница 293: ...of your vehicle and can be calculated as Miles Per Gallon MPG or Liters Per 100 Kilometers L 100K Do not calculate fuel economy during your vehicle s break in period This would not be an accurate esti...

Страница 294: ...Fuel Economy Fuel economy is affected by a number of variables which can reduce efficiency You can improve fuel economy by understanding these variables and minimizing their effect The following decre...

Страница 295: ...SA SB SC SD SE SF or SG Additional engine oil additives oil treatments or engine treatments For vehicles with 5 8L engines Engine oils with an SAE 5W 30 viscosity are PREFERRED for your vehicle They...

Страница 296: ...mount of engine oil is important for safe engine operation check the oil using the dipstick each time you put fuel in your vehicle Remember the engine must be off the oil must be warm and the vehicle...

Страница 297: ...in and make sure it is fully seated It may be necessary to add some oil between oil changes Make sure you use a CERTIFIED engine oil of the preferred viscosity Your vehicle s warranty coverage may no...

Страница 298: ...en determining the right time to change your engine oil and filter If you are using your Ford vehicle in a manner which allows it to remain stationary while the engine is running for long periods door...

Страница 299: ...for disposing of these types of fluids Call your local recycling center to find out about recycling automotive fluids RWARNING Continuous contact with USED motor oil has caused cancer in laboratory m...

Страница 300: ...ngs before removing the radiator cap If it is necessary to fill the radiator refer to the Engine Coolant Refill Procedure in this chapter for instructions Adding engine coolant Checking engine coolant...

Страница 301: ...turn and remove cap 5 Stand away from the radiator opening Hot steam may blow out or hot engine coolant may even splash out Freezing Protection The factory installed solution of Ford Premium Cooling...

Страница 302: ...e freeze protection and above 60 your engine may overheat on a warm day NOTE Do not use an engine coolant that does not meet all 14 requirements of Ford Specification ESE M97B44 A The use of an improp...

Страница 303: ...ng of at least 34 F 37 C or whatever protection rating is appropriate for the climate in which you live To find out how much engine coolant mixture your vehicle s coolant system can hold see Refill ca...

Страница 304: ...ning engine coolant into a container 5 Reconnect the lower radiator hose and close the radiator drain cock Proper procedures for flushing the cooling system can be found in the Truck Service Manual En...

Страница 305: ...radiator cap with a thick cloth and cautiously remove it Step back while the pressure releases 5 Finally check the radiator and add more engine coolant if needed following the procedures noted above R...

Страница 306: ...in the container for the engine coolant Windshield washer reservoir Use specially formulated windshield washer fluid rather than plain water because specially formulated washer fluids contain additive...

Страница 307: ...your new Ford product Wiper Blades Check the windshield wiper blades at least twice a year Also check them whenever they seem less effective than usual Such substances as tree sap and some hot wax tr...

Страница 308: ...he pressure in all of them Always follow these precautions Keep your tires inflated to the pressures that are recommended See Checking the pressure of the tires later in this chapter Stay within the r...

Страница 309: ...the tire treads and remove stones nails glass or other objects that may be wedged in the tread grooves Check for holes or cuts that may permit air to leak from the tire and make the necessary repairs...

Страница 310: ...at 500 miles 800 km after any wheel change or any time the lug nuts are loosened Traction Lok Rear Axle If equipped This axle provides added drive away traction on slippery surfaces particularly when...

Страница 311: ...ou can rotate the front tires side to side without disturbing the rear tires Rotate the tires according to the following diagram If you notice that the tires wear unevenly have them checked If your li...

Страница 312: ...non temporary spare tire if so equipped and remount on an aluminum wheel to rotate the spare tire into your vehicle s rotation pattern You may discover uneven outside shoulder wear on your vehicle s...

Страница 313: ...ide Before you begin to repair a tire mark the wheel and tire so that they are properly aligned when remounted This will ensure that the tires will continue to give you the same ride level RWARNING Wh...

Страница 314: ...formance tires or larger size tires RWARNING Use of aftermarket wheel assemblies may damage your vehicle or cause accidents resulting in serious injuries RWARNING Failure to follow these precautions m...

Страница 315: ...317 Tire identification chart...

Страница 316: ...de traction in rain or snow However during the winter months in some climates you may need to use snow tires and occasionally chains for your tires RWARNING Snow tires must be the same size and grade...

Страница 317: ...you use to wash your vehicle s body Do not use acid based wheel cleaners steel wool abrasives fuel or strong detergents These substances will damage protective coatings Use tar and road oil remover t...

Страница 318: ...rotect Our Environment Ford Motor Company strongly recommends that used lead acid batteries be returned to an authorized recycling facility for disposal Battery recycling symbol Auxiliary Battery Opti...

Страница 319: ...me near the battery When charging or working near a battery always cover your face and protect your eyes and also provide ventilation RWARNING Batteries contain sulfuric acid which burns skin eyes and...

Страница 320: ...requirement Transmission fluid filter and seal assembly should be changed every 21 000 miles 34 000 km only under any of the following conditions Extended periods of high speed driving during hot weat...

Страница 321: ...turned off for about 30 minutes to allow the fluid to cool before checking With the vehicle on a level surface start the engine and move the transmission shift selector through all of the gear ranges...

Страница 322: ...n the dipstick Before adding any fluid be sure that the correct type will be used Add fluid in 1 2 pint 25L increments through the filler tube to bring the level to the correct area on the dipstick If...

Страница 323: ...325 Automatic transmission dipstick location Automatic transmission dipstick location...

Страница 324: ...rapidly However expect the level of the brake fluid to slowly fall as you put more mileage on your vehicle and the brake lining wears Check the brake fluid at least once a year You can do this by loo...

Страница 325: ...fluid that is not DOT 3 you will cause permanent damage to your brakes Do not fill the reservoir above the MAX line If you find that the fluid level is excessively low below the seam or ridge on the...

Страница 326: ...n the instrument cluster is near the center of the NORMAL operating temperature range 2 While the engine idles turn the steering wheel back and forth several times Make sure that the cap assembly is i...

Страница 327: ...you reach the FULL HOT range Do not overfill 6 When you are finished put the dipstick back in and make sure that it fits snugly If you check the power steering fluid when it is cold make sure that th...

Страница 328: ...wer steering fluid is below the MIN mark add fluid in small amounts until the level is between the MIN and MAX lines on the side of the reservoir Power steering reservoir If you check the power steeri...

Страница 329: ...rotect your vehicle s electrical system from overloading If electrical parts in your vehicle are not working the system may have been overloaded and blown a fuse or tripped a circuit breaker Before yo...

Страница 330: ...SV40300 E 05 94 full page art 0020392 I File 14ltsve ex Update Wed Apr 17 08 40 13 1996...

Страница 331: ...333...

Страница 332: ...334...

Страница 333: ...335...

Страница 334: ...disconnect the battery before servicing high current fuses Ford recommends that high current fuses be replaced by a qualified technician RWARNING Always replace the cover to the Power Distribution Bo...

Страница 335: ...337 Power distribution box...

Страница 336: ...ove the cover using the quick release fasteners 2 On the fuse panel cover find the number of the fuse you want to check The diagram on the cover tells you where to locate the fuse on the panel 3 Check...

Страница 337: ...out how to locate the fuse panel Otherwise locate the circuit breaker according to the instructions on the charts given earlier in this chapter Since you need diagnostic equipment to check whether a...

Страница 338: ...turn signals license plate lamp The alignment of your headlamps should be checked if oncoming motorists frequently signal you to turn off your vehicle s high beams when you do not have the high beams...

Страница 339: ...by its plastic base and do not touch the glass The oil from your hand could cause the bulb to break the next time the headlamps are operated NOTE If the bulb is accidently touched it should be cleaned...

Страница 340: ...s while holding the lamp to vehicle This will release the lamp from the installed position Removing Installing the headlamp bulb 4 Remove the bulb retaining ring by turning it 1 8 of a turn to free it...

Страница 341: ...three adjuster screws into the retaining holes and hold while pushing the two black tabs downward to engage the ends of the adjuster screws You will hear a snap when the tabs are properly engaged Make...

Страница 342: ...amp and lift the assembly from the vehicle 2 After removing the two screws that secure the lens remove the cargo lamp lens 3 Remove the two screws attaching the cargo lamp to the Hi mount stop lamp 4...

Страница 343: ...345 Bulb Specifications...

Страница 344: ...o comply with applicable exhaust emission requirements RWARNING Exhaust leaks may result in the entry of harmful and potentially lethal fumes into the passenger compartment Under extreme conditions ex...

Страница 345: ...emissions system In general maintenance replacement or service of the emissions control devices or systems in your new Ford Motor Company vehicle or engine may be performed at your expense by any auto...

Страница 346: ...engine Changes that cause more unburned fuel to reach the exhaust system can increase the temperature of the engine or exhaust system By law anyone who manufactures repairs services sells leases trade...

Страница 347: ...GVWR of over 10 000 lbs 4 536 kgs The following statements concerning prohibited tampering acts and the noise warranty are found in the Warranty Information Booklet and are applicable to completed Ec...

Страница 348: ...inlet pipe muffler outlet pipe resonator or diffuser Removing the fan shroud Removing or dismantling the fan clutch so that it no longer functions properly Maintenance Instructions for maintenance an...

Страница 349: ...dy condition The amount of driving required to reach the ready condition varies with individual driving patterns To complete this requirement in the minimum amount of time refer to the OBD II Drive Cy...

Страница 350: ...ation from idles at 1 4 to 1 2 throttle position and c choose 3 different speeds to do 1 5 minute steady state throttle drives 7 Accelerate the vehicle up to between 45 and 60 mph 70 100 km h This sho...

Страница 351: ...353 Refill Capacities Motorcraft Parts and Lubricant Specifications Refill Capacities NOTE Refer to the Diesel Engine Owner s Guide Supplement for refill capacities on diesel engines...

Страница 352: ...354...

Страница 353: ...355...

Страница 354: ...356 Motorcraft Parts...

Страница 355: ...357 SV53500 ALL 05 95 Lubricant Specifications SV54500 E 05 95 thirty six pica chart 00204 File 14ltsve ex Update Wed Apr 17 08 40 13 1996...

Страница 356: ...358 SV54600 E 05 95 thirty six pica chart 0020 File 14ltsve ex Update Wed Apr 17 08 40 13 1996...

Страница 357: ...359 SV54650 E 04 95 thirty six pica chart 00 File 14ltsve ex Update Wed Apr 17 08 40 13 1996...

Страница 358: ...360 SV54670 E 03 94 thirty six pica chart 002 File 14ltsve ex Update Wed Apr 17 08 40 13 1996...

Страница 359: ...rotect against rust and damage Body Wash vehicle thoroughly to remove dirt grease oil tar or mud from exterior surfaces rear wheel housing and underside of front fenders Periodically wash vehicles sto...

Страница 360: ...mers in the fuel system and may also clog small orifices Ford Gas Stabilizer should be added whenever actual or expected storage periods exceed 60 days Follow the instructions on the label The vehicle...

Страница 361: ...Make sure brakes and parking brake are fully released Tires Maintain recommended air pressures Miscellaneous Make sure all linkages cables levers and clevis pins under vehicle are covered with grease...

Страница 362: ...369 Warning label locations...

Страница 363: ...QI02800 E 06 93 full page art 0021025 A File 15ltqie ex Update Wed Apr 17 08 37 06 1996...

Страница 364: ...QI03400 E 06 93 full page art 0021031 A File 15ltqie ex Update Wed Apr 17 08 37 06 1996...

Страница 365: ...QI04000 E 05 94 full page art 0021037 C File 15ltqie ex Update Wed Apr 17 08 37 06 1996...

Страница 366: ...QI04600 E 06 93 full page art 0021043 A File 15ltqie ex Update Wed Apr 17 08 37 06 1996...

Страница 367: ...QI05200 E 06 93 full page art 0021049 B File 15ltqie ex Update Wed Apr 17 08 37 06 1996...

Страница 368: ...QI05800 E 05 94 full page art 0021055 B File 15ltqie ex Update Wed Apr 17 08 37 06 1996...

Страница 369: ...operation 31 passenger air bag 31 proper seating 30 service and informatio n label s 36 tone generator 32 wearing safety belts 29 Air cleaner filter location 283 specification s 356 Air conditioning...

Страница 370: ...tic overdrive 197 199 203 driving a regular automatic 195 fluid adding 324 fluid checking 323 fluid refill capacities 353 fluid specification 357 Axle lubricant specifications 357 refill capacities 35...

Страница 371: ...ities 353 fluid specifications 326 front disc 206 if brakes do not grip well 211 master cylinder 326 new brake linings 8 noise 206 parking 212 power braking 206 rear anti lock 208 servicing 211 stoppi...

Страница 372: ...aints 38 child safety belts 40 child safety seats 41 Child safety seats and air bags 41 attaching with tether straps 53 automatic locking mode retractor 41 in front seat 41 in rear outboard seat 41 te...

Страница 373: ...ee Electronic sound system 150 156 Compact disc radio see Electronic sound system 150 Console description 147 Controls instrument panel 81 mirrors 143 146 power seat 140 steering column 99 Coolant see...

Страница 374: ...bad weather 216 heavy load 218 high speed 215 high water 217 slippery roads 216 tips for safe driving 214 towing a trailer 219 E Electrical system circuit breakers 339 fuses 331 338 operating when the...

Страница 375: ...6 fuel injected engine starting 57 59 fuel pump shut off switch 63 preparing to start 58 refill capacities 353 service points 283 starting 55 59 starting after a collision 63 storing your vehicle 361...

Страница 376: ...xhaust fumes 65 Extended Service Plan Ford 4 F Fan engine fan avoiding injury 280 Federal Communications Commission 192 Federal Highway Administration Regulation 7 Flashers hazard 103 Flashing the lig...

Страница 377: ...afety information relating to automotive fuels 292 storing your vehicle 362 treating emergencies 292 Fuel cap removing 288 replacing 288 294 Fuel filler door 288 remote release 287 Fuel filter specifi...

Страница 378: ...95 200 column mounted 195 200 locking the gearshift 55 positions 195 200 shifting the gears 195 200 shift lock 60 196 202 Gearshift shifting the gears 195 200 GVWR Gross Vehicle Weight Rating calculat...

Страница 379: ...er the hood 280 Horn 104 Hoses checking 305 I Identification Number Vehicle VIN 6 Idle relearning 57 247 280 Ignition chime 56 positions of the ignition 55 removing the key 56 Indicator lights and chi...

Страница 380: ...ight system 93 dome lamps 94 flashing the lamps 101 hazard flashers 103 headlamps 92 high beams 100 high mount brakelamp 96 343 illuminated entry system 120 illuminated mirrors 143 instrument panel di...

Страница 381: ...ations 357 Lug nuts standard 252 tightening sequence 255 Lumbar support seats 141 M Maintenance schedule and record see separate Maintenance Schedule and Record booklet 3 Maintenance see Servicing 279...

Страница 382: ...ices 267 P Panic alarm feature remote entry system 117 Parking brake operation 212 warning light 69 Parts see Motorcraft Parts 356 PCV valve specifications 356 Power door locks 116 Power features door...

Страница 383: ...117 replacement additional transmitters 120 replacing the batteries 118 Reporting safety defects 266 Restraints safety see Safety restraints adult 11 child 38 infant 38 41 Roadside assistance 259 Road...

Страница 384: ...aching with tether straps 53 in front seat 41 in rear outboard 41 in rear seat 41 tether anchorage hardware 53 Seat belts see Safety restraints 11 Seats adjusting the seat manual 124 adjusting the sea...

Страница 385: ...iesel powered vehicles 6 Specification chart lubricants 357 Speed control accelerating 108 canceling a set speed 111 resetting 108 resuming a set speed 111 tap up tap down 108 when towing a trailer 23...

Страница 386: ...cking the pressure 310 311 cleaning 319 inspection and maintenance 311 replacing 315 rotating 312 snow tires and chains 318 spare tire 247 248 storing your vehicle 363 tire grades 315 treadwear 315 we...

Страница 387: ...1 304 324 V Vanity mirror 143 Variable interval wipers 102 VECI Vehicle Emission Control Information decal 348 Vehicle Identification Number VIN 6 Vehicle loading 220 calculating the load 225 Vehicle...

Страница 388: ...dollie s see Towing 258 Wheels cleanin g 319 covers 252 inspectio n and maintenanc e 310 lug nuts 250 replacement 318 Windows 123 power windows operating 123 Windshield washing 101 Windshiel d washer...

Отзывы: