www.foodsaver.com
1-877-777-8042
www.foodsaver.com
1-877-777-8042
TR
OU
B
LE
S
HOO
TING
M
AI
NT
EN
A
NCE
9
10
To Clean Appliance:
Remove Power Cord from electrical outlet. Do not
immerse in liquid.
Check Gaskets and around Drip Tray to make sure
they are free from food materials. Wipe off gasket
with warm soapy cloth if needed. Bottom gasket
may be removed for cleaning. Clean with warm,
soapy water.
The Removable Drip Tray makes cleanup easy when
small amounts of liquids are inadvertently pulled
into the Vacuum Channel during vacuum process.
Empty Drip Tray after each use. Wash in warm
soapy water or place in top rack of dishwasher. Dry
thoroughly before re-inserting into the appliance.
Always leave lid latch in open or store position,
never leave in closed position. When appliance
is left in closed position, the gaskets become
compressed and the unit may not function properly.
Do not leave appliance outside in the environment
while not in use.
Care and Cleaning
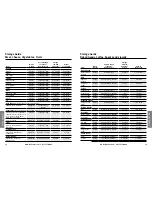
Problem
Solution
Red Seal LED flashes.
•
Unit is overheated, wait for 20 minutes for unit to cool down.
•
If trying to seal an end of a roll to make a bag, make sure the bag is on the
seal strip.
• If storing unit, make sure that latch is in Store position and not Locked
position. If in Locked position for extended period of time the gaskets
become compressed.
• Replacement Gaskets are available for purchase. Please call 1-877-777-8042 if
you need assistance.
Pump is running
for more than 2
minutes without bag
vacuuming (no visible
air coming out of bag).
•
Make sure bag is inserted curl down in the vacuum channel.
• Check to make sure top and bottom gaskets are inserted properly.
• Check to make sure that that at least one end of bag is sealed.
• Open unit and check to make sure that there are no foreign objects, dirt or
debris on the top or bottom gasket.
• Make sure there is enough room at top of bag (3 inches) to fit to middle of
drip tray with lid closed and latched.
•
Make sure accessory hose is not attached.
• Make sure the lid is latched down all of the way.
• Do not store unit in locked position as this will compress the gaskets. If this
has occurred, leave the door of the unit open for a period of time to allow
gaskets to expand/restore to their original size.
Bag is not sealing
properly.
• There is too much liquid in bag, freeze bag contents before vacuuming.
• To prevent wrinkles in the seal, gently stretch bag flat while inserting bag into
vacuum channel and continue to hold bag until vacuum pump starts.
• Create a second seal above the first seal on the bag to ensure a proper seal.
There are no lights on
the control panel.
• Make sure unit is plugged in.
• Make sure wall outlet is functional.
•
Make sure latch is in Locked position.
Nothing happens
when latch is closed
and Vac/Seal or Seal
button is pressed.
• Make sure unit is plugged in.
• Make sure wall outlet is functional.
• Open latch, make sure lid is all the way down, re-latch lid.
Troubleshooting
Tips
for using Your FoodSaver
®
GameSaver
®
Appliance
Tips on Sealing a Bag
When making a bag from a roll, make sure end of
cut piece is on Sealing Strip, not over rubber gasket
or in Vacuum Channel.
Prevent moisture or liquid from being pulled into the
Vacuum Channel or trapped in the seal. Either pre-
freeze moist foods such as raw meat for
1–2 hours before vacuum packaging, or place a
folded paper towel between food and end of bag
to absorb excess liquids. Be sure to leave at least
3 inches between paper towel and end of bag so
that bag seals properly with paper towel inside.
Tips on Removing Air from a Bag
When vacuum packaging make sure open end of
bag is inside Drip Tray with curl down. Also make
sure roll itself is tucked back into Roll Storage
Compartment or it could prevent appliance from
operating properly.
Check for wrinkles in the bag along the Sealing Strip
before closing lid and vacuum packaging. Wrinkles
in seal may cause leakage and allow air to come
back into bag. If you find wrinkles after sealing bag,
simply cut bag open and vacuum package again.
If Motor runs for more than 30 seconds without
stopping, you may need to adjust bag and try
again. If you are making initial seal on a piece of
bag material with two open ends, make sure you
have pressed the Seal and not Vac/Seal Button. If
you are vacuum packaging with a bag, make sure
open end is placed down inside Vacuum Channel
and make sure Accessory Hose is not attached. Also
check that gasket is clean and free of debris. If you
are vacuum packaging with an accessory, check
Accessory Hose in appliance lid and in accessory
to ensure a tight fit.
TI
PS


