WARRANTY POLICY
FOR FONRI SMART HOME PRODUCTS
FONRI products are designed and manufactured
to the highest standards and deliver high-quality
performance, ease of use and ease of installation.
If you encounter any difficulties while using your
product, we recommend that you first consult the
user manual or the information in the support
section of this website, where (depending on the
product type) you may find a downloadable user
manual, frequently asked questions, instruction
videos or a support forum.
In the unlikely event of a failure of the product,
FONRI will arrange for your FONRI product to be
serviced, free-of-charge when you informed us of
the defect during the warranty period, provided
that the product was used in accordance with the
user manual (e.g. in the intended environment).
This document only applies to consumer
products. For professional products the warranty
terms of the applicable sale or purchase
agreement applies.
Warranty period
The warranty period for the product categories
mentioned in the heading of this document is 24
months, except where stated otherwise within the
user manual.
Warranty terms
The warranty period starts on the date of purchase
as stated on your proof-of-purchase and expires at
the end of the period indicated in the section
“Warranty period” below. If you require service but
you have lost your proof-of- purchase, the warranty
period shall be deemed to have started three
months from the date of manufacture indicated on
the product or derived from the serial number. If
you require service for products without
86
Содержание Kr-WE571
Страница 1: ...SMART SOS BUTTON USER GUIDE ...
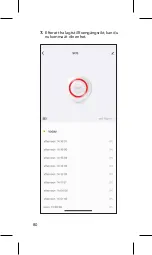
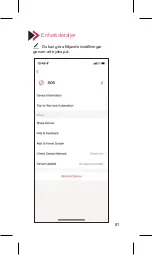
Страница 5: ...rst time to outer ap on 3 Select Sensors tap on Smart SOS Button 4 Tap on 5 ...
Страница 6: ...SOS Button 4 Tap on Confirm 5 Lon butt indic statu 6 Tap 6 ...
Страница 14: ...nú izquierdo gente 4 Haga clic en el botón Confirmar 5 Cua RES herra el ind eso s estad 6 Hag parp 14 ...
Страница 19: ...AR 1 3 2 19 ...
Страница 20: ... 1 2 1 3 2 20 ...
Страница 21: ... 1 2 3 21 ...
Страница 22: ... 3 4 22 ...
Страница 23: ... 4 5 6 23 ...
Страница 24: ... 5 6 7 24 ...
Страница 25: ... 7 25 ...
Страница 26: ...26 ...
Страница 29: ...вые вы ь фон к в 3 Выберите Датчики в меню слева и нажмите Умная кнопка SOS 4 Нажми 29 ...
Страница 30: ...лева и 4 Нажмите кнопку Подтвердить 5 При на за иглы свет мига пере наст 6 Наж быст 30 ...
Страница 37: ...ulamada bı in kmesine dokunun 3 Sol menüden Sensörler i seçin ve Akıllı SOS Butonu na dokunun 4 Onayl 37 ...
Страница 38: ...ve Akıllı 4 Onayla butonuna dokunun 5 Telef buto uzun yanıp yapıl 6 Gös yazıs 38 ...
Страница 45: ...n Mal istrieren zwerk mit erät 3 Wählen Sie links Sensoren und dann Smarter SOS Knopf 4 Drücke 45 ...
Страница 46: ...d dann 4 Drücken Sie Bestätigen 5 Drü dem Tele schn den 6 Drüc best 46 ...
Страница 54: ...e menu de SOS 4 Appuyez sur le bouton Confirmer 5 Lors l arri pend d éje l ind sign de c 6 App l ind 54 ...
Страница 61: ...ta è t utente WiFi di e 3 Selezionare Sensori dalla menu a sinistra e cliccare Pulsante SOS Smart 4 Clicca 61 ...
Страница 62: ...nu a sinistra 4 Cliccare il tasto Conferma 5 Qua indie rimo l ind il che stato 6 Clic lamp 62 ...
Страница 69: ...ruikt anmaken een in de voegen 3 Selecteer Sensoren in het linkermenu en tik op Slimme SOS knop 4 Tik op 69 ...
Страница 70: ...ermenu en 4 Tik op de knop Bevestigen 5 Dru SOS uitha de L dat b wifi 6 Tik o knip 70 ...
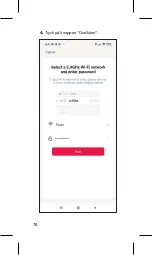
Страница 78: ...änster sida 4 Tryck på knappen Godkänn 5 När SOS anvä mob snab in i W 6 Tryck blink 78 ...
Страница 84: ...Seller Dealer Information Name Address Tel Fax e mail Invoice Date and No Signature Stamp 84 ...
Страница 95: ......

