background image

6

❑ 

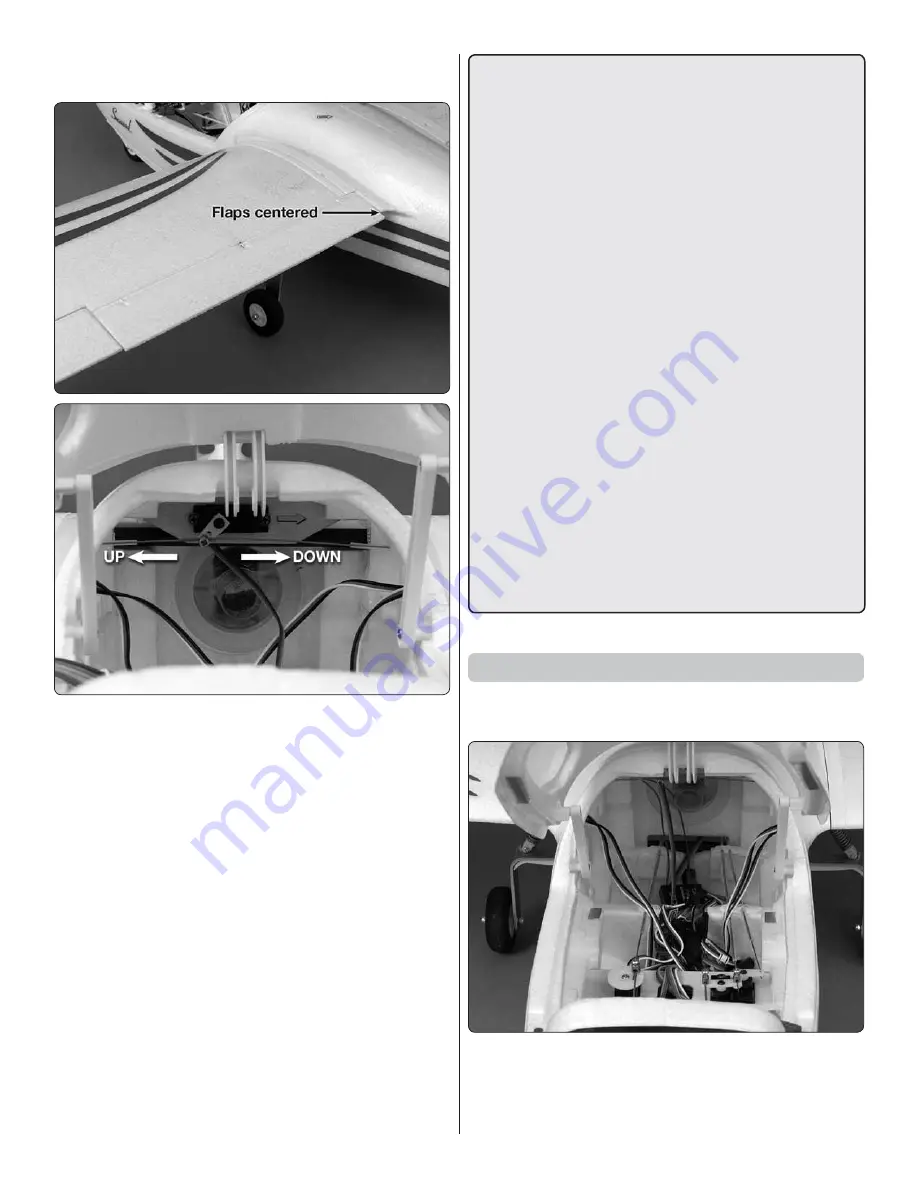
7. Move the fl ap switch on the transmitter to the "0" 

position.

❑ 

8. Position both fl aps so that they are in the up 

position, then tighten the screw-lock connector on the 

fl ap pushrods.

❑ 

9. Check the fl ap throws to make sure there is no 

binding.

!!! WARNING !!!

Set the Failsafe

With electric planes, once the motor battery is 
connected to the ESC the motor can come on at 
anytime causing damage or serious injury. If the failsafe 
is not set and the transmitter is switched off before the 
motor battery is disconnected, the motor could come 
on. Review the instructions included with your radio 
system for setting the failsafe. 

This procedure must 

be done with the propeller removed.

Setting the Tactic TR625 receiver failsafe:

❑ 

1. Switch on the transmitter and connect the motor 

battery to the ESC.

❑ 

2. Make sure the throttle stick is down.

❑ 

3. Press and hold the “Link” button on the receiver 

until the red LED goes out and then release the button 
and the red LED should come back on.

❑ 

4. Check the failsafe operation. To arm the motor the 

throttle stick must be in the down position. If the throttle 
stick is not, the motor will beep. Once the throttle stick 
is moved to the down position the motor is ready to run. 
With the transmitter switched on and the motor battery 
connected, move the throttle stick so that the motor is 
running slowly. Switch off the transmitter and the motor 
will stop if the failsafe is set correctly. If it does not stop, 
repeat the failsafe setting procedure.

Finish the Assembly

❑ 

1. Separate the four servo wires coming from the wing 

and tape together the remaining wires.

❑ 

2. Place the receiver at the back of the radio compartment. 

Position the receiver antennas and tape into place following 
the radio manufacturer’s recommendations.

Содержание Seawind

Страница 1: ...e original cost of the purchased kit Further Flyzone reserves the right to change or modify this warranty without notice In that Flyzone has no control over the final assembly or material used for fin...

Страница 2: ...ould possibly cause injury to yourself or spectators and damage to property 2 You must assemble the Seawind according to the instructions Do not alter or modify the model as doing so may result in an...

Страница 3: ...tics 5151 East Memorial Drive Muncie IN 47302 9252 Tele 800 435 9262 Fax 765 741 0057 Or via the Internet at http www modelaircraft org ASSEMBLE THE MODEL Install the Main Landing Gear 1 Note that the...

Страница 4: ...do not tighten at this time 4 Slide the fin tip in completely Install the Wing Halves 1 Insert the carbon fiber wing tube 2 Slide one wing panel onto the wing tube Route the flap pushrod and servo lea...

Страница 5: ...Elevator CH2 Rudder CH4 Flaps and Lights CH6 Throttle CH3 Retracts CH5 3 Set the servo reversing switches on the TTX610 under the battery cover as shown All the switches are to the right except channe...

Страница 6: ...ery to the ESC 2 Make sure the throttle stick is down 3 Press and hold the Link button on the receiver until the red LED goes out and then release the button and the red LED should come back on 4 Chec...

Страница 7: ...battery Down Up Up Down 3 8 10mm 12 FLAPS 1 2 Flap 11 16 17mm 21 Full Flap These are the recommended control surface throws 5 8 16mm 21 7 8 22mm 12 3 8 10mm 10 15 16 24mm 32 1 1 2 38mm 21 1 2 13mm 15...

Страница 8: ...ge 10 and place it on or inside your model Ground Check and Range Check Follow the radio manufacturer s instructions to ground check the operational range of your radio before the first flight of the...

Страница 9: ...er again make a few practice runs to see how the plane reacts to the water rudder Advance the throttle slowly for takeoff We recommend taking off with the rudder on low rates to avoid over control and...

Страница 10: ...OR MOUNT FLZA6579 17g NOSE WHEEL RETRACT SERVO FLZA6580 36g MAIN GEAR RETRACT SERVO FLZA6640 WING SET FLZA6641 FUSELAGE FLZA6642 HORIZONTAL STAB FLZA6643 VERTICAL FIN FLZA6644 COCKPIT SEAT FLZA6645 CA...

Страница 11: ...11...

Страница 12: ......

Отзывы: