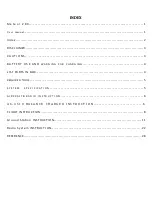
FlySky Meteor 280 Скачать руководство пользователя страница 10

3

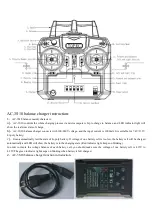
Warning for AC-3S10 balance changer:

1. AC-3S10 is for charging the lion battery or the Lipo battery.It only support the charging of only one pack which is

consisted of 2 or 3 cells. It cannot charge two or more lipo battery packs, otherwise the battery and the charger will be damaged.

2. While charging, the balance charger should be out at dry and ventilated place. And it should be (kept) away from heat

source & inflammable & explosive materials.

3.

While charging, balance charger should be out of aircraft. In order to avoid accident, you should be kept an eyes on it

during charging.

4.

Please don’t charge it immediately after the battery is used or when the surface temperature does not cool down. Otherwise

battery tends to get inflated easily or even leads to fire.

5. Please check if the positive pole and negative pole are connected correctly before you connect the battery and balance

charger.

6.

When the battery is charged, please avoid any fall or external force. Otherwise it may cause the short circuit for the

positive pole and negative poles of the battery.

7.

In order to make sure the safety in use, please use the original charger and battery on request. Please remember to change the

battery when it gets aging and bouffant after using for a long time.

8.

After fully charged, the battery will discharge automatically if it is not removed from balance charger for a long time, and it

may cause power consumption. When the charging voltage is lower than nominal voltage, balance charger will recharge the
battery until it is fully charged. The battery lifetime will be shortened if it is repeatedly charged and discharged.
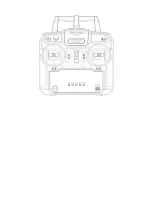
Flight instruction

1. Power on the

radio

1

Open the battery hatch cover of radio.

2

Install

4pcs AA batteries into the radio

3

Close the battery hatch cover of radio.

Please use correct type of battery in the flight. In order to avoid reducing the life of battery, please don’t mix up the

new battery and old battery.

Please take off the battery from the radio if you don’t use it for a long time.
Please pay attention to the electric quantity in your flight. Please change the battery in time to avoid

malfunction

caused by low voltage

during flight.

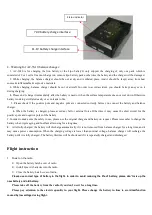
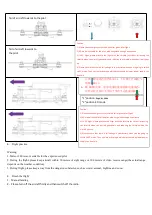
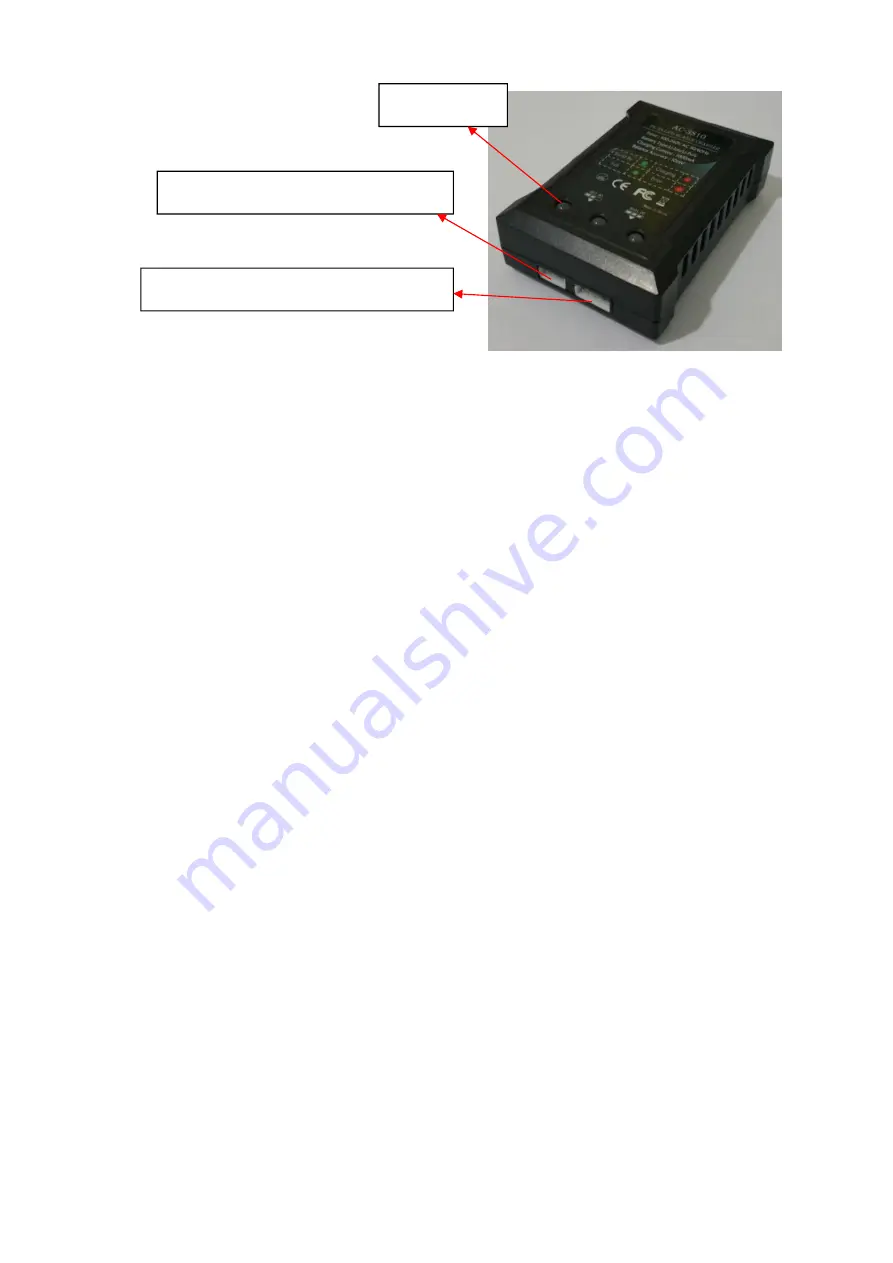
7.4V battery charge interface

11.1V battery charge interface

Status indicator

Содержание Meteor 280

Страница 1: ...Meteor 280 User manual Version v1 0 2015 8 10...

Страница 2: ......

Страница 3: ...I N G F O R C H A R G I N G 4 LIST PARTS IN BOX 4 REQUIRED TOOLS 5 S Y S T E M S P E C I F I C A T I O N 5 A I R C R A F T R A D I O I N S T R U C T I O N 6 A C 3 S 1 0 B A L A N C E C H A R G E R I N...

Страница 4: ...sibilities caused by improper operation or subjective misjudgment 8 Damage s injuries or any legal responsibilities caused by mechanical failures due to product aging and natural wear more than 100 ho...

Страница 5: ...parts for aircraft should be put in the safe place where the children cannot touch it Please call for emergency medical assistance immediately if any parts are swallowed by children The transmitter r...

Страница 6: ...dangerous consequence 17 Do not allow the electrolyte to get into eyes Please wash affected areas immediately and call for emergency medical help if they come into contact with electrolyte or your ey...

Страница 7: ...ttery 11 1V 2200mAh 25C 3SLi Po Flight time 4 6 minutes Operating temperature 10 40 2 Image transmitter parameter Operating power 600MW Operating frequency 5 645GHz 5 945GHz Operating voltage 6V 28V O...

Страница 8: ...R propeller 3 Arm 4 700 TVL camera 5 Frame 6 5045 Propeller 7 CW brushless motor 8 SP Racing flight controller 9 12A brushless ESC 10 5V BEC circuit board 11 2 4G receiver 12 EVA foot pad 13 808 camer...

Страница 9: ...ble for 7 4V 11 1V Li poly battery c It can automatically test the state of Li poly battery If voltage of one battery cell is too low the battery cell will be charged automatically and LED will show t...

Страница 10: ...ole and negative poles of the battery 7 In order to make sure the safety in use please use the original charger and battery on request Please remember to change the battery when it gets aging and bouf...

Страница 11: ...e propellers with the corresponding colored hub to the aircraft Please lock them per the marked locking direction on propeller The red arrow in below picture is the head direction 2 To avoid finger cu...

Страница 12: ...ight of flight controller blink fast 5 The self checking is finished when the blue indicator light of flight controller stop blinking 6 Lock and unlock the radio Please note The default lock setting i...

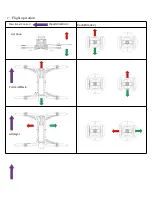
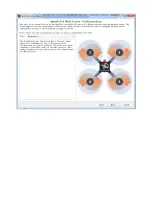
Страница 13: ...7 Flight operation Directional Control Head direction Radio Mode 2 Up Down Forward Back Left Right...

Страница 14: ...Rotation Direction...

Страница 15: ...ed enough experience 3 In 3D flight please practice the flight with the throttle joy sticker Increasing the throttle when the aircraft goes down and reducing the throttle when the aircraft goes up 4 P...

Страница 16: ...ware Man ual GCS http wiki openpilot org display Doc Installing the Ground Control Station Instruction of Flight Controller http wiki openpilot org pages viewpage action pageId 20250682 The Vehicle Se...

Страница 17: ...Vehicle Setup Wizard Step by step 1 Vehicle Setup Wizard welcome page WARNING YOU MUST REMOVE ALL PROPELLERS FROM THE VEHICLE BEFORE PROCEEDING...

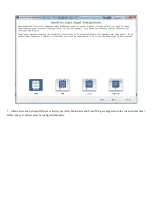
Страница 18: ...2 It will allow you to upgrade to the latest Firmware that matches the GCS...

Страница 19: ...3 Board Identification page...

Страница 20: ...4 Allows selection of your RX receiver type Reboot Selecting any input signal configuration other than PWM will initiate a necessary automated reboot...

Страница 21: ...5 Allows selection between different vehicle types Only Multirotors and Fixed Wing are supported in the wizard at this time Other types of vehicles must be configured manually...

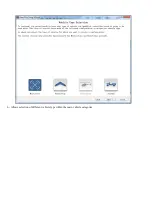
Страница 22: ...6 Allows selection of different vehicle type within the main vehicle categories...

Страница 23: ......

Страница 24: ...7 Allows selection of ESC signal update speeds Selection of Turbo PWM in most cases is the optimal choice 8 Allows user to confirm selected vehicle configuration before proceeding...

Страница 25: ......

Страница 26: ...Hardware connection diagram from configuration summary page above 9 Allows calibration of the Gyros to level so ensure your vehicle is on a flat level surface before proceeding...

Страница 27: ......

Страница 28: ...10 Allows output calibration of your ESC s WARNING YOU MUST REMOVE ALL PROPELLERS FROM THE VEHICLE BEFORE PROCEEDING 11 Allows output calibration of your motors...

Страница 29: ......

Страница 30: ...ery This procedure is undertaken for ALL motors only motor one shown in this tutorial Click Start Slowly move slider until motor just starts to spin Click Stop Click Next and do same for ALL motors 13...

Страница 31: ...14 Save setting to board...

Страница 32: ...Model is reset it will take about a minute...

Страница 33: ...15 Vehicle setup wizard complete Click Finish to exit this wizard or select the Radio Setup Wizard to set up your radio...

Страница 34: ...ease ensure that the quad copter is power on and the transmitter has band with the receiver 1 Enter the set up interface of remote controller then click the configuration at the bottom 2 Click Input a...

Страница 35: ......

Страница 36: ...3 Please choose the setup wizard then you can enter into the interface of setting up 4 Please refer the screen tips to choose the mode type and radio channel type the factory mode is default...

Страница 37: ...5 According to the screen tips please calibrate the joysticks of the radio...

Страница 38: ...We can leave out this step and click the next step directly 6 Put all joy stickers at the neutral position...

Страница 39: ...el space per the screen tips and then turn on and off the mode switch repeatedly 8 Moving the joy stickers and observe the moving direction in GCS If the actions are opposite please click the correspo...

Страница 40: ...heir actions are the same with the screen actions on GCS 10 Setting for unlocking the radio Please choose the Roll left in the options and then choose the locking time 10 seconds Please click save to...

Страница 41: ...n airframe and 2pcs extra Velcro strap for mounting Voltage alarm In order to prevent it is overcharged and ensure it can be alarmed when it happened we suggest you to purchase a voltage alarm separat...

Отзывы: