
10
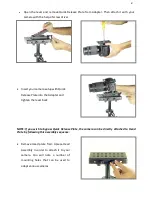
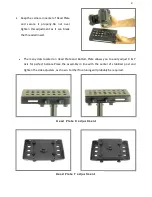
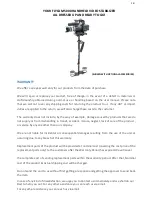
Continuing the assembly and balance requirements to make your Flycam Handheld Video
Stabilizer fully functional you will note that the base platform has a provision to mount the
balance weights in their cups via a slot found on both sides of the post.
The purpose of the counter weight system is to match the low end of the stabilizer to the weight
of the camera and accessories at the high/top end with the gimbaled handle as the pivot point in
between.
The heavier the camera and accessories, the more weights are required to achieve proper
balance. Generally as you add weight to one side of the central post, an equal amount has to be
added to the other side to maintain horizontal balance.
However if you are using an offset configuration such as a flip out viewfinder or off center
accessories, extra weights might be needed on the opposite side of the post to counter act and
maintain proper balance.
Total weight fixed to the base platform should be equal to the weight of your camera plus the
head and any accessories.
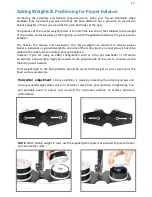
Adding Weights & Positioning for Proper Balance
Horizontal adjustment
on base platform is made by loosening the retaining screws and
moving counterweight plates closer to or farther away from post and then re-tightening. You
will probably need to adjust and re-adjust the horizontal position to achieve optimum
performance.
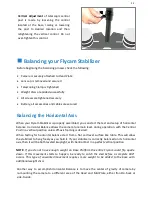
NOTE:
When adding weight in cups, use the supplied foam spacers as silencers to prevent metal
to metal washer noise.


