Lapping the sealing surfaces
You will need check valve lapping kit B-1813-1 and a drill press. Attach a 320 grit abrasive strip to one side of the
glass plate, and a 600 grit strip to the other side. The check valve components have different lapping techniques,
which are described below.
Lapping the outlet poppet, insert, and
check valve outlet passage
Machining allowances
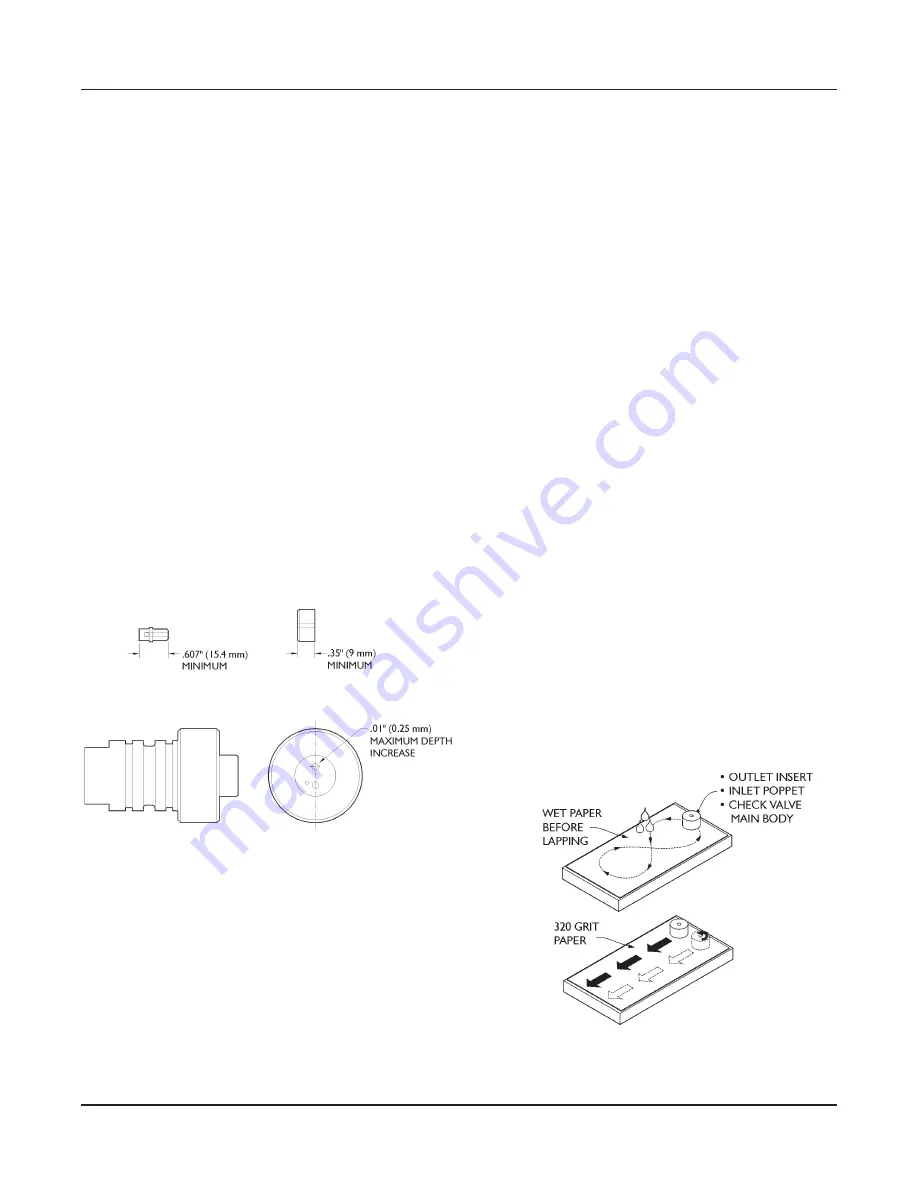
If the sealing surface of any component cannot easily
be restored by lapping, you can machine it flat before
lapping as long as only the sealing surface is machined,
the relationship of the face to the component axis is
unchanged, and minimum dimensions are maintained.
Minimum dimensions
Insert:
•
Minimum thickness of 0.35 in. (8.9 mm)
Outlet poppet:
•
Minimum length is 0.607 in. (15.42 mm)
•
The retainer screw thread depth of the outlet pop-
pet passage may need to be increased. This in-
crease shall not exceed 0.01 in. (0.25 mm) at any
time.
Lapping the outlet poppet
For maximum performance and life, the sealing surface
must be flat and smooth with no radial grinding or lap-
ping marks.
Because of its size and shape, hand-lapping the poppet
can round the sealing surface, which causes squealing
during operation. Flow recommends using a drill press
to lap this part.
1. Make sure the drill chuck is square to the table and
does not wobble. Secure the chamfered end of the
poppet into the chuck up to the shoulder.
2. Place the glass plate on the table with the 320 grit
side up. Place a few drops of water on the abrasive
strip.
3. Start the drill press and lower the poppet onto the
glass plate, moving the plate in a figure-8 pattern un-
der the poppet. Lap until all surface imperfections
have been removed.
CAUTION
Do not lap outlet poppet with 600 grip abrasive. A
polished sealing surface can cause the poppet to stick.
Lapping the outlet insert
The outlet insert can be lapped by hand.
1. Lap the insert on the wetted 320 grit side of the
plate in a figure-8 pattern until all surface imperfec-
tions have been removed.
2. Turn the plate over and lap the insert on the 600 grit
side until the insert is evenly polished.
3. Using the wetted 320 grit side of the plate, draw the
body along the full length of the abrasive strip once,
then rotate it 90° and repeat the score.
This final scoring process will help avoid poppet sticking.
24 | M-310
© Flow International Corporation
ESL Intensifier


