


REPAIR
QS200 Insert Replacement and
QS200 Retrofit Insert Installation Instructions
NOTE: These instructions are intended to assist in replacing the insert in an
existing FLOMEC
®
QS200 ultrasonic Meter.
These instructions also apply when a FLOMEC QS200 insert is used as
a replacement insert in other brands of Tee type meters, that have an
obsolete or unreliable insert.
The FLOMEC QS200 is a direct replacement for a paddle wheel type insert
in most meters that have a Tee type housing.
Keep the new insert free of dirt and debris during
installation.
Check Meter Size
If your flow controller requires a meter K-factor, use the K-factor for your
size meter (see SPECIFICATIONS section). If the meter size is unknown, it
is easily determined using one of the following methods (for FLOMEC and
other brands):
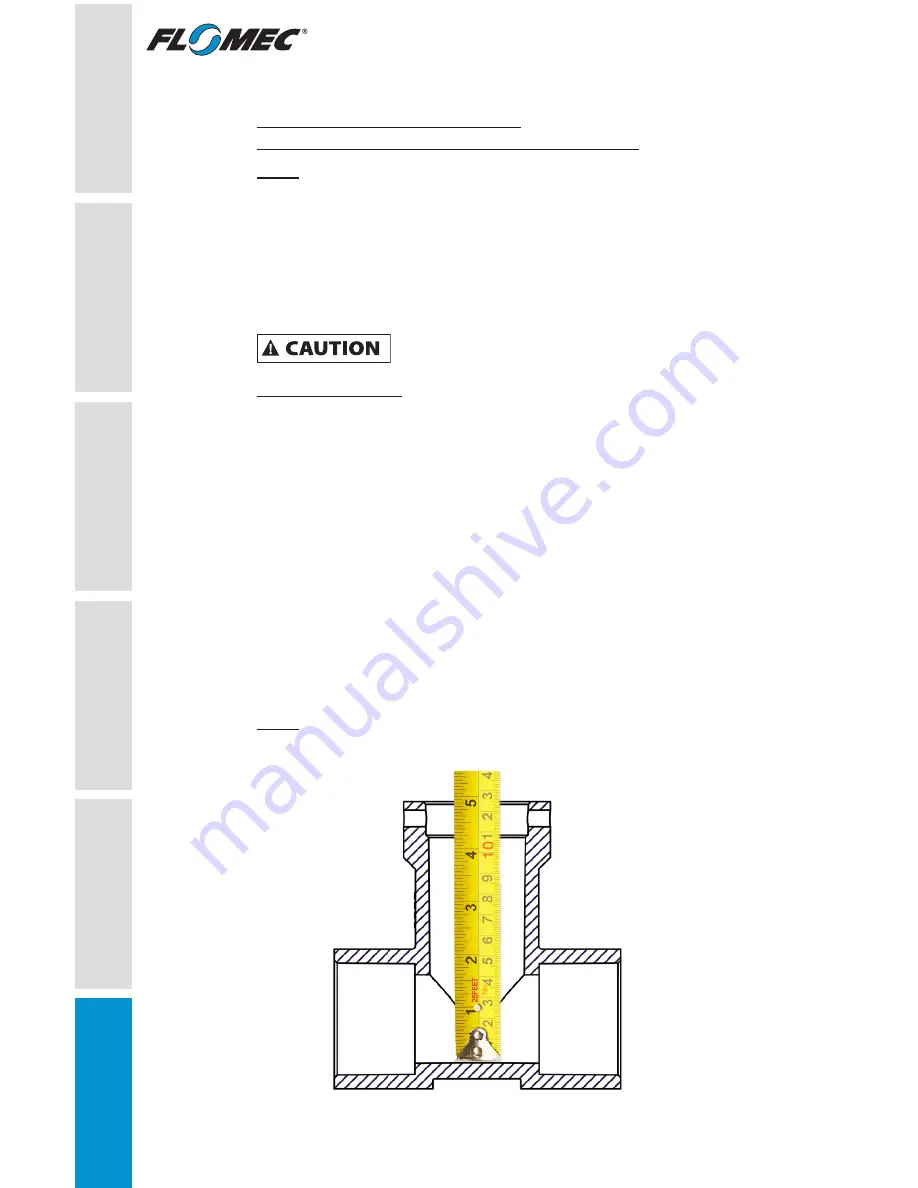
1. Dipstick Method (For 2 in., 3 in. and 4 in. meters only):The interior
depth of the meter body indicates its size. To check, remove the old
insert from the meter body and insert the end of a stiff tape measure
down into the insert bore until it touches the bottom of the meter body
bore. Read the depth shown on the tape measure at the top of the
Tee housing (see Figure 11) and compare with dimension “D” in the
specifications section (see Figure 1).
2. Line Pipe Size Method: Normally, the line pipe size is the same as the
meter size. Figure 12 shows line pipe sizes.
NOTE: FLOMEC Tees are marked with hallmark of size, part number,
SCH80 and pressure.
MAINTENANCE /
REP
AIR
TROUBLESHOOTING
OPERA
TION
ASSEMBL
Y /
INST
ALLA
TION
SAFETY
/
SPECIFICA
TIONS
GETTING ST
ARTED
16
Figure 11