


CP-6408-31-I QIG Rev 100
September 2020
This document does not contain any export-controlled inf ormation.
Right-click the camera and select
IP
Setup
.
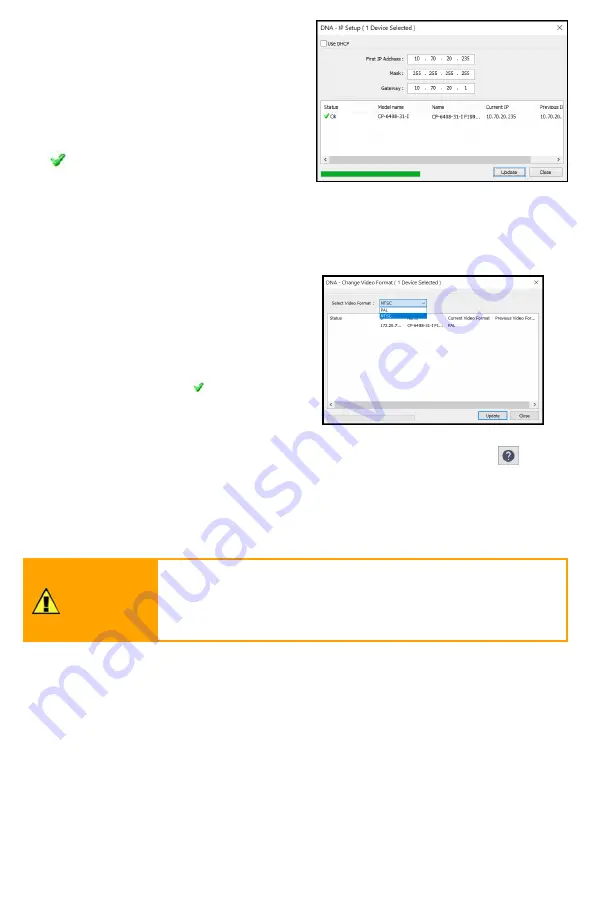
In the
DNA - IP Setup
window, clear
Use DHCP
and specify the camera's
IP address
. You can also specify the
Mask
(default: 255.255.255.0) and
Gateway
. Then, click
Update
, wait for
Ok status to appear, and then click
Close
.
4.2 Change Video Format (Optional)
By default, NTSC is the camera's video format.
To change the camera's video format to PAL using the DNA tool:
a. In the DNA Discover List, right-click
the camera and select
Change Video
Format
.
b. In the
Change Video Format
window, select PAL.
c. Click
Update
, wait for Ok status to
appear, and then click
Close
.
For more information about using the DNA tool to configure one or more cameras,
see the
DNA User Guide
. While the software is open, click the Help icon
.
4.3 Configure and Test the Optional Wash Kit
If you have mounted and connected an optional wash kit, configure and test it and
the camera's wiper according to the kit's instructions manual and according to the
camera's installation and user guide.
Caution
Before activating the wiper, make sure the lens windows are
wet. Using the wiper when the windows are dry causes
irreparable damage to the window coatings and voids the
warranty.
4.4 Attach the Camera to a VMS
After you have mounted the camera and discovered or defined its IP address, you
can use VMS Discovery/Attach procedures to attach the camera to a VMS.


