CLEANING THE ELECTRIC OVEN
Each FiveStar electric oven contains
a self-clean cycle. These self-cleaning
electric ovens clean with very high
temperatures (well above cooking
temperatures) which reduce soils to a
fine powdered ash for easy clean up
with a damp cloth.
WARNING – During the self-
cleaning cycle, the exterior of the
range can become very hot to the
touch. DO NOT leave small
children unattended near the
appliance while in self-clean.
CAUTION – DO NOT line the
oven with aluminum foil. This
practice will destroy heat
distribution during cleaning and
cause the aluminum foil to melt to
the oven finish creating permanent
damage to the appliance.
DO NOT use commercial oven
cleaners or protective coatings in or
around any part of the self-cleaning
oven.
DO NOT clean the oven door seal.
The woven gasket is essential for a
good seal. Care should be taken not
to rub, damage, or remove the seal.
Preparing Oven for Self-
Cleaning
Before pre-cleaning, always allow the
oven to cool.
Wear rubber gloves when pre-
cleaning and when wiping up after
the self-clean cycle.
Remove all utensils from inside the
oven. These items cannot withstand
cleaning temperatures.
It is recommended that oven racks be
removed before self-cleaning. The
high cleaning temperatures could
permanently discolor the bright
finish.
Remove excess spill-overs from the
oven cavity prior to starting the self-
clean cycle. To pre-clean, use hot
soapy water and a cloth. Remove
large spill-overs, as they can cause
heavy smoke or fire when subjected
to high temperatures. DO NOT allow
food spills with high acid or sugar
content to remain on the surface.
These may cause dull spots even after
cleaning.
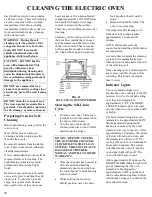
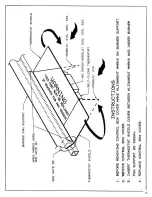
Clean any soil from the oven frame,
the door liner outside the oven seal,
and the small area at the front center
of the oven bottom. These areas do
not become hot enough to burn soil
off. Clean with soap and water only.
FIG. 22
SELF-CLEAN OVEN INTERIOR
Starting the Self-Clean
Cycle
Close the oven door. There is an
interlock switch that senses when
the door is fully closed.
Turn the oven control knob
counter-clockwise to the CLEAN
position (until it stops).
DO NOT ATTEMPT TO TURN
THE OVEN KNOB COUNTER-
CLOCKWISE TO THE CLEAN
SETTING. THIS COULD CAUSE
DAMAGE TO THE THER-
MOSTAT AND WILL VOID THE
WARRANTY.
Once the oven dial has been set to
CLEAN, push and hold the
momentary door lock switch on
the control panel. A faint buzzing
sound is normal.
While holding the switch in
LOCK position, move the door
lock handle to the left until it
stops.
Release the LOCK switch. The
oven is now cleaning.
The complete self-cleaning cycle
from door lock to unlock takes
approximately 3 hours and 45
minutes.
NOTE: During this cycle the
convection fan and the griddle burner
are inoperative.
A remote timer controls the cleaning
cycle and it is automatically reset
when the door is unlocked at the end
of the cleaning cycle.
If the cleaning cycle is interrupted for
any reason, wait three hours before
restarting. This allows the remote
timer to reset.
Indicator Lights
The oven indicator light is on
anytime the oven control is in the ON
position. It will cycle at knob setting
or at the clean temperature,
approximately 875°F. The DOOR
LOCKED indicator light will come
on only when the oven reaches 400°F
or higher.
The broil element brings the oven
temperature to approximately 800°F.
Smoke generated during initial
heating is consumed by the broil
element on its way to the vent. After
approximately 30 minutes, the system
will switch from broil to bake, and
the temperature will rise to 875°F,
cycling off and on for an additional 2
hours and 30 minutes. The system
will then turn the oven off, and the
oven signal light will go off. The
oven will then begin to cool.
After approximately 45 minutes, the
DOOR LOCKED indicator light will
go off, indicating that the oven
temperature has dropped to
approximately 400°F, and the door
can be unlocked and opened. Follow
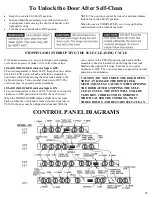
instructions on page 21 to unlock the
door after self-clean.
20
Содержание TPN335-BGW
Страница 1: ...24 30 36 48 and 60 Range Models 36 and 48 Cooktop Models Your exact model may not be pictured ...
Страница 22: ...22 ...
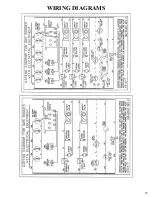
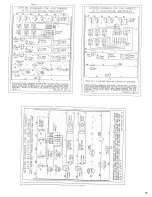
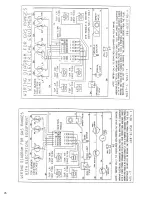
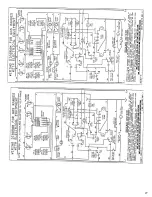
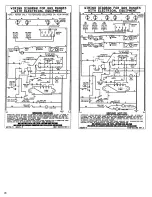
Страница 23: ...WIRING DIAGRAMS 23 ...
Страница 24: ...24 ...
Страница 25: ...25 ...
Страница 26: ...26 ...
Страница 27: ...27 ...
Страница 28: ...28 ...
Страница 33: ...33 ...
Страница 35: ...NOTES ...
Страница 36: ...Part No 188 6C043 01 11 ...


