background image

41

ELECTRIC TREADMILL 

MC-460

EN

INTRODUCTION

Thank you for selecting the FITFIU Electric Treadmill. 

Whether you are a beginner or an experienced athlete, FITFIU will be your allied to keep fit, and develop your physical 
condition. Performing any kind of exercise offers many benefits and the possibility of being able to do it daily will now 
be more accessible thanks to this convenient product which allows you to train from home. 

This product has been designed for walking from 1 km/h, active walking and running up to a speed of 12 km/h.
We hope you enjoy your training and that this FITFIU product fully meets your expectations.

IMPORTANT SAFETY INFORMATION

Before using this machine, read all important safety information as well as the instructions manual. Please keep this 
manual in a safe place for future reference, and if you decide to sell this machine, remember to give it to the new owner. 


Before starting any exercise program you should consult your doctor to determine if you have any physical or 
health conditions that could create a risk to your health and safety, or prevent you from using the equipment 
properly, especially people over 35 years old that might have had health problems previously. 


The equipment is designed for adult use only, keep children away from the equipment. Also those with reduced mental, 
sensory or physical capabilities, except express preceding instruction from a person responsible for their safety. 


This device has been designed for home use only.


This machine can only be used by one person at the time.  Maximum user weight: 110Kg. 


Wear suitable clothing while using the equipment. Avoid wearing loose clothing that may get caught in the 
equipment or that may restrict or prevent movement.


Make sure you do some warm-ups before workout and before any physical activity to avoid muscle injury. Also 
have an after workout routine. 


Notice to persons with pacemakers, defibrillators, or other implanted electronic devices. Persons who have a 
pacemaker use the pulse sensor at their own risk. Pregnant women are not advised to use pulse sensor products.


ATTENTION! Systems that calculate cardio frequency are not always exact in its calculations. Please note that 
excessive effort may cause serious injuries, or death. If you feel pain, sickness, dizziness or any other uncommon 
symptoms while exercising, stop immediately, rest a while and consult your doctor before continuing with your workout. 


Place the machine on a flat, even and solid surface. Do not place the product on a wet or damp area. 


Do not use this product outdoors. 

INDEX

INTRODUCTION 44

IMPORTANT SAFETY INFORMATION 

44

PRODUCT DESCRIPTION 

45

ASSEMBLY 47

BEFORE USING THIS PRODUCT 

48

USE THE PRODUCT 

49

MAINTENANCE 52

TROUBLESHOOTING 54

STORAGE AND TRANSPORT 

55

RECYCLING AND DISPOSING 

56

GUARANTEE 56

DECLARATION OF CONFORMITY (CE) 

57

Содержание 1100032

Страница 1: ...Manual usuario Cinta de correr Manuel d instructions Tapis d entra nement Manuale dell utente Tapis roulant Instruction manual Electric treadmill Betriebsanleitung Laufband ES IT EN DE FR MC 460...

Страница 2: ...sable de su seguridad Este aparato est destinado al uso dom stico S lo puede utilizar el aparato una persona cada vez El peso m ximo del usuario es de 100Kg Utilice prendas y calzado apropiado para re...

Страница 3: ...al del ejercicio retire la llave de seguridad de la consola y gu rdela en un lugar fuera del alcance de los ni os Pare siempre la m quina con el interruptor principal Para realizar una salida urgente...

Страница 4: ...culos No deseche el material de empaquetado hasta que haya inspeccionado cuidadosamente el producto y la haya utilizado satisfactoriamente ATENCI N Si falta o est da ada alguna pieza p ngase en contac...

Страница 5: ...etire el marco principal y los componentes y col quela en el suelo en un rea abierta PASO 1 Abra la estructura coloque el producto suavemente en el suelo abra la estructura y bloqu elo en ambos lados...

Страница 6: ...mna derecha de la cinta con el tornillo ST4 2 16 y la llave m ltiple Finalmente ponga la llave de seguridad en la parte inferior de la consola PASO 4 Cuando no use la cinta puede desbloquear las peril...

Страница 7: ...o pie en la parte interna de su pierna derecha Ac rquese lo m s que pueda a la punta de su pie Cuente hasta 15 Relaje y repita con la pierna izquierda extendida ROTE SU CUELLO Rote la cabeza hacia la...

Страница 8: ...miento de la unidad as como informaci n sobre el entrenamiento la duraci n velocidad distancia recorrida etc Para utilizar el equipo 1 Enchufe el equipo en una toma de corriente 2 Coloque el interrupt...

Страница 9: ...d utilizando seg n lo desee o escoja un modo de selecci n directa 4 Cuando termine presione STOP ENTRENAMIENTO Los usuarios con falta de pr ctica deben empezar a entrenar a poca resistencia sin forzar...

Страница 10: ...los que no se sienta c modo o si no tiene las herramientas o experiencia necesarias haga que la unidad sea atendida por un t cnico cualificado Para evitar descargas el ctricas apague y desenchufe el...

Страница 11: ...esenchufe el equipo Con la llave Allen suministrada gire los tornillos de ajuste del rodillo trasero izquierdo y derecho a la derecha luego vuelva a encender el interruptor de alimentaci n principal y...

Страница 12: ...la muestra E05 Protecci n antiexplosiva Compruebe la tensi n de entrada PCB quemados Cambie la nueva placa de circuito impreso El cable del motor no est bien conectado Vuelva a conectar el cable del m...

Страница 13: ...una garant a de 2 a os a partir de la fecha de compra La garant a cubre las aver as y el mal funcionamiento del aparato siempre y cuando sea utilizado de acuerdo a los usos indicados y seg n las instr...

Страница 14: ...el Parlamento Europeo y del Consejo de 12 de diciembre de 2006 relativa a la aproximaci n de las legislaciones de los Estados miembros sobre el material el ctrico destinado a utilizarse con determinad...

Страница 15: ...e d une personne responsable de leur s curit Cet appareil est destin un usage domestique Une seule personne peut utiliser l appareil la fois Le poids maximum de l utilisateur est de 110 kg Portez des...

Страница 16: ...pl tement avant d teindre la fin de l exercice retirez la cl de s curit de la console et rangez la dans un endroit hors de port e des enfants Arr tez toujours la machine l aide de l interrupteur princ...

Страница 17: ...es l ments sont pr sents Ne jetez pas le mat riel d emballage avant d avoir soigneusement inspect et utilis le produit de fa on satisfaisante ATTENTION Si des pi ces manquent ou sont endommag es veuil...

Страница 18: ...enlevez le cadre principal et les composants et placez le sur le sol dans un endroit ouvert TAPE 1 Ouvrez le cadre placez le produit doucement surle sol ouvrez le cadre etverrouillez le des deux c t s...

Страница 19: ...belet la colonne droite de la ceinture avec la vis ST4 2 16 et la cl multiple Enfin placez la cl de s curit dans la partie inf rieure de la console TAPE 4 Lorsque vous n utilisez pas le ruban adh sif...

Страница 20: ...jambe droite Rapprochez vous le plus possible du bout de votre pied Comptez jusqu 15 D tendez vous et r p tez avec la jambe gauche tendue FAITES ROTATION DE VOTRE COU Tournez la t te vers la droite en...

Страница 21: ...ue des informations sur l entra nement la dur e la vitesse la distance parcourue et ainsi de suite Pour utiliser l quipement 1 Branchez l appareil dans une prise lectrique 2 Mettez l interrupteur d al...

Страница 22: ...sant comme vous le souhaitez ou choisissez un mode de s lection directe 4 Lorsque vous avez termin appuyez sur STOP ENTRA NEMENT Les utilisateurs qui manquent d entra nement devraient commencer s entr...

Страница 23: ...soutilsoudel exp riencen cessaires faitesr parerl appareilparuntechnicienqualifi Pour viter les chocs lectriques teignez et d branchez l quipement avant de le nettoyer ou d effectuer toute op ration d...

Страница 24: ...l l aide de la cl Allen fournie tournez les vis de r glage des rouleaux arri re gauche et droit vers la droite puis remettez l interrupteur principal sous tension et faites fonctionner la machine une...

Страница 25: ...Remplacer le circuit imprim L cran affiche E05 Protection contre les explosions V rifier la tension d entr e BPC br l s Remplacer la nouvelle carte de circuit imprim Le c ble du moteur n est pas corre...

Страница 26: ...fonctionnements de l appareil condition qu il soit utilis conform ment aux utilisations indiqu es et selon les instructions du manuel Pour faire valoir la garantie une preuve d achat ticket ou facture...

Страница 27: ...du Conseil du 12 d cembre 2006 concernant le rapprochement des l gislations des tats membres relatives au mat riel lectrique destin tre employ dans certaines limites de tension Directive 2011 65 UE du...

Страница 28: ...a Questo apparecchio destinato all uso domestico L apparecchio pu essere utilizzato da una sola persona alla volta Il peso massimo dell utilizzatore di 110Kg Indossare indumenti e calzature adatti per...

Страница 29: ...esercizio rimuovere la chiave di sicurezza dalla console e conservarla fuori dalla portata dei bambini Arrestare sempre la macchina con l interruttore principale Per un uscita di emergenza afferrare l...

Страница 30: ...Non gettare il materiale di imballaggio fino a quando non si ispezionato attentamente e utilizzato in modo soddisfacente il prodotto ATTENZIONE In caso di parti mancanti o danneggiate contattare il Se...

Страница 31: ...rimuovere il telaio principale e i componenti e posizionarla sul pavimento in uno spazio aperto PASSO 1 Aprire il telaio posizionare il prodotto delicatamente sul pavimento aprire il telaio e bloccarl...

Страница 32: ...olonna destra della cintura con la vite ST4 2 16 e la chiave multipla Infine posizionare la chiave di sicurezza nella parte inferiore della console PASSO 4 Quando non si utilizza il nastro possibile s...

Страница 33: ...erna della sua gamba destra Si avvicini il pi possibile alla punta del suo piede Conti fino a 15 Rilassi e ripeta con la gamba sinistra distesa RUOTI IL SUO COLLO Ruoti la testa verso destra sentendo...

Страница 34: ...r il funzionamento dell unit nonch informazioni sull allenamento la durata la velocit la distanza percorsa e cos via Per usare l attrezzatura 1 Inserire l apparecchio in una presa elettrica 2 Impostar...

Страница 35: ...esiderato o scegliere una modalit di selezione diretta 4 Quando hai finito premi STOP ALLENAMENTO Gli utenti che non hanno esperienza devono iniziare ad allenarsi con poca resistenza senza forzare e f...

Страница 36: ...ecessaria faccia controllare l impianto da un tecnico qualificato Per evitare scariche elettriche spenga e scolleghi l impianto prima di pulirlo o prima di realizzare qualsiasi lavoro di manutenzione...

Страница 37: ...ant et d branchez l appareil l aide de la cl Allen fournie tournez les vis de r glage des rouleaux arri re gauche et droit vers la droite puis remettez l interrupteur principal sous tension et faites...

Страница 38: ...B bruciati Sostituire il circuito stampato Il display mostra E05 Protezione contro le esplosioni Controllare la tensione d ingresso PCB bruciati Sostituire il nuovo circuito stampato Il cavo del motor...

Страница 39: ...uesto prodotto ha una garanzia di 2 anni a partire dalla data di acquisto La garanzia copre le avarie e il mal funzionamento dell apparecchio sempre e quando sia utilizzato in accordo agli utilizzi in...

Страница 40: ...CE del Parlamento europeo e del Consiglio del 12 dicembre 2006 concernente il ravvicinamento delle legislazioni degli Stati membri relative al materiale elettrico destinato ad essere adoperato entro...

Страница 41: ...th reduced mental sensory or physical capabilities except express preceding instruction from a person responsible for their safety This device has been designed for home use only This machine can only...

Страница 42: ...e your hands or feet under the walking belt After exercising wait for the treadmill to stop completely before getting off After use remove the safety key from the console and store it in a place which...

Страница 43: ...ll items are present Do not discard the packaging material until you have carefully inspected and satisfactorily used the product ATTENTION If any parts are missing or damaged please contact the Offic...

Страница 44: ...box remove the main frame and components and place it on the floor in an open area STEP 1 Open the frame place the product gently on the floor open the frame and lock it on both sides with 2 M10 knob...

Страница 45: ...hen secure the cup holder to the right column of the belt with the ST4 2 16 screw and the multi wrench Finally place the safety key on the bottom of the console STEP 4 When not using the tape you can...

Страница 46: ...to the right for one count feeling the stretch up the left side of your neck Next rotate your head back for one count stretching your chin to the ceiling and letting your mouth open Rotate your head...

Страница 47: ...th controls for the operation of the unit as well as information on training duration speed distance traveled and so on To use the equipment 1 Plug the equipment into an electrical outlet 2 Set the po...

Страница 48: ...direct selection mode 4 When you are finished press STOP TRAINING If you are a beginner start by training for several days at a gentle pace don t push yourself and rest if necessary Gradually increas...

Страница 49: ...r experience for have the unit serviced by a service centre or qualified technician To prevent electrical shock switch OFF and unplug the equipment before cleaning or performing any maintenance tasks...

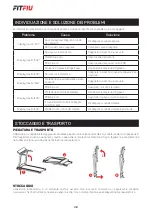
Страница 50: ...ng the supplied Allen key turn the left and right rear roller adjustment screws to the right then turn the main power switch back on and operate the equipment at a speed of 6km h Run over the treadmil...

Страница 51: ...ace the printed circuit board The display shows E05 Explosion protection Check the input voltage Burned PCBs Change the new printed circuit board The motor cable is not connected properly Reconnect th...

Страница 52: ...clable please dispose ofthem in the appropriate container GUARANTEE This product has a 2 years guarantee This guarantee covers damages and bad function only if the product has not been misused and all...

Страница 53: ...n Parliament and ofthe Council of 12 December 2006 on the harmonisation of the laws of Member States relating to electrical equipment designed for use within certain voltage limits Directive 2011 65 E...

Страница 54: ...denn sie werden von einer f r ihre Sicherheit verantwortlichen Person beaufsichtigt oder angewiesen Dieses Ger t ist f r den Hausgebrauch bestimmt Nur eine Person darf das Ger t gleichzeitig benutzen...

Страница 55: ...tillstand gekommen ist bevor Sie aussteigen Am Ende der bung den Sicherheitsschl ssel von der Konsole abziehen und an einem Ort au erhalb der Reichweite von Kindern aufbewahren Die Maschine immer mit...

Страница 56: ...das Verpackungsmaterial erst wenn Sie das Produkt sorgf ltig gepr ft und zufriedenstellend verwendet haben ACHTUNG Sollten Teile fehlen oder besch digt sein wenden Sie sich bitte an den Technischen Di...

Страница 57: ...trahmen und die Komponenten und legen Sie ihn in einem offenen Raum auf den Boden SCHRITT 1 ffnen Sie den Rahmen Legen Sie das Produkt vorsichtig auf den Boden ffnen Sie den Rahmen und verriegeln Sie...

Страница 58: ...raube ST4 2 16 und dem Multischl ssel an der rechten S ule des G rtels Legen Sie schlie lich den Sicherheitsschl ssel in den unteren Teil der Konsole SCHRITT 4 Wenn Sie das Band nicht verwenden k nnen...

Страница 59: ...ah wie m glich an die Fu spitze Entspannen und mit gestrecktem linken Bein wiederholen DREHEN SIE IHREN HALS Drehen Sie Ihren Kopf nach rechts und sp ren Sie die Dehnung der linken Seite Ziehen Sie da...

Страница 60: ...er ts sowie Informationen ber Ausbildung Dauer Geschwindigkeit zur ckgelegte Strecke usw ablesen k nnen Zur Verwendung der Ausr stung 1 Schlie en Sie das Ger t an eine Steckdose an 2 Schalten Sie den...

Страница 61: ...eit zu laufen 3 Stellen Sie die Geschwindigkeit mit wie gew nscht oder w hlen Sie einen Direktauswahlmodus 4 Wenn Sie fertig sind dr cken Sie STOP TRAINING Benutzer mit mangelnder bung sollten das Tra...

Страница 62: ...lassenSiedasGer tvoneinemqualifiziertenTechnikerwarten UmeinenelektrischenSchlagzuvermeiden schaltenSiedasGer tausundziehenSiedenNetzstecker bevor Sie es reinigen oderwarten berpr fen Sie vor jedem Ge...

Страница 63: ...ehen Sie den Netzstecker Drehen Sie mit dem mitgelieferten Inbusschl ssel die Einstellschrauben f r die linke und rechte hintere Walze nach rechts schalten Sie dann den Hauptschalter wieder ein und be...

Страница 64: ...te Die Anzeige zeigt E05 Explosionsschutz Pr fen Sie die Eingangsspannung Verbrannte PCBs Ersetzen Sie die neue Leiterplatte Das Motorkabel ist nicht richtig angeschlossen Schlie en Sie das Motorkabel...

Страница 65: ...ses Produkt hat eine Garantie von 2 Jahren ab Kaufdatum Die Garantie erstreckt sich auf Ausf lle und Fehlfunktionen des Ger tes solange es entsprechend den angegebenen Verwendungszwecken und den Anwei...

Страница 66: ...arlaments und des Rates vom 12 Dezember 2006 zur Angleichung der Rechtsvorschriften der Mitgliedstaaten betreffend elektrische Betriebsmittel zur Verwendung innerhalb bestimmter Spannungsgrenzen Richt...

Страница 67: ......

Страница 68: ...Manual revisado en octubre de 2020 www fitfiu es...

Отзывы: