- 22 -
- Do not lost the O-ring. It drops off carelessly.
- Do not make scratch to the O-ring groove.
CAUTION
When it is hard to insert it in a connector, apply a thin coat of the O-ring grease.
- In the case of the dome lens installation, moisture may be shut in in the space with the
light head and the lens. This moisture becomes the dew condensation inside and may
affect the irradiation. But there is no fear of the flood.
- Even if may be flooded in the dome lens inside, do not worry about the NEO.
Disassembly of the dome lens
Connecting of the optical fiber
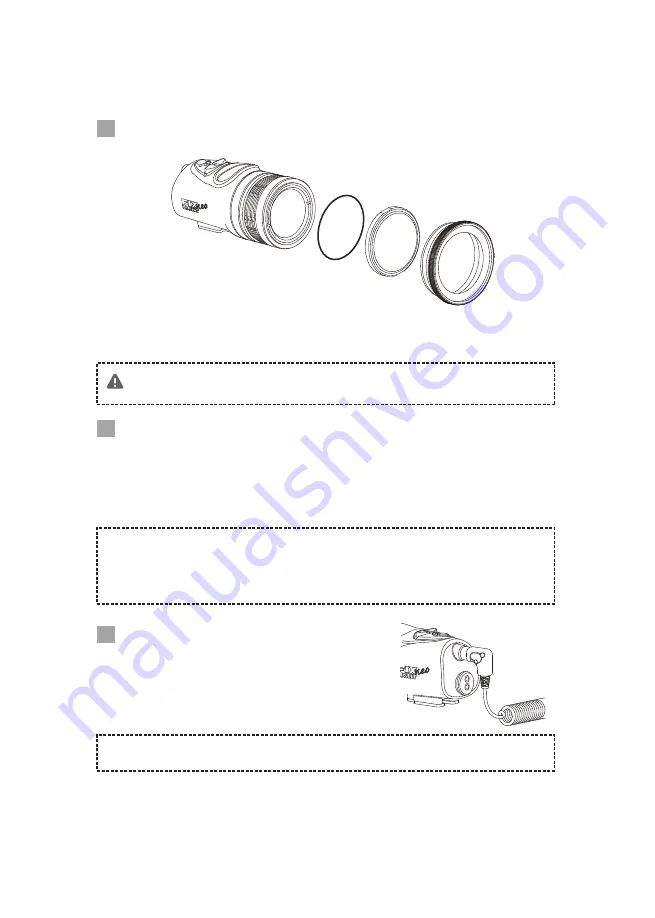
1. Hold the light head firmly and remove the dome ring by rotating counter-clockwise.
2. Take off the dome lens and the O-ring.
3. Set the dome ring once again for protect the O-ring groove.
Connect the EF sensor connector of the NEO and the
optical fiber connector of the camera housing in an optical
fiber cable. The type of the connector is SEA&SEA.
1. Hold the light head firmly and remove the dome ring by rotating counter-clockwise.
2. Make sure that there is no sand or small lint on the O-ring groove and the O-ring contact
surface.
3. Apply a thin coat of the bundled O-ring grease to the O-ring. Then put it on the O-ring groove.
4. Put the dome lens on the O-ring, and attach the dome ring by clockwise rotating.
O-ring
Dome lens
Dome ring
Attaching of the dome lens
NOTE
NOTE
Содержание FIX NEO Premium 4030 EF II
Страница 1: ...NEO Premium 4030 EF user manual ...


