


5
Replacement Parts
- When replacement parts are required, be sure the service technician
uses replacement parts that have been specified by the manufacturer or that have the
same characteristics as the original part. Unauthorized substitutions may result in fire,
electric shock, or other hazards.
Safety Check
- Upon completion of any service or repairs to this product, ask the service
technician to perform safety checks to determine that the product is in proper operating
condition.
Wall or Ceiling Mounting
- The product should be mounted to a wall or ceiling only as
recommended by the manufacturer.
Heat
- The product should be situated away from heat sources such as radiators, heat
registers , stoves, or other products (including amplifiers) that produce heat.
Nonuse Periods
- Unplug the product’s power cord when you will not use it for an
extended period.
19.
20.
21.
22.
23.
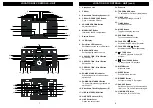
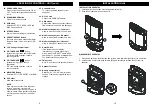
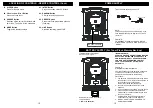
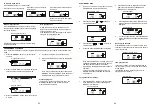
CONNECTIONS
AUDIO I
N
Amplifier (for LINE IN)
AUDIO OUT
LI
NE
(
L
)
LIN
E
(R
)
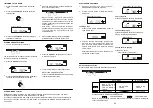
LINE (AUX) IN/OUT CONNECTIONS
Press the LINE (AUX) button (34) to select IN or OUT mode.
+
+
Active Subwoofer
SUBWOOFER CONNECTIONS
Connect the Active Subwoofer to the Subwoofer socket (45) at rear of main unit.
6
VCR (for LINE OUT)
VIDEO O
U
T
TV
Содержание DS24425
Страница 1: ...INSTRUCTION MANUAL SLIM3010 ...


