background image

19  


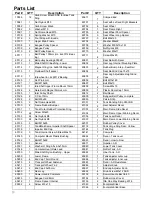
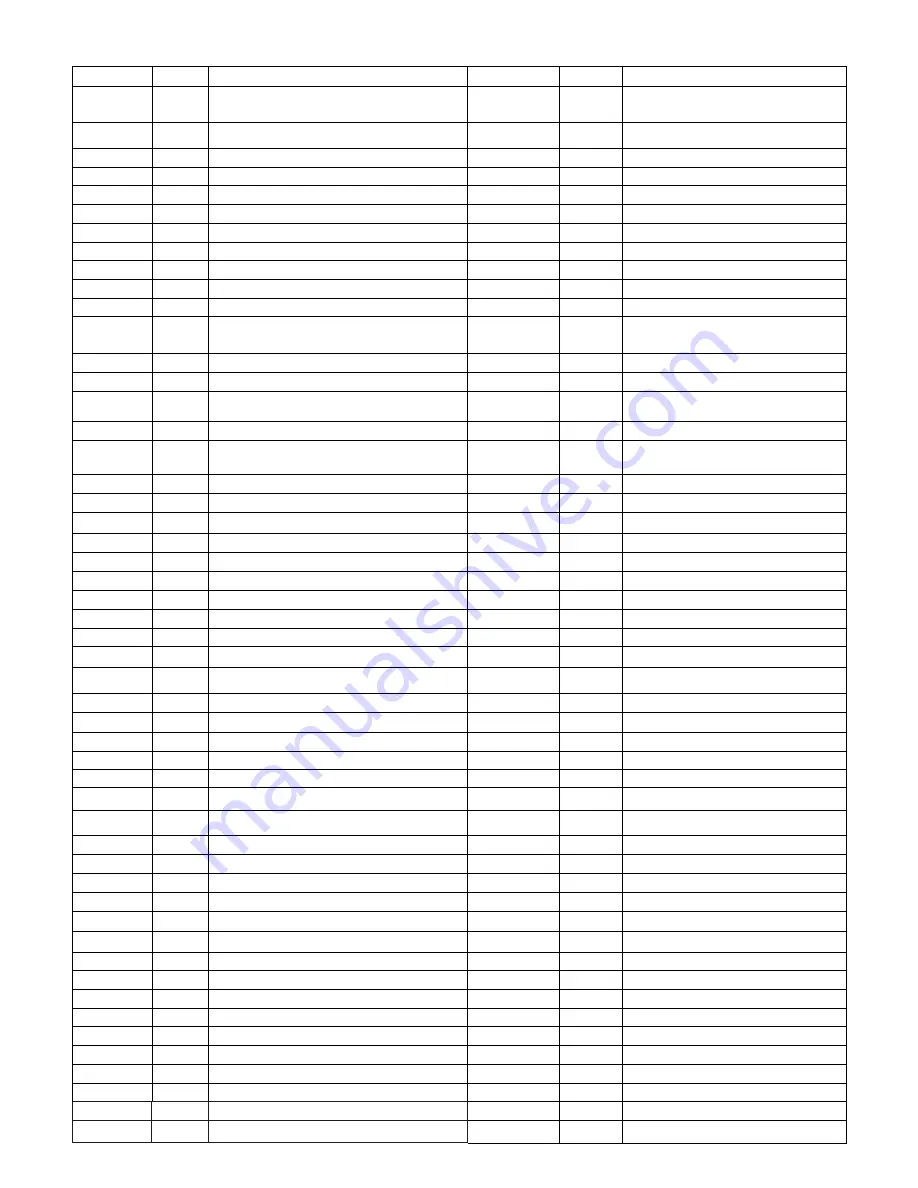
Parts List


Part # 

QTY Description  Part # 

QTY Description 

10036 

12 

Grub Screw M3x20 SUS for Blue Tank 
Ring 

60617 

Crimped End  

10041 

Nut Nylock M10 

60701 

Seat with Left and Right Brackets 

10052 

1 Grub 

Screw 

M4x6 

60702 

Seat Wheel 

10082 

5 Washer 

M10 

60704 

Seat Frame Right 

10097 

Nut Dome Head M10 

60705 

Seat Wheel Short Spacer  

10139 

8 Spring 

Washer 

M10 

60706 

Seat Wheel Long Spacer 

10176 

Foot Strap with Buckle 

60707 

Bolt M8x120 

60100 

Upper Main Frame 

60708 

Washer M8x22 

60108 

Bungee Pulley Spacer 

60708 

Washer M8.5x19x1.6t 

60109 

2 Bungee 

Pulley 


60709 

Nut Nylock M8 

60110 

Belt Pulley Spacer 

60710 

Washer M6x11 

60111 

Belt Pulley 100mm (inc. 2x60112 Bear-
ing) 

60711 

Screw M6x20 

60112 

Belt pulley bearing 6000ZZ 

60801 

Seat Rail with Decal 

60113 

Main Shaft Oil Bushing - Lower 

60802 

Rear Leg Internal Mounting Plate 

60114 

Magnet Ring (inc. 6x60124 Magnet) 

60803 

Rubber Bump Stop - Seat Rail 

60115 

Flywheel Shaft spacer  

60804 

Seat Rail End Cap 75x75 

60119 

Idle wheel inc. 2x60112 Bearing 

60805 

Rear Leg Adjustable Height End 
Caps 

60120 

Roll Pin 6mm 

60806 

Bolt M10x180 

60121 

1 Bolt 

M10x90 

60807 

Bolt M6x10 

60123 

Idle Shaft Upper Frame Mount 10mm 

60808 

Screw M8x15 

60124 

Rare Earth Magnet 5mmx4mm 

60809 

Plastic Dome Cap 10mm 

60125 

Idler Pulley Shaft 

60812 

Rail Decal 

60126 

C Clip 10mm 

60900 

Bungee/ Belt Pulley complete 

60128 

2 Bolt 

M8x65 

60903 

1 Velcro 

Strip 

60129 

Nut Dome Head M8 

61001 

Tank Bonding Strip 3M-VHB 

60130 

2 Frame 

Rubber 

Bumper 

61002 

Heel Adjuster Decal 

60131 

Tank Outer Rubber Protection Ring 

61003 

Main Frame Side Decal 

60132 

24 

Screw M3x20 

61004 

Main Frame Upper Warning Decal 

60133 

24 

Nut Nylock M3 

61006 

Tank Level Decal 

60133 

24 

Nut Nylock M3 

61007 

Main Frame Lower Warning Decal 

60135 

5 Bolt 

M10x95 

62001 

Rubber Pulley Cover 

60137 

Tank/Mainframe Impeller Shaft Spacer 

63118 

Tank Large Ring Seal - Yellow 

60138 

Impeller End Cap 

63144 

Tank Plug  

60139 

Tank Internal Screw S/Steel M6x15 

64141 

1 Computer 


60140 

Computer Mount Plastic Bushing 

65944 

Decal - Tank Level 

60142 

Bolt M10x60 

65945 

Decal - How to Row 

60143 

1 Sensor 

65971 

1  Impeller 

AR 

60147 

Washer O Ring 9.5x6.5x1.5mm 

65980 

Lower Tank Cover 

60148 

Computer Heart Rate Lead 

65981 

Outter Tank - AR 

60150 

Main Shaft Nylon Bushing - Upper 

65982 

Inner Tank - AR 

60200 

1 Lower 

Frame 

65983 

1  Tank adjuster outer cup 

60209 

End Cap 75mm Round 

65984 

Tank adjuster inner cup 

60210 

Transport Wheel Fastener 

65985 

Decal - AR Resistance  

60211 

Transport Wheel 76.2 

65986 

Adjuster Knob 

60212 

End Cap 25x50mm 

65991 

End cap-Adjuster Knob 

60400 

1 Rear 

Leg 

65992 

Grub Screw M3x12 SUS 

60500 

Rower Handle Complete 

90102 

Rower Handle Bar Catch 

60615 

Bungee Cord 8mm  

90104 

Rubber Hook Cover 

60616 

Frame Spacer Internal 

90136 

INA One Way Bearing 2016 

95902 4


Screw M5 x 15


61063 2 

Footplate 

Slider 


61064 

Footplate Slider Base 

Содержание NEWPORT Challenge AR

Страница 1: ...Owners Manual...

Страница 2: ...AR Pack 2 Assembly 3 Tank Filling and Water Treatment 4 Operational Instructions 5 The Newport Challenge AR Computer with USB Function 6 Replacing Rower Belt 7 Changing Bungee Shock Cord 8 Maintenanc...

Страница 3: ...m bolt 17 Multi tool 5 M10 Washer 18 Water treatment pack 4x tablets 6 M10 Washer 19 Siphon 7 M10 Dome nut 20 Rear seat rail leg 8 M10 Nylock nut 21 Rear seat rail leg mounting bracket 9 M10 Washer 22...

Страница 4: ...Leg the bottom of the Seat Rail and threading into the Internal Seat Rail Bracket as illustrated M8x15mm bolts washers Install Rubber End Cap once Rear Leg assembly is completed Next install Rear Bump...

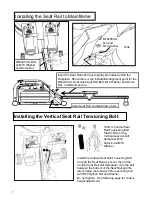
Страница 5: ...her and Dome Nut Install and secure Installing the Vertical Seat Rail Tensioning Bolt 180mm Vertical Seat Rail Tensioning Bolt Plastic Dome Cap Vertical seat rail bolt dampener M10 Nylock and M10 Wash...

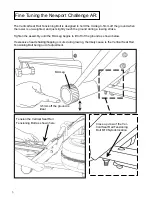
Страница 6: ...he Mid Leg begins to lift off of the ground as shown below If excessive head shaking hopping occurs during rowing the likely cause is the Vertical Seat Rail Tensioning Bolt being out of adjustment Fin...

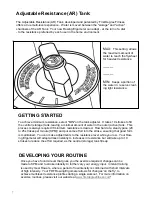
Страница 7: ...resistance is desired Row hard at a steady pace 20 to 25 strokes per minute SPM and put some effort into the stroke ensuring that good form is maintained You can make adjustments to the resistance le...

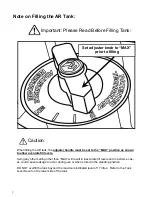
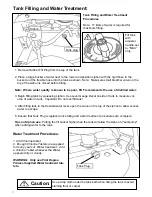
Страница 8: ...set to the MAX position as shown to allow accurate fill levels Using any other setting other than MAX will result in inaccurate fill levels and in extreme cas es could cause leakage to occur during us...

Страница 9: ...ow excess water to escape 5 Ensure that Tank Plug is replaced once filling and water treatment procedures are complete Tips on Siphon use Putting the fill bucket higher than the tank will allow the si...

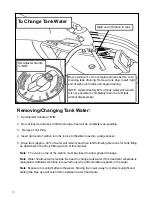
Страница 10: ...Note Water treatment will preclude the need to change tank water if the treatment schedule is maintained Additional chlorine is required only when discoloration appears in the water Note Exposure to s...

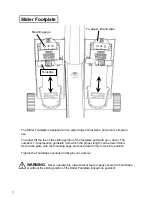
Страница 11: ...6 represent a guideline from which the proper length can be determined Secure the plate onto the mounting pegs and push down firmly to lock into position Tighten the Footstraps securely and begin your...

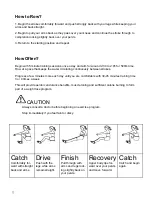
Страница 12: ...inning an exercise program Stop immediately if you feel faint or dizzy Catch Comfortably for ward with straight back and arms Drive Push with the legs while arms remain straight Finish Pull through wi...

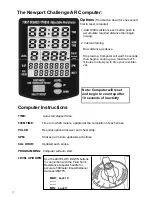
Страница 13: ...reset and begin to count up after 10 seconds of inactivity Options Hold button down for one second first to reset computer 1 Add 1000m distance each button push to accumulate required distance then b...

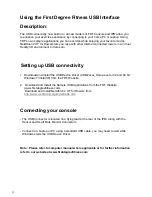
Страница 14: ...the FDF Website 2 Download and Install the Sample USB Applications from the FDF Website www firstdegreefitness com Download and Install NetAthlon 2 XF for Rowers from http www webracing org downloads...

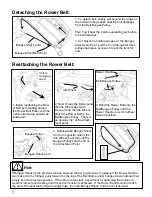
Страница 15: ...the Mainframe under bungee tension alone then simply tie off at previous position If the return is too slack experiment by tightening the tension in small increments and testing until the correct tens...

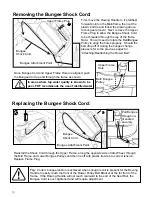
Страница 16: ...h un til seated securely Removing the Bungee Shock Cord First move the Rowing Handle to it s farthest forward point on the Mainframe then cut the plastic end tie and follow the drawing above for bunge...

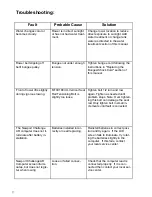
Страница 17: ...tly too loose Tighten bolt 1 2 turn and row again Tighten as needed until problem stops Note Over tighten ing this bolt can damage the seat rail Only tighten bolt in small in crements until fault is c...

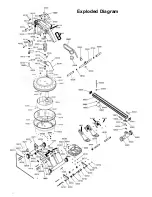
Страница 18: ...18 Exploded Diagram 61063 90104 90102 65945 95902 61064 64141...

Страница 19: ...ngee Belt Pulley complete 60128 2 Bolt M8x65 60903 1 Velcro Strip 60129 2 Nut Dome Head M8 61001 4 Tank Bonding Strip 3M VHB 60130 2 Frame Rubber Bumper 61002 2 Heel Adjuster Decal 60131 1 Tank Outer...

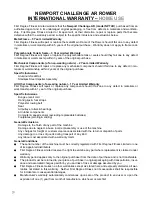
Страница 20: ...y defect in materials or workmanship within 1 year of the original purchase Specific Inclusions Bungee recoil cord Hand grips foot straps Polyester rowing belt Seat All pulleys rollers bearings All ru...

Отзывы: