background image

-5-

III. Installing the SeriTek/1SM2

Introduction

This section describes the proper method of installing your SeriTek/1SM2.

Caution

:  Please make sure your data is backed up prior to installing the SeriTek/1SM2 

CardBus adapter and hard drive(s) or peripheral(s).

The  SeriTek/1SM2  CardBus  adapter  and  your  Macintosh  contain  sensitive  components  that 
can  be  permanently  damaged  by  Static  Electric  Discharge.  To  minimize  the  chance  of 
Electro-Static Discharge avoid touching the CardBus connector, handle only the edges of the 
card (do not touch the interface connector) and work in an area free of static electricity.

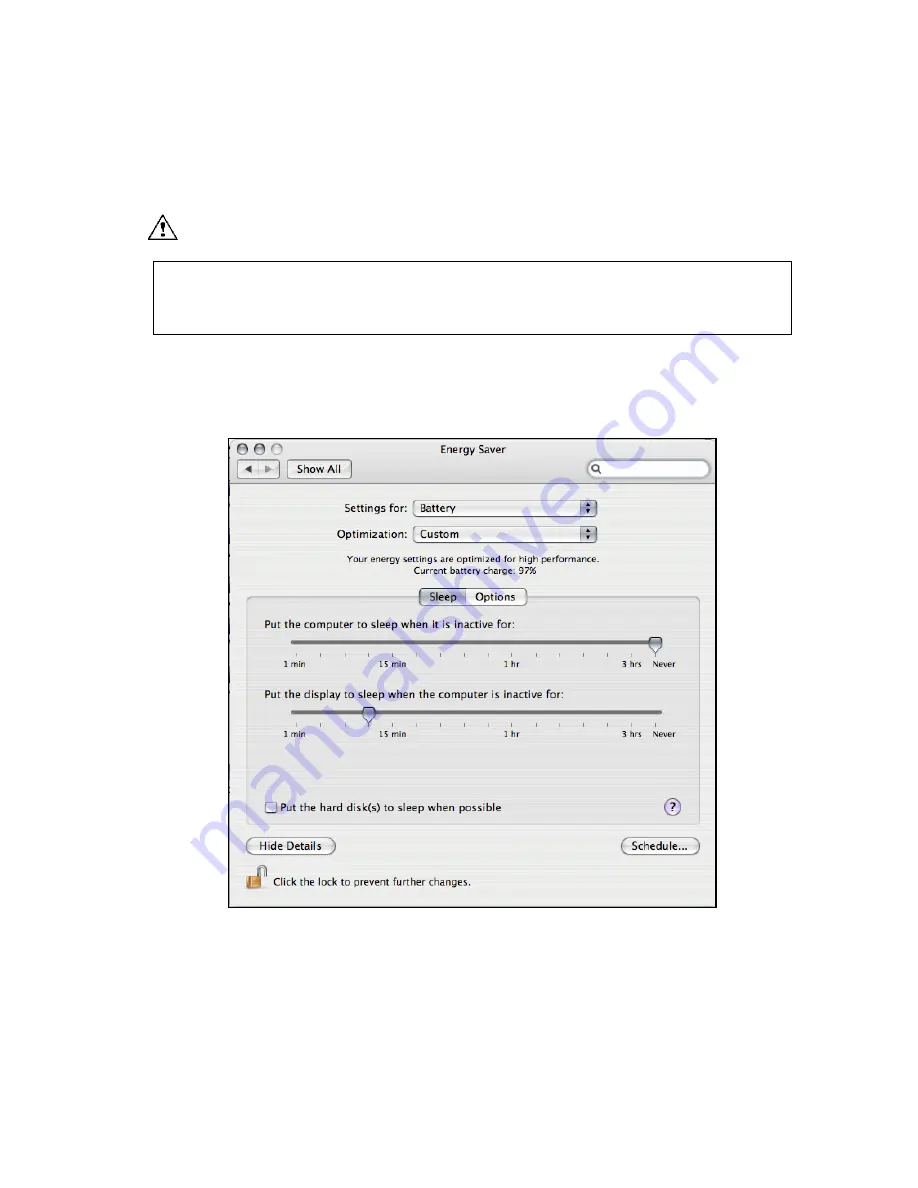
Note:  Prior to using you SeriTek/1SM2 disable Sleep Mode by adjusting the Energy Saver to 
never allow the sleep function on the system when the SeriTek/1SM2 is installed, if you need 
to sleep the system first un-mount drives attached to the SeriTek/1SM2 and unplug the 
adapter.

Figure 1: Disabling Sleep Mode When Using the SeriTek/1SM2

Содержание SeriTek/1SM2

Страница 1: ...Store and Share your Digital Creations SeriTek 1SM2 Two Port External Serial ATA CardBus Adapter For Notebook Computers User Manual for Power Macintosh ...

Страница 2: ...al or other errors FirmTek assumes no liability for any errors omissions or from the use of this manual that may result from such errors including but not limited to loss of data or profits Before installing SeriTek 1SM2 or any other hardware or software you are responsible for backing up data contained on any storage devices After hardware or software installation you are responsible for backing ...

Страница 3: ...quirements 4 III Installing the SeriTek 1SM2 5 IV Connecting and Formatting Hard Drives 8 V Using SeriTek 1SM2 Hot Swap Functionality 20 VI Troubleshooting 24 VII Product Support 26 VIII Product Warranty and Disclaimers 26 IX Regulatory Compliance Statements 27 ...

Страница 4: ...an easy and affordable way for Macintosh users to add inexpensive high speed storage to their PowerBook computer With two external Serial ATA ports each offering 1 5Gbits sec performance the SeriTek 1SM2 provides the high bandwidth to meet the needs of performance hungry applications The SeriTek 1SM2 is CardBus compatible and should be used in systems that offer CardBus Compatible slots Note The S...

Страница 5: ...ect for upgrading and expanding PowerBook computers Bus master operation enhances multitasking during disk transfers and increases CPU efficiency The CPU is free to handle other tasks during data transfers between the PCI Bus and system memory Data protection Supports Mac OS X RAID Mac OS 9 Software RAID third party software and other storage utilities Reduced setting on storage devices no master ...

Страница 6: ...lly compliant with Serial ATA 2 5 specification Bus Mastering off loads data I O handling from CPU Complete 32 bit CRC error checking for all bits transmitted command data and status offers enhanced data protection for high speed Serial ATA drives Two independent data channels allows for separate device timings Automatically identifies and configures drive types Cables Supported 7 pin external Ser...

Страница 7: ...specifically listed are expected to work with the SeriTek 1SM2 adapter Please check your PowerBook specifications to ensure it offers CardBus 32 bit PC Card support o Titanium G4 400MHz and 500MHz Product code M7952LL A M7710LL A o Titanium G4 550MHz DVD reader product code M8362LL A and with DVD CD writer product code M8622LL A o Titanium G4 667MHz Product code M8363LL A DVD ROM M8623LL A Combo o...

Страница 8: ... by Static Electric Discharge To minimize the chance of Electro Static Discharge avoid touching the CardBus connector handle only the edges of the card do not touch the interface connector and work in an area free of static electricity Note Prior to using you SeriTek 1SM2 disable Sleep Mode by adjusting the Energy Saver to never allow the sleep function on the system when the SeriTek 1SM2 is insta...

Страница 9: ...priate installer application for your particular operating system 3 Insert the SeriTek 1SM2 adapter into an available CardBus slot see Figure 2 Be sure the card fully seats If the metal part of the card is not fully inserted try turning the card over and insert again Figure 2 Inserting the SeriTek 1SM2 4 Find the Icon that looks like a CardBus card it should appear next to your other system status...

Страница 10: ... the System 6 You are now ready to connect and initialize your storage please see Section IV Connecting and Formatting Hard Drives section located below SeriTek 1SM2 CardBus adapter Installation on Mac OS 9 1 Drag and drop the system enabler from the CD to the active system folder 2 Reboot your PowerBook 3 Insert the SeriTek 1SM2 adapter Ready for Use Your SeriTek 1SM2 CardBus adapter is now insta...

Страница 11: ...eceptacle s on the SeriTek 1SM2 and connect the other end s to the external enclosure 4 The external enclosure s may be powered on or off at this time If it is off power it on at this time Note FirmTek Serial ATA cables were specially designed to be compatible with PC and Macintosh computers Please use only FirmTek external shielded Serial ATA cables with the SeriTek 1SM2 The original Serial ATA c...

Страница 12: ...nnectors and receptacles to each other If your connectors still do not fit rotate the cable and try again 4 Connect your drive cables or insert them in an enclosure If your enclosure is powered on a configuration screen will appear If your enclosure is powered off power it on and you should see the following configuration screen appear Figure 8 Mac OS X Configuration Changed Screen Make sure that ...

Страница 13: ...vice s have not been formatted for use with the Macintosh Disk Insertion message window will appear on your desktop for each un configured storage device Select Initialize to setup your storage or Ignore if you wish to configure these disks later see Figure 10 Figure 10 Disk Insertion Window ...

Страница 14: ...as disks 2 Open Apple s Disk Utility which is located in the Utilities folder of the Mac OS X start up volume To open this application a Double click the Mac OS X startup volume b Double click the Applications folder c Double click the Utilities folder d Double click the Disk Utility icon See Figures 11 and 12 for examples Figure 11 Locating Apple s Disk Utility Figure 12 Alternate Method for Loca...

Страница 15: ...he drive you wish to format Note Some versions of Apple Disk Utility incorrectly display Serial ATA hard drives as having the Connection Type of Slave Serial ATA hard drives are all in fact Master drives Later versions of Apple Disk Utility correctly display Serial ATA hard drives as Master If your Serial ATA hard disk is listed as Slave don t worry its performance will not be affected Figure 13 E...

Страница 16: ...ription for your new hard drive 7 Note FirmTek Mac OS 9 support is limited to simple file transfer FirmTek recommends that Mac OS 9 users use the FirmTek 1SM2 only to transfer files If you wish to have your new hard drive be recognized by Mac OS 9 XX select the Install Mac OS 9 Drivers checkbox 8 Be sure to back up any data on the hard drive before clicking the Erase button to format the hard driv...

Страница 17: ...f the hard drives fails all of the volume s data will be lost A volume that is mirrored also known as RAID 1 has its data duplicated from one hard drive onto another A mirrored volume offers data integrity and immediate access to data in the event of a single hard drive failure Because data is mirrored duplicated across two hard drives only half of the combined capacity of the two drives is availa...

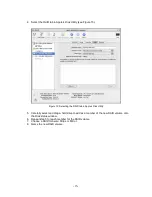
Страница 18: ...Selecting the RAID tab in Apple s Disk Utility 5 Carefully select and drag a hard drive to add as a member of the new RAID volume onto the Disk status window 6 Repeat step 5 for each member for the RAID volume 7 Choose a RAID Scheme Stripe or Mirror 8 Name the new RAID volume ...

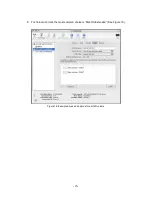
Страница 19: ... 16 9 For Volume Format the most common choice is Mac OS Extended See Figure 16 Figure 16 Example drives and options for a RAID volume ...

Страница 20: ... 17 Note For Mac OS X 10 4 0 and later you can select the RAID block size for best performance select a RAID block size of 64K Figure 17 Selecting a RAID Block Size ...

Страница 21: ... 18 After reviewing the options you selected click on the Create button to initialize the new RAID volume see Figure 18 Figure 18 Creating a new RAID volume ...

Страница 22: ... 19 10 After the RAID volume is successfully initialized it should appear on the desktop Figure 19 RAID set configured ...

Страница 23: ...wo hard drives to one SeriTek 1SM2 host adapter Future SeriTek 1SM2 firmware may provide the ability to support RAID volumes that span hard drives among multiple SeriTek 1SM2 host adapters If RAID volumes span internal and external hard drives do not attempt to remove and insert external hard drives that partially support the RAID volume or data loss may occur Do Not Remove the SeriTek 1SM2 from i...

Страница 24: ...vent loss of data save your work and close associated applications before removing the external hard drive applications need to be closed since they may keep temporary working files open on the external hard drive Always unmount the volumes eject or drag the volumes to trash associated with an external hard drive before removing it Eject or drag all of the volumes associated with the hard drive s ...

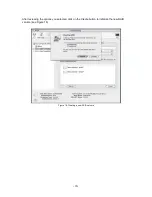
Страница 25: ...since they may keep temporary working files open on the external hard drive Always unmount the volumes eject or drag the volumes to trash associated with an external hard drive before removing it If you do not properly unmount volumes before removing the associated hard drive s a Device Removal dialog box will appear See Figure 25 This dialog box shows up as a reminder to unmount volumes properly ...

Страница 26: ...eriTek 1SM2 Connecting and Immediately Removing External Hard Drive s If you connect an external hard drive then remove it without acknowledging it has been added to the system a dialog box will appear that explains no new hard drive s were detected See Figure 27 Figure 27 Connecting and Disconnecting an External Hard Drive s ...

Страница 27: ...ect the Devices and Volumes tab early Mac OS X version or open Hardware and select PCI AGP Cards See Figure 28 Figure 28 SeriTek 1SM2 Listed Under PCI AGP Cards 3 Under PCI AGP Cards section SeriTek 1SM2 should show up as an ata card type 4 If SeriTek 1SM2 is not listed shut down your PowerBook computer and try re seating it in the CardBus slot by removing and reinserting it Repeat steps 1 through...

Страница 28: ...is included however yet No further MacOS 9 enhancements are planned My older Parallel ATA hard drives and peripherals have jumper settings However I can t find jumper settings on my new Serial ATA hard drive or peripheral How can I set it to Master or Slave is there any way to set the SCSI ID Serial ATA hard drives and peripherals are internally configured as Master drives Only one drive can be at...

Страница 29: ...pping charges will be paid by FirmTek Foreign and other shipping methods such as express shipping are available for an additional charge Write down the RMA number on the outside of the shipping container and include the following information with the shipment A description of the problem A copy of the original purchase invoice Return shipping address Contact information including daytime telephone...

Страница 30: ... or television equipment reception which can be determined by turning the equipment off and on the user is encouraged to try to correct the interference by one or more of the following measures Reorient or relocate the receiving antenna Increase the separation between equipment and receiver Connect the equipment to an outlet on a circuit different from that to which the receiver is connected Consu...

Отзывы: