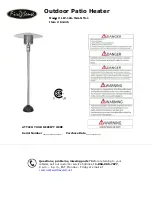
Firesense LIP-10A-TGG-NTS-1 Скачать руководство пользователя страница 7


1.

 To protect your heater from strong winds, it is best to anchor the base securely to the ground. There 

are two methods you may use to secure the base. 
 

OPTION A (for solid ground such as concrete): 


Hardware Used

: 4 - M8x110 Expandable Bolts, 4 - M8 Nut/Lock Washer/Washer 


OPTION B (for soft ground such as soil): 


Hardware Used

: 4 - Anchoring Pins 


ASSEMBLY 


Using the holes in the Base as a template, drill 

4 - 12.5-13mm diameter holes (1/2") that are 

at least 300mm (4") deep. 

Fig. 1


Then insert the Expandable Bolts (4 pcs) into 

the holes. 

Fig. 2 


Slide  the  Base  down  over  the  Expandable 

Bolts. 

Fig. 3 


Affix the Base to    the Expandable Bolts using 

the M6 Nut/Lock Washer/Washers. 

Fig. 4 


Set  the  Base  in  the  desired  location.  Insert 

Anchoring Pin through hole in Base and using 

a rubber mallet, tap the Anchoring Pin into the 
soil. 

Fig. 1 


Repeat  with  the  other  3  -  Anchoring  Pins  to 

secure the Base to the soil. 

Fig. 2


1 - A 

1 - B 

Содержание LIP-10A-TGG-NTS-1

Страница 1: ...Serial Number ___________ Purchase Date ________ Manufacturer Changzhou Wellife Furnace Co Ltd Questions problems missing parts Before returning to your retailer call our customer service hotline at 1...

Страница 2: ...bly operation and maintenance of this patio heater General safety information is presented in the first few pages and is also located throughout this manual Keep this manual for future reference and t...

Страница 3: ...3 SAFETY INFORMATION...

Страница 4: ...4 SAFETY INFORMATION...

Страница 5: ...Y PART DESCRIPTION QTY A Reflector Panel 4 pcs packed in 2 inner ctns B Reflector Center Cap 1 C Head Assembly 1 packed in 1 inner ctn D Main Post 2 E Gas Hose 1 attached to Head Assembly F Lower Post...

Страница 6: ...ot attempt to assemble this product Contact customer service for replacement parts ESTIMATED ASSEMBLY TIME 60 minutes Tools Required for Assembly NOT included Philips Head Screwdriver with Medium Blad...

Страница 7: ...Using the holes in the Base as a template drill 4 12 5 13mm diameter holes 1 2 that are at least 300mm 4 deep Fig 1 Then insert the Expandable Bolts 4 pcs into the holes Fig 2 Slide the Base down over...

Страница 8: ...er Post with the holes in the Base and insert 6 M6x12 Bolts through Lock Washers and into the holes and hand tighten Hardware Used 6 M6x12 Bolt with Lock Washer 3 Slide the Base Cover H over the Lower...

Страница 9: ...ctor Center Cap B Reflector Panels A come packaged in two brown boxes with two panels in each box Hardware for assembly is already affixed to each panel Place two panels side by side and remove the tw...

Страница 10: ...n the heater to an upright position Hardware Used 3 M8 Wing Nuts 3 M8 Washers 9 Connect the hose and regulator from natural gas company to the natural gas outlet The natural gas is obtained from your...

Страница 11: ...d marked in accordance with the specifications for gas source supplier of the U S Department of Transportation DOT or the standard for cylinders spheres and tubes for transportation of dangerous goods...

Страница 12: ...Inspect the hose assembly for evidence of excessive abrasion cuts or wear Suspected areas should be leak tested If the hose leaks it must be replaced prior to operation Only use the replacement hose a...

Страница 13: ...onnections are secure and do not leak 5 Wind velocity is below 10 mph 6 Unit will operate at reduced efficiency below 40 degrees F 7 Heater is for use outdoors outside any enclosure 8 There is adequat...

Страница 14: ...urner holes by using a heavy duty pipe cleaner Compressed air may help clear away smaller particles Carbon deposits may create a fire hazard Clean dome and burner screen with warm soapy water if any c...

Страница 15: ...press control knob for 2 3 mins Loose connection Check all fittings Igniter fails Use stick lighter to manually light Gas pressure low with valve open full Replace gas source supplier regulator New cy...

Страница 16: ...77 9a m 6 p m EST Monday Friday or email us at cservice welltraveled net REPLACEMENT PARTS LIST ASSEMBLY PART DESCRIPTION QTY A Reflector Panel 4 pcs packed in 2 inner ctns B Reflector Center Cap 1 C...

Страница 17: ...UCTIONS CONTAINED IN THIS MANUAL CAN RESULT IN SEVERE PROPERTY DAMAGE AND OR PERSONAL INJURY IN NO EVENT WILL WELL TRAVELED LIVING OR ITS DIRECTORS OFFICERS OR AGENTS BE LIABLE TO THE PURCHASER OR ANY...

Отзывы: