


- 20 -
0..9 (Numeric buttons):
The TV will jump to the
fi
le starting with the letter you input via the numeric
buttons on your remote control.
Play This (OK button)
: Plays the selected
fi
le.
Previous/Next (Left/Right buttons)
: Jumps to
previous or next
fi
le to play.
Yellow
Button: Change viewing style
BLUE:
Changes media options.
Note:
If the Viewing Style is set to Folder in Media
Browser Settings, Music folder will be displayed as
sorted and there is no need to sort
fi
les again by
pressing FAV button.
INFO
: Displays settings.
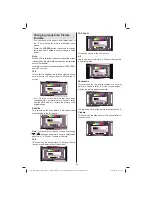
Recordings Library
IMPORTANT: To view recordings library, you should
fi
rst connect a USB disk to your TV while the TV is
switched off. You should then switch on the TV to
enable recording feature. Otherwise, recording feature
will not be available.
To view the list of recordings, select “
Recordings
Library
” and press the
OK
button. Recordings Library
will then be displayed with available recordings.
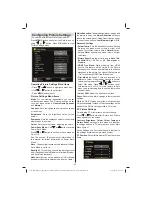
All the recordings are kept in a list in the recordings
library.
RED button (Delete)
:Erases the selected
recording.
GREEN button (Edit)
: Makes changes on the
selected recording.
BLUE button (Sort)
: Changes the order of the
recordings. You can select from a wide range of
sorting options.
OK button:
Activates play options menu:
• Play from start: Plays the recording from the
beginning.
• Resume: Recommences the recordings.
• Play from offset: Speci
fi
es a playing point.
Note: Viewing main menu and menu items will not ve
available during the playback.
(Resume): Recommences the recordings.
INFO (Details)
: Displays the short extended
programmes in detail.
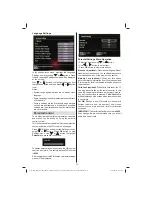
Media Browser Settings
You can set your Media Browser preferences by
using the Settings dialog. Press “ ” or “ ” button to
highlight an item and use “ ” or “ ” button to set.
View Style:
Sets default browsing mode.
Slide Show Interval:
Sets slide show interval time.
Show Subtitle:
Sets subtitle enabling preference.
Subtitle Language
: Sets the preferred subtitle
language for video
fi
les.
Subtitle Position:
Sets subtitle position as up or
down.
Subtitle Font Size:
Sets subtitle font size (max.
54pt).
Using the 3D Mode
IMPORTANT!
Read and understand the 3D mode safety
precautions carefully for your safety before using
the 3D function. Read and understand “3D Mode
and 3D Images” precautions section on page 4.
You must use 3D glasses parallel to your TV. The
•
picture may not be visible or may look dark if you
do not stay within the viewing angle.
Use 3D glasses only when watching 3D picture
•
with the correct angle. Remove the glasses in any
other case. The picture may not be visible or may be
dark if you look down or if you lie on your side while
watching 3D picture using 3D glasses.
3D picture may not be visible or become distorted
•
when watching under dense light conditions.
You can enjoy viewing 3D images on your TV by
•
wearing the supplied 3D Glasses. Note that this TV’s
3D feature works only with its speci
fi
c 3D glasses.
Connect a 3D compatible player via an HDMI cable
•
and play the 3D content. Refer to the manual of the
player for the settings of the player.
Press
•
SOURCE
button and select the connected
input.
You should select suitable 3D Mode before
•
viewing.
01_MB62_[GB]_woypbpr_IDTV_PVR_NICKEL17_5103UK_32850W_10077373_50210686.indd 20
01_MB62_[GB]_woypbpr_IDTV_PVR_NICKEL17_5103UK_32850W_10077373_50210686.indd 20
10.01.2012 13:52:00
10.01.2012 13:52:00


