


English
- 29 -
Press “ ” button to set timers on an event. Programme
timer function buttons will be displayed on the
screen.
Adding a Timer
Press
•
YELLOW
button on the remote control to
add a timer. The following menu appears on the
screen:
Channel
: Changes network type by using “ ” or “ ”.
Timer Type
: You can select timer type as Record
or Timer.
Date
: Enter a date using the numeric buttons.
Start:
Enter a starting time using the numeric
buttons.
End
: Enter an ending time using the numeric
buttons.
Duration
: Displays duration between the starting and
ending time.
Repeat
: Sets a timer to be repeated as Once, Daily or
Weekly. Use “ ” or “ ” buttons to select an option.
C h a n g e / D e l e t e
: S e t s t h e c h a n g e / d e l e t e
permission.
Playback
: Sets the playback permission and parental
settings.
Press
•
GREEN
button to save the timer. Press
RED
button to cancel.
Change/Delete:
Controls parental settings on timers.
Editing a Timer
Select the timer you want to edit by pressing “
•
”
or “ ” button.
Press
•
GREEN
button. Edit Timer menu screen will
be displayed.
When
fi
nished with editing, press
•
GREEN
button to
save. You can press
MENU
button to cancel.
Deleting a Timer
Select the timer you want to delete by pressing “
•
” or “ ” button.
Press
•
RED
button.
Select
•
YES
by using “ ” or “ ” buttons to delete the
timer. Select
NO
to cancel.
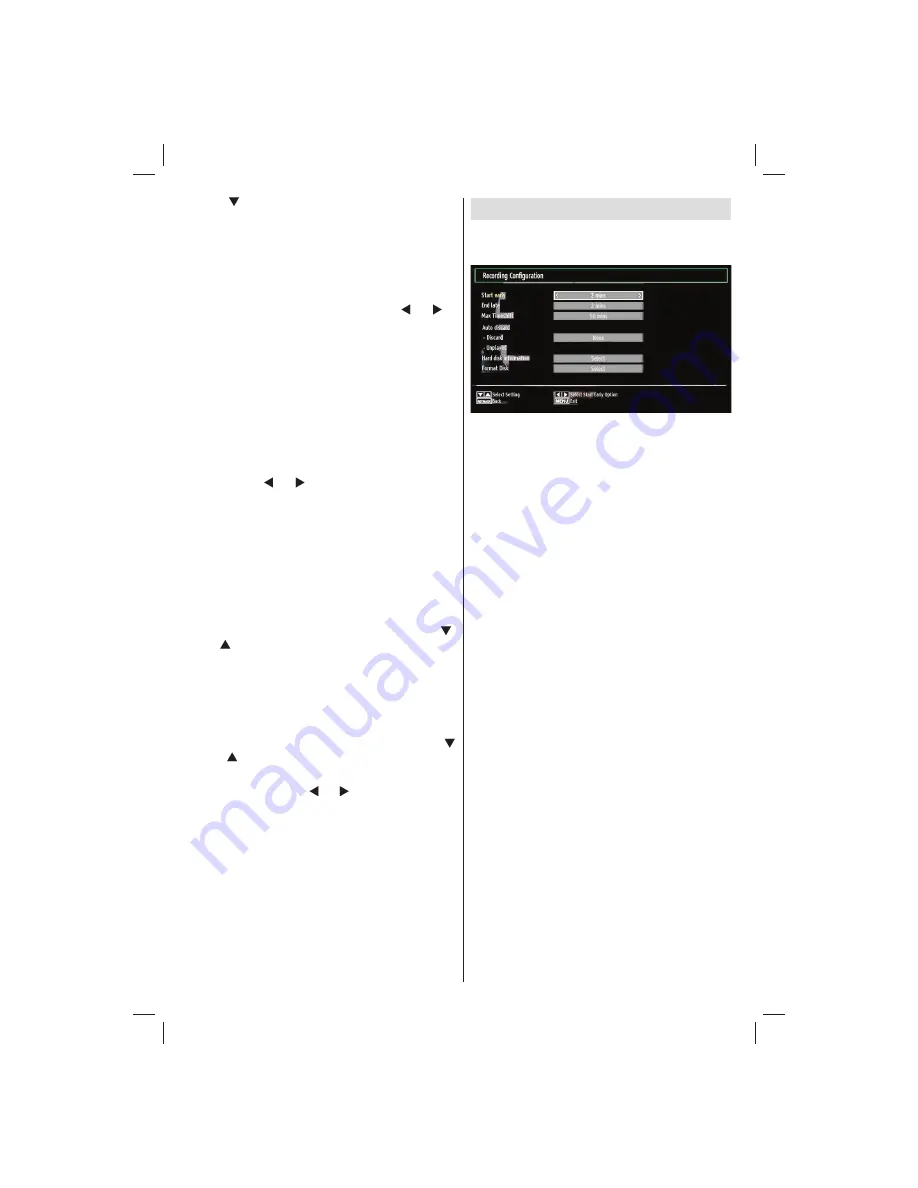
Recording Con
fi
guration
Select Recording Con
fi
guration item in the Settings
menu to con
fi
gure recording settings. The following
menu is displayed for recording con
fi
guration.
The following options are available for adjustments:
Start Early (*)
You set recording timer’s starting time to start earlier
by using this setting.
(*) Available only for EU country options.
End Late (*)
You set recording timer’s end time to end later by
using this settings.
(*) Available only for EU country options.
Max Timeshift
This setting allows you to set the maximum time
allowed for timeshifting. Duration options are
approximate and can change accordingly, depending
on the broadcast received.
Format Disk
IMPORTANT: Note that ALL the data stored on the
USB disk will be lost and then the disk format will be
converted to FAT32 if you activate this feature.
•If you want to delete all
fi
les on the connected USB
hard disk drive or memory stick, you can use Format
Disk option.
• Also, if your USB disk malfunctions, you can try
formatting the USB disk. In most cases formatting
the USB disk will restore normal operation; however,
ALL the data stored on the USB disk will be lost in
such a case.
• Press
OK
button while the Format Disk option
is highlighted. A menu will appear on the screen,
requiring you to enter a pin number. If you have not
changed the pin number, the factory default is 0000.
After you enter the pin, a pop-up menu appears on
the screen to ensure that the hard disk should be
formatted, select “YES” and press OK to format the
hard disk. Select “NO” and press OK to cancel. Ensure
you back up important recordings before you format
the USB disk unit.
A01_MB62_[GB]_woypbpr_DVBTC_PVR_NICKEL17_5103UK_26965WLED_10079350_50220218.indd 29
A01_MB62_[GB]_woypbpr_DVBTC_PVR_NICKEL17_5103UK_26965WLED_10079350_50220218.indd 29
10.05.2012 08:55:12
10.05.2012 08:55:12


