


English
- 14 -
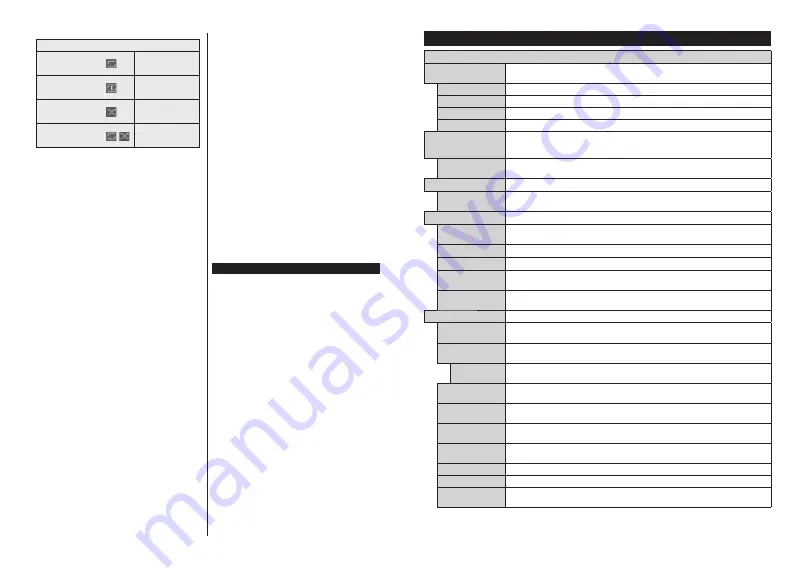
Loop/Shuffle Mode Operation
Start playback and activate
All files in the list will be
continuously played in
original order
Start playback and activate
The same file will be
played continuously
(repeat)
Start playback and activate
All files in the list will be
played once in random
order
Start playback and activate
,
All files in the list will be
continuously played in
the same random order
To use the functions on the information bar highlight the
symbol of the function and press
OK
. To change the
status of a function highlight the symbol of the function
and press
OK
as much as needed. If the symbol is
marked with a red cross, that means it is deactivated.
Custom Boot Up Logo
You can personalize your TV and see your favourite
image or photo on the screen each time your TV boots
up. To do this, copy your favourite image files into a
USB disk and open them in the
Media Browser
. Select
USB input from the
Sources
menu and press
OK
.
When you have chosen the desired image, highlight
it and press
OK
to view it in full screen. Press the
Info
button, highlight the gear wheel symbol on the
information bar and press
OK
. Select
Options
and
press
OK
to enter.
Set Boot Logo
option will be
available. Highlight it and press
OK
again to choose the
image as custom boot logo. A confirmation message
will be displayed. Select
Yes
and press
OK
again. If
the image is suitable
(*)
you will see it on the screen
during the TV’s next boot up.
Note:
If you perform a
First Time Installation
the TV will
return to using the default logo, if any.
(*)
Images should be in jpeg file formats. Only files with sizes
no greater then 4MB are supported. CEC
This function allows to control the CEC-enabled
devices, that are connected through HDMI ports by
using the remote control of the TV.
The
CEC
option in the
Settings>System>Device
Settings
menu should be set as
Enabled
at first. Press
the
Source
button and select the HDMI input of the
connected CEC device from the
Sources List
menu.
When new CEC source device is connected, it will be
listed in source menu with its own name instead of
the connected HDMI ports name(such as DVD Player,
Recorder 1 etc.).
The TV remote is automatically able to perform the
main functions after the connected HDMI source has
been selected. To terminate this operation and control
the TV via the remote again, press and hold the “0-
Zero” button on the remote control for 3 seconds.
You can disable the CEC functionality by setting the
related option under the
Settings>System>Device
Settings
menu accordingly.
The TV supports ARC (Audio Return Channel). This
feature is an audio link meant to replace other cables
between the TV and an audio system (A/V receiver or
speaker system).
When ARC is active, the TV will mute its other audio
outputs, except the headphone jack, automatically
and volume control buttons are directed to connected
audio device. To activate ARC set the
Sound Output
option in the
Settings>Sound
menu as
HDMI ARC
.
Note:
ARC is supported only via the HDMI2 input.
System Audio Control
Allows an Audio Amplifier/Receiver to be used with the
TV. The volume can be controlled using the remote
control of the TV. To activate this feature set the
Sound Output
option in the
Settings>Sound
menu
as
HDMI ARC
. When
HDMI ARC
option is selected,
CEC
option will be set as
Enabled
automatically, if it
is not already set. The TV speakers will be muted and
the sound of the watched source will be provided from
the connected sound system.
Note:
The audio device should support System Audio Control
feature.
E-Manual
You can find instructions for your TV’s features in the
E-Manual.
To access the E-Manual, enter
Settings
menu, select
Manuals
and press
OK
. For quick access press
Menu
button and then
Info
button.
By using the directional buttons select a desired
category. Every category includes different topics.
Select a topic and press
OK
to read instructions.
To close the E-Manual screen press the
Exit
or
Menu
button.
Note:
Depending on model, your TV may not support this
function. The contents of the E-Manual may vary according
to the model.
English
- 15 -
Settings Menu Content
Picture Menu Content
Mode
You can change the picture mode to suit your preference or requirements. Picture mode can
be set to one of these options:
Cinema
,
Game
(optional),
Sports
,
Dynamic
and
Natural
.
Contrast
Adjusts the light and dark values on the screen.
Brightness
Adjusts the brightness values on the screen.
Sharpness
Sets the sharpness value for the objects displayed on the screen.
Colour
Sets the colour value, adjusting the colours.
Energy Saving
For setting the
Energy Saving
to
Custom
,
Minimum
,
Medium
,
Maximum
,
Auto
,
Screen Off
or
Off
.
Note:
Available options may differ depending on the selected
Mode
.
Backlight
This setting controls the backlight level. The backlight function will be inactive if the
Energy Saving
is set to an option other than
Custom
.
Picture Zoom
Sets the desired image size format.
Picture Shift
This option may be available depending on the
Picture Zoom
setting. Highlight and
press
OK
, then use directional buttons to shift the picture upwards or downwards.
PC Position
Appears only when the input source is set to VGA/PC.
Autoposition
If the image is not centered in VGA mode use this option to automatically adjust the
position of the image. Press
OK
to start the auto adjustment.
H Position
This item shifts the image horizontally to the right hand side or left hand side of the screen.
V Position
This item shifts the image vertically towards the top or bottom of the screen.
Dot Clock
Dot Clock adjustments correct the interference that appear as vertical banding in dot
intensive presentations like spreadsheets or paragraphs or text in smaller fonts.
Phase
Depending on the input source(computer etc.) you may see a hazy or noisy picture on
the screen. You can use phase to get a clearer picture by trial and error.
Advanced Settings
Dynamic
Contrast
You can change the dynamic contrast ratio to desired value.
Colour Temp
Sets the desired colour temperature value.
Cool
,
Normal
,
Warm
and
Custom
options
are available.
White Point
If the
Colour Temp
option is set as
Custom
, this setting will be available. Increase the
‘warmth’ or ‘coolness’ of the picture by pressing Left or Right buttons.
Blue Stretch
White colour enhancement function that makes white colour more cooler in order to
make more bright picture. Set as
On
to enable.
Micro Dimming
Low
,
Medium
,
High
and
Off
options are available. While
Micro Dimming
is active, it
will enhance contrast locally for each defined zone.
Noise Reduction
Low
,
Medium
,
High
and
Off
options are available. If the signal is weak and the picture
is noisy, use the
Noise Reduction
setting to reduce the amount of noise.
Film Mode
Films are recorded at a different number of frames per second to normal television programmes.
Turn this feature on when you are watching films to see the fast motion scenes clearly.
Skin Tone
Skin tone can be changed between -5 and 5.
Colour Shift
Adjust the desired colour tone.
Colour Tuner
Opens colour tuner settings. Set the
Colour Tuner
as enabled to adjust the
Hue
,
Colour
and
Brightness
values manually.


