F.
E.
C.
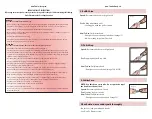
Nail Heads (Recommended Speed)
B.
A.
NOTE: Heads that are nicked, worn, or broken could
cause damage to nails and should be replaced.
Heads last through several sessions depending on frequency of use and size of area.
Replace heads as needed.
Visit www.FlawlessBeauty.com to purchase replacement heads.
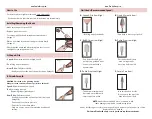
B. Grind & Smooth (Low)
A. Shape & File (Low/High)
• Can help to remove gel polish
D. Polish Prep (Low/High)
• This wider head is best
used on larger nails
• Last step before polish
D.
C. Buff & Shine (Low/High)
• Can be used to buff gel
polish or unpolished nails
• Leaves your nail with a
natural shine
F. Cuticle Care (Low)
E. Polish Prep (Low/High)
• This narrow attachment is
best used on smaller nails
• Last step before polish
• Speed: Recommended Low or High Speed
• For: Filing unpolished nails
• How To Use: Fully insert head
• Gently move over the tip of the nail to shape (Image 9)
How to Use
Image 9
Image 10
For best results, use light pressure and only on dry nails.
• If you experience a sensitive reaction, discontinue use immediately.
www.FlawlessBeauty.com
A. Shape & File
CAUTION: This head uses a grinding motion.
Always use with extreme caution especially on thin nails.
Speed: Recommended Low Speed
For: Removing gel polish
Removing ridges from the nail
How To Use: Fully insert head
• Gently move over the nail until polish is removed
(Image 10)
• Do not apply excessive pressure
• Do not hold in the same place
• Only use every 2 weeks to maintain a healthy nail
surface
B. Grind & Smooth
www.FlawlessBeauty.com
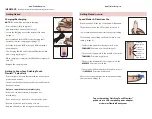
• Make sure the unit is turned OFF.
• Remove protective cover.
• To remove, pull the head straight out from the unit
(Image 7).
• Place a new head into the unit and press down firmly
(Image 8).
• Check that the new head is firmly in place (not loose or
shaky) before turning the unit on.
Installing/Removing the Heads
Image 7
Lorem ipsum
Image 8
• For filing unpolished nails
• Use this head on its side.
• Do not push the tip of the
head into the nail bed.


