Image 5
Reverse,
Low Speed
Reverse,
High Speed
Forward,
High Speed
Forward,
Low Speed
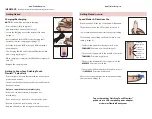
Charging/Recharging
NOTE: The unit will operate while charging.
• Prior to first use, fully charge unit
(approximately 2 hours to fully charge).
• Locate the charging port at the bottom of the unit
(Image 1).
• Insert small end (micro USB) of the charging cable
(included) into the charging port (Image 2).
• Insert the large end (USB-A) into any USB compliant
power adapter.
• The charging LED Indicator Light will illuminate while
unit is charging (Image 3).
• When charging is complete, the LED Indicator Light will
turn OFF.
• Remove the charging cable.
Getting to Know Your Finishing Touch
Flawless™ Salon Nails
• Prior to first use, become familiar with the heads, speed
modes, and directions.
• The unit has both Low/High speed modes and Forward/
Reverse directions.
• Only use on nails that are completely dry.
• If there is a sensitive reaction, discontinue use
immediately.
• Use on nails only – do not use on other body parts.
• Replace protective cover when not in use.
• Replace all heads to the storage case when not in use.
IMPORTANT:
Read all instructions and warnings prior to use.
Image 6
DUST
ROTATION
Image 4
Image 3
Getting Started
Lorem
Image 2
Charging
Cable
(included)
www.FlawlessBeauty.com
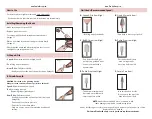
Speed Modes & Directions Use
• When switched ON, the top of the unit will illuminate.
• The horizontal line is the OFF position for the unit.
• It is recommended to always start on the Low setting.
• Turn the unit on by sliding the Power Switch to Low
setting (Image 4).
º The first click upward to the single circle is the
FORWARD Direction, Low Speed (Image 5).
º The second click upward to the double circles is the
FORWARD Direction, High Speed.
º The first click downward to the single circle is the
REVERSE Direction, Low Speed.
º The second click downward to the double circles is
the REVERSE Direction, High Speed.
• Choose the setting that directs nail dust/debris away
from your hand (Image 6).
www.FlawlessBeauty.com
Getting Started
(continued)
To purchase other Finishing Touch Flawless™
products or a USB compliant power adapter,
visit www.FlawlessBeauty.com
Image 1


