to make a proper reset.
no
Wait 10 seconds before re-insert the battery again
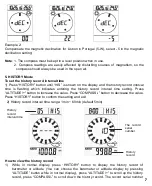
scroll up the history record, press “COMPASS/-” to scroll down the history record. Press
“HISTORY” button again to exit the history mode and return the normal display. While in
history mode, “HIS” will be displayed on the temperature reading area(4), the history data
sets number will be displayed at the center of compass.
- While in normal display, press “HISTORY” button for 2s to enter store data interval setting.
Press “AL” button to increase the value. Press “COMPASS/-” button to decrease
the value. Press ”HISTORY” button to confirm the setting and exit
- The program mode can be exited at any time by pressing ‘HISTORY” button.
1.3 LCD display
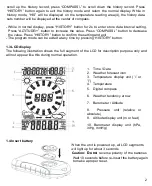
The following illustration shows the full segment of the LCD for description purpose only and
will not appear like this during normal operation.
1. Time / Date
2. Weather forecast icon
3. Temperature display unit (
℃
or
℉
)
4. Temperature
5. Digital compass
6. Weather tendency arrow
7. Barometer / Altitude
8. Pressure unit (relative or
absolute)
9. Altitude display unit (m or feet)
10. Barometer display unit (hPa,
inHg, mmHg)
1.4 Insert battery
When
the
unit
is
powered
up,
all
LCD
segments
will
light
up
for
about
3
seconds
Caution:
Do
Do not
reverse
polarity
of
the
batteries
2


