2.
Select the Alarms tab.
3.
Make changes to these fields:
• Standard (ISO, NAS or SAE)
• Alarm Direction (Clean to Dirty or Dirty to Clean)
• Code Limits (4, 6, 14 or 21 µm) If NAS is selected as the Standard, only the code limits for 6–
14 µm and 14–21 µm will be available.
4.
To open the contact when an alarm occurs, select Open Contact on Alarm.
5.
To close the contact when an alarm occurs, do not select Open Contact on Alarm.
6.
To save the settings to the instrument internal memory, select Save Settings to Permanent Flash.
Note: If this option is not selected, the instrument still operates with the new settings. If the power to the
instrument is lost, the new settings are lost and the instrument goes back to the previous settings.
7.
Click OK.
Configure the general settings
1.
From the main menu, select the Edit Settings icon.
2.
Select the General tab.
3.
Make changes to these fields.
• Display ISO Codes (All Codes or Highest Code)
• Display NAS Codes (All Codes or Highest Code)
• Display SAE Codes (All Codes or Highest Code)
4.
To calculate average counts, select Calculate Average Counts and adjust the number of samples.
5.
To change the output folder, click the button next to the Log File Output Folder field and select
the desired folder. As an option, move a copy of the output folder into the text box.
6.
Click OK.
Data management
Load the settings
1.
From the main menu, select the Load Settings icon.
2.
Enter a location and a file name.
3.
Click Open.
Save the settings to a computer
1.
From the main menu, select the Save Settings icon.
2.
Enter a location and a file name.
3.
Click Save.
To see the current data
1.
From the main menu, select the Current Data tab.
2.
Click a down arrow (next to each record) to see the particle count data, average particle count
data and temperature.
3.
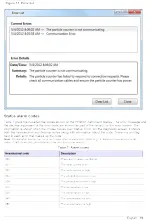
To see the errors for an individual data record, move the cursor over the Status text that is
located on the right side of the screen. A window opens and shows the error code and a text
description of the errors.
14
English
Содержание PC9001
Страница 1: ......
Страница 5: ......
Страница 6: ......
Страница 7: ......
Страница 10: ......
Страница 12: ...P C 9 0 0 1...
Страница 14: ...P C 9 0 0 1...
Страница 15: ...P C 9 0 0 1...
Страница 16: ......
Страница 18: ......


