69
I.4 Create & Upload Label to TSC Printer
I.4.1 Selecting the Correct Edition for Bartender Software
1.
To enable label uploading from computer to TSC printer, it is necessary to run Bartender as Automation
or Enterprise Automation edition. Procedures as below: -
2.
Install Bartender Software to the computer. The Bartender software usually comes with the TSC printer.
If not, please contact your printer supplier.
3.
Run Bartender, then click on Help, then click on Edition Selection.
4.
Select Enterprise Automation or Automation, then click OK.
5.
At this point, the correct Bartender edition is selected.
I.4.2 Adding Information from Instrument to Label & Uploading to a TSC Printer
The below procedures are based on Bartender Label Software. If a different label creating software is used,
contact your label software dealer for more details if in doubt.
1.
Set the label printer as the default printer of
your computer.
2.
Create the foundation of a label by Bartender.
All information to be obtained from instrument
should be added afterward.
3.
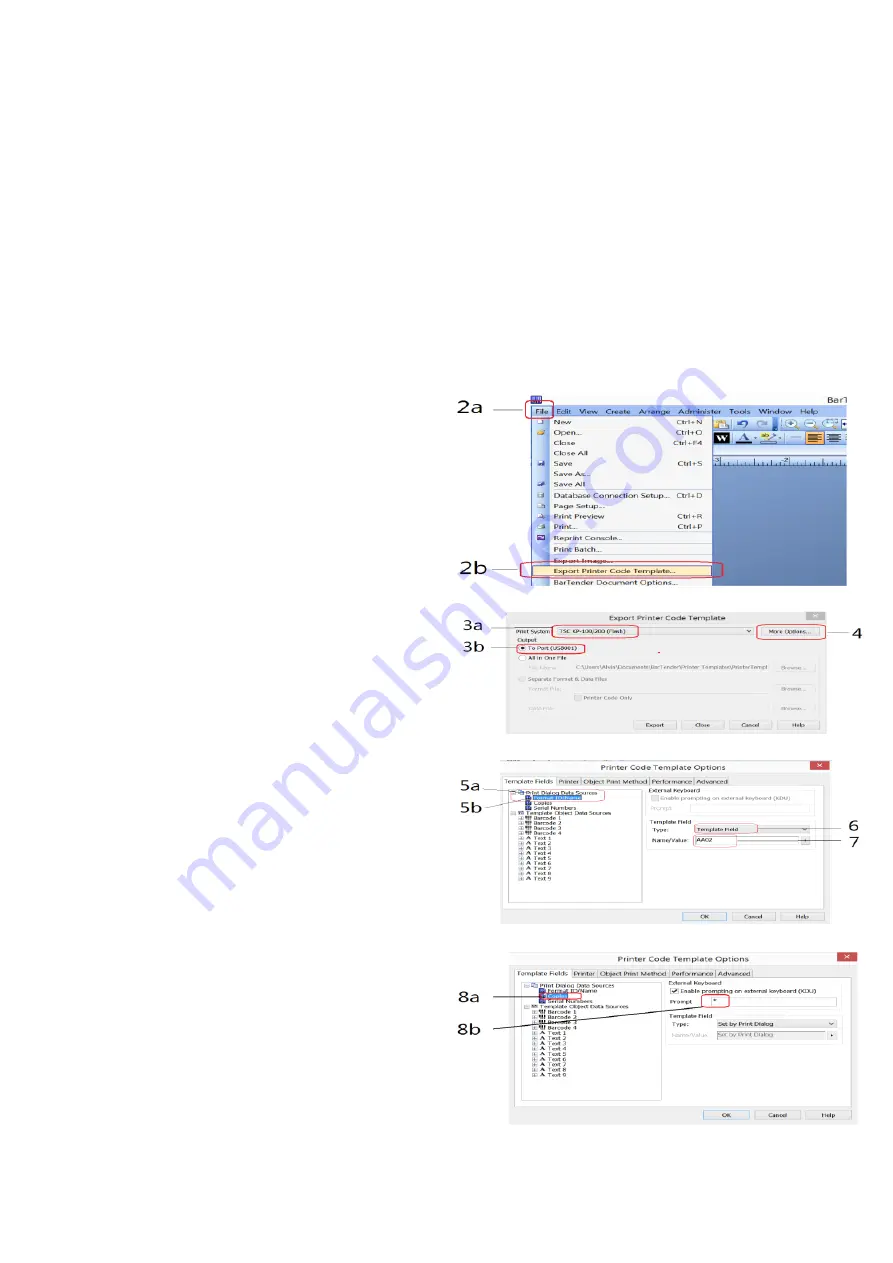
Once the label foundation has been
completed, (a) click on File and (b) select
Export Printer Code Template.
4.
On Print System, (a) select TSC KP-100/200
(Flash) and (b) select to Port.
5.
Click More Option.
6.
Then (a) click Print Dialog Data Sources, then
(b) click on Format ID/Name.
7.
On Template Field, select Template Field for
Type.
8.
Input the correct label file name on
Name/Value. Refer to paragraph
18.1
for the
valid file name format. (a) Click Copies, check
KDU, and (b) input asterisk (*) on Prompt box.
9.
Below procedures explain how to edit
information to be obtained from instrument.
10.
Click Template Object Data Sources and
select the object which information from
instrument (net, gross, tare weight, and
product code) to be sent and printed on the
label.


