24
en
overheating of the power tool and the materials being
sanded, empty the dust collector/container in time,
observe the material manufacturer’s working instruc-
tions, as well as the relevant regulations in your country
for the materials being worked.
Operating Instructions.
The
self-start lock
prevents the cordless straight
grinder from automatically restarting again after a
power interruption, e.g., after changing the battery. In
this case, switch the power tool off, remove it from the
workpiece and check the application tool. Afterwards,
switch the power tool on again.
Use a collet that fits the grinding accessory.
Insert the clamping shaft of the grinding accessory to
the stop into the collet chuck.
Observe the maximum permitted projecting shaft
length (a) of the grinding accessory according to the
manufacturer’s instructions (see page 7).
Move the power tool back and forth applying uniform
pressure, so that the workpiece surface does not
become too hot.
For best performance, operate the power tool only
with the B18A.173 battery. When using other batter-
ies, the functionality can be limited.
Handling the battery.
Operate and charge the battery only within the battery
operating-temperature range of 0°C – 45°C (32°F –
113°F). At the beginning of the charging procedure, the
battery temperature must be within the battery operat-
ing-temperature range.
The real percentage of the battery charge condition is
only indicated when the power tool motor is stopped.
The electronics automatically switch off the motor
prior to the battery being deep discharged.
Repair and customer service.
When working metal under extreme oper-
ating conditions, it is possible for conductive
dust to settle in the interior of the power tool. Blow
out the interior of the power tool via the ventilation
slots frequently with dry and oil-free compressed air.
When working gypsum-containing materials, dust can
settle within the power tool and switch element, which
can harden in connection with humidity. This can
impair the switching mechanism. Blow out the interior
of the power tool via the ventilation slots and the
switch element frequently with dry and oil-free com-
pressed air.
If the supply cord of this power tool is damaged, it must
be replaced by a specially prepared cord available
through the FEIN customer service centre.
The current spares parts list for this power tool can be
found on our website at www.fein.com.
If required, you can change the following parts your-
self:
Application tools, collet
Warranty and liability.
The warranty for the product is valid in accordance
with the legal regulations in the country where it is mar-
keted. In addition, FEIN also provides a guarantee in
accordance with the FEIN manufacturer’s warranty dec-
laration.
The delivery scope of your power tool may include
only a part of the accessories described or shown in this
Instruction Manual.
Declaration of conformity.
FEIN declares itself solely responsible for this product
conforming with the relevant provisions given on the
last page of this Instruction Manual.
Technical documents at: C. & E. Fein GmbH,
D-73529 Schwäbisch Gmünd
Environmental protection, disposal.
Packaging, worn out power tools and accessories
should be sorted for environmental-friendly recycling.
Dispose of batteries only when discharged.
For batteries that are not completely discharged, insu-
late the terminals with tape as a protective measure
against short-circuiting.
Selection of accessories (see page 7).
Use only original FEIN accessories. The accessories
must be intended for the power tool type.
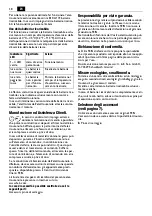
A
Collet
LED indica-
tor
Meaning
Activity
1 – 4 green
LED
Percentage of
charge condi-
tion
Operation
Continu-
ous red
light
Battery is
almost empty
Charge battery
Red flash-
ing light
Battery is not
ready for
operation
Bring the battery into
the battery operating-
temperature range,
then charge
Содержание AGSZ 18-280 BL SELECT
Страница 1: ...AGSZ18 280BL 7 123 AGSZ18 280LBL 7 123 AGSZ18 90LBL 7 123 ...
Страница 3: ...3 6 5 9 4 7 10 8 8 11 9 ...
Страница 4: ...4 2 1 ...
Страница 5: ...5 2 3 1 17 mm 13 mm 4 17 mm 13 mm ...
Страница 6: ...6 2 2 1 17 mm 13 mm 3 17 mm 13 mm ...
Страница 7: ...7 A ...
Страница 8: ...8 1 2 ...
Страница 10: ...10 a ...
Страница 11: ...11 ø 6 mm 17 mm 13 mm ...


