Page 10
Microscope Operation:
Adjust the Aperture Diaphragm
The aperture diaphragm decides the numerical aperture (NA) of
the illumination. If the NA of the illumination matches the NA of
the objective, the best resolution is obtained with increased
contrast and depth of field.
Adjusting the aperture diaphragm is the same as adjusting the
field diaphragm.
Adjust the size of the aperture diaphragm for comfortable
viewing.
Using the Simple Polarizing Kits
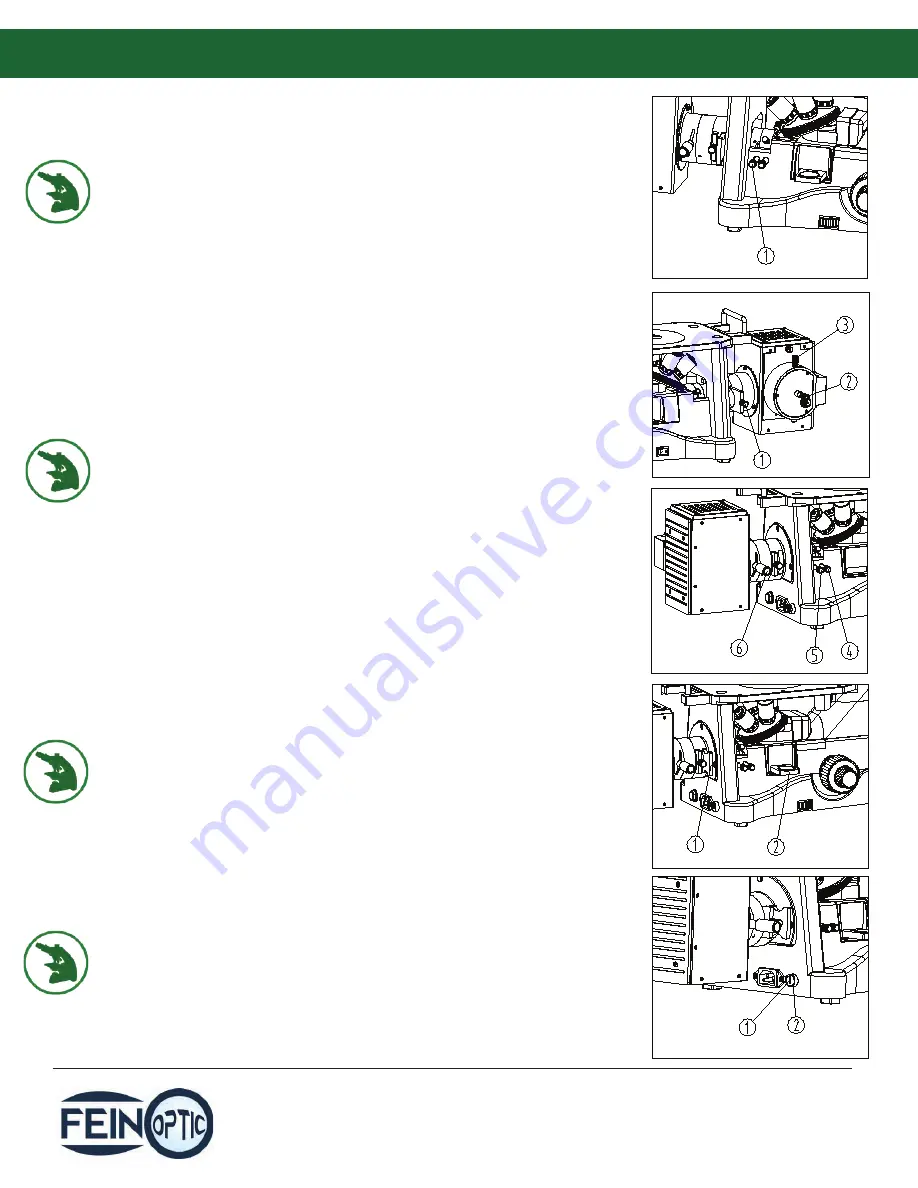
The simple polarizing kit includes the polarizer (1) and the 360˚
rotating analyzer (2).
When using the polarizer remove the color filter from the light
path.
Dialing the turntable on the 360˚ rotating analyzer can change the
orthogonal states of the polarized light.
When the turntable on the analyzer is set to “0” the analyzer and
polarizer are in the orthogonal state.
Center the Light Filament
Adjust the filament to the center of the field of view for even
illumination. Shift the ground glass slider (1) out of the optical
path until it clicks.
Set the field diaphragm lever (4) and the aperture diaphragm lever
(5) to the left. Place a white piece of paper on the stage. Rotate the
nosepiece without an objective in it into the light path.
Adjust the halogen bulb horizontal adjustment screw (2) and the
vertical adjustment screw (3) to center the light. Adjust the focus
lock handle (6) to get a clear filament image, then center it in the
field of view.
Pull the ground glass slider back into the light path and put a
sample on the stage, adjusting the focus knob for a clear image.
Observe through the eyepieces and once a clear, focused image is
obtained, lock the focus lock handle (6). Adjust the field
diaphragm (4) and aperture (5) for comfortable observation.
Replacing the Fuse
Before replacing the fuse, make sure the power is switched to “O”
off and unplug the microscope. Use a screwdriver to remove the
fuse (1) from the fuse holder (2) and replace it with a new one.
Fuse: 250V, 3A


