Feider Machines FBVE3000 Скачать руководство пользователя страница 13

Operation instructions
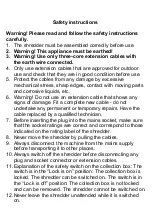
Warning

1.

Before starting the machine, look into the feeding chamber to make sure that it is empty.

2.

Keep your face and body away from the feed intake opening.

3.

Do not allow your hands or any other part of your body or your clothing to get inside the

feeding chamber, discharge chute, or near any moving part.

4.

Keep proper balance and footing at all times. Do not overreach. Never stand at a higher

level than the base of the machine when feeding material into it.

5.

Always keep the discharge zone clear when operating this machine;

6.

When feeding material into the machine be extremely careful that pieces of metal, rocks,

bottles, tins or other foreign objects are not included.

7.

If the cutting mechanism strikes any foreign objects, or if the machine should start making

any unusual noise or vibration, shut off the motor and allow the machine to stop. Unplug

the connection cable (to disconnect the electric unit from the power supply) and take the

following steps:

a)

inspect for damage;

b)

check for and tighten any loose parts;

c)

have any damaged parts replaced or repaired with parts having equivalent

specifications.

8.

Do not allow processed material to build up in the discharge zone; this may prevent proper

discharge and can result in kickback of material through the feed intake opening.

9.

If the machine becomes clogged, shut off the motor and unplug the connection cable (to

disconnect the electric unit from the power supply) before clearing any debris. Keep the

motor (ventilation slots) clear of debris and other accumulations to prevent damage to the

motor or possible fire.

10. Keep all guards and deflectors in place and in good working condition.

11. Do not transport this machine while the motor is running.

12. Shut off the motor and unplug the connection cable (to disconnect the electric unit from the

power supply) whenever you leave the work area.

13. Do not tilt the machine while the motor is running.

14. When using the device the collection box must be securely in position and the safety switch

is locked.

Feeding

Feed the material to be chopped into the right side of the feeding tunnel. The material is

automatically pulled in by the chopping knife.

Caution! Longer material standing out from the machine could lash out when being pulled

in by the chopping knife! Keep a safety distance!

Warning! Always use the pusher (Fig.11) if you try to push the material into the feeding

tunnel. Do not use your hands directly! Keep the pusher well after use.

Only insert as much material as will not block up the feeding tunnel.

Chop garden waste that has been stored for some days and is wilted and damp alternately with

branches.

This will prevent the chopping knife from getting blocked up.

Do not fill into the shredder any soft material such as kitchen waste instead of compositing it.

Widely branched material with leaves must be completely chopped before any new material is

fed in.

Take care that the chopped material can freely fall from the discharge chute – danger of backing

up!

The ventilation slots must not be covered by the waste bag or the chopped material.

Содержание FBVE3000

Страница 1: ...ORIGINAL INSTRUCTIONS INSTRUCTION MANUAL SILENT SHREDDER FBVE3000 READ THIS INSTRUCTIONS MANUAL BEFORE USE THE TOOL FEIDER 32 rue Aristide Berg s ZI 31270 Cugnaux France Made in PRC...

Страница 2: ......

Страница 3: ......

Страница 4: ......

Страница 5: ......

Страница 6: ...ons Keep bystanders away Danger Rotation blades Keep hands and feet out of openings while machine is running Wear eye and ear protection Caution Remove plug from the mains immediately if cable is dama...

Страница 7: ...temporary repairs Have the cable replaced by a qualified technician 7 Before inserting the plug into the mains socket make sure that the socket ratings are correct and correspond to those indicated o...

Страница 8: ...fter switching off 20 Always switch off the shredder unplug the connection cable and wait until the chopping knife comes to stop before carrying out any maintenance or cleaning work 21 Be careful when...

Страница 9: ...the shredder until such defects have been rectified 33 Replace any worn out or damaged parts for your safety Use original spare parts only Parts not produced by the manufacturer may fit poorly and ca...

Страница 10: ...1 Overload protector 2 On off switch 3 Reversing switch 4 Feeding tunnel 5 Electric plug 6 Adjuster 7 Collection box 8 Base frame 9 Front wheel 10 wheel 11 Safety switch Technical data Mains voltage f...

Страница 11: ...bag 1x Adjuster 1 Take all parts out of the package Be sure four protruding supports in the bottom of the motor unit pass through four notches in the upper face of the base frame Fig 3 2 Slide the co...

Страница 12: ...tion A Fig 1 A The reversing switch has been set to position A The chopping knife will pull in the material and chop it The switch is set to position A after the manufacturer s test Position B Fig 1 B...

Страница 13: ...r supply before clearing any debris Keep the motor ventilation slots clear of debris and other accumulations to prevent damage to the motor or possible fire 10 Keep all guards and deflectors in place...

Страница 14: ...opping knife is in contact with the counter knife especially when shredding soft materials or wet woody branches When you use strong and dry materials the counter knife should have a corresponding dis...

Страница 15: ...tenance and Storage Take care of your machine and clean it regularly to obtain long lasting efficiency and performance Keep the air vents clean and free from dust Use only a warm damp cloth and a soft...

Страница 16: ...l facility Carton packaging and electric equipment can be taken to a corresponding recycling materials receiving depot or be conveniently disposed of through the manufacturer for instance With your co...

Страница 17: ......

Страница 18: ...L771 04 Location plate 1 14 MK L771 02 Lower shell 1 15 GB T894 1 1986 Circlip for shaft 8 2 16 GB845 85 Screw ST4 2X20 F 8 17 GB95 85 Flat grommet 6 2 18 GB93 87 Spring grommet 6 2 19 GB70 85 Screw M...

Страница 19: ...L771 14 Safety switch plate 1 40 GB T846 85 Screw ST4 2X16 1 41 MK L17 17 Wheel 2 42 MK L771 16 wheel shaft 2 43 GB T96 85 Grommet 8 2 44 GB93 87 Spring grommet 8 2 45 GB70 85 Screw M8x70 2 46 MK L17...

Страница 20: ...ansposing it Also complies with the following European directives EMC Directive 2014 30 EU ROHS Directive 2011 65 EU EU 2015 863 Noise directive 2004 14 EC and 2005 88 EC Sound power level measured 86...

Страница 21: ...the user manual Due to our policy of continuous product improvement we reserve the right to alter or change specifications without notice Consequently the product may be different from the information...

Страница 22: ...before dropping off the machine Go to the repair station with the complete machine packed accompanied by the purchase invoice and the station support sheet downloadable after the service request is c...

Страница 23: ...ecessary for repairs and more generally the costs related to the immobilization of the product The costs of a second opinion established by a third party following an estimate by a SWAP Europe repair...

Отзывы: