background image

SECTION 1

SAFETY PRECAUTIONS

HYDRAULICS

Hydraulic fluid operates under high temperatures.
Avoid contact with piping, hoses or cylinders to pre-
vent burns.

Never use hands to check for leaks. Hydraulic fluid
escaping under pressure may cause injury.

1.

2.

In case of injury seek proper medical treatment im-
mediately.

3.

FIRE PROTECTION

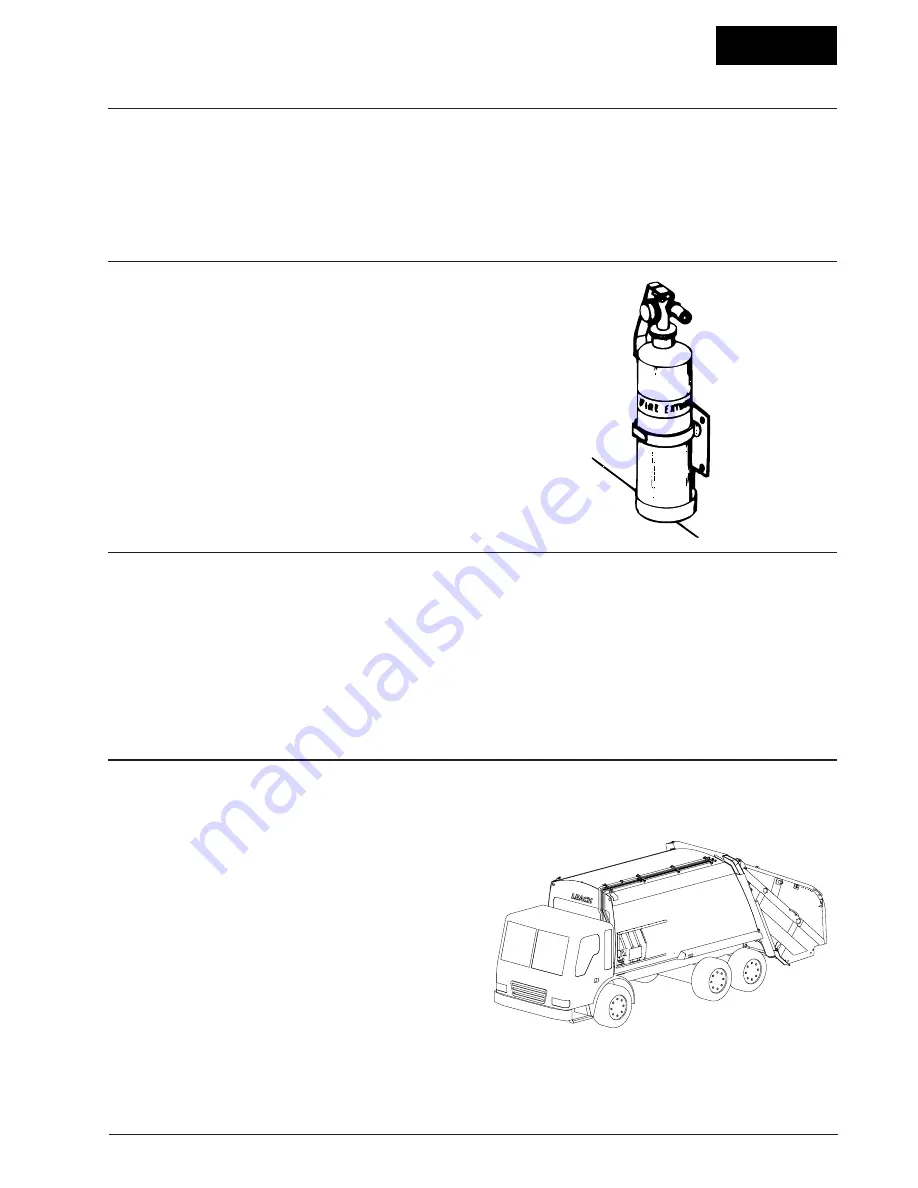
Keep a fire extinguisher accessible at all times, as
recommended by the Bureau of Motor Carrier
Safety.

Never use lighted smoking materials, open flame
or sparks around when working with flammable
materials such as fuel tanks or storage batteries.

Never have an open flame as a light source.

Never load ashes or other materials which might
be smoldering. These materials could ignite refuse
in the packer body.

1.

2.

3.

4.

HOUSEKEEPING

Good housekeeping habits are a major factor in acci-
dent prevention.

Keep handrails and steps clean and free of grease
or debris.

Do not store brooms or other equipment where they
could inadvertently activate the packer controls.

1.

2.

Rubbish, scrap paper and litter are highly combus-
tible. Such material should be stored in metal con-
tainers entirely clear of sparks and flames.

3.

SHUTDOWN

Put all controls in neutral.

Set parking brake.

Disengage PTO.

Shut off engine.

Shut off solenoid dashboard switch.

Remove key.

Lock vehicle.

1.

2.

3.

4.

5.

6.

7.

1-5

Содержание LEACH 2R-III

Страница 1: ...2R III SERVICE MANUAL Over Serial Number 30000 BUILDING THE BEST A Subsidiary of Federal Signal Corporation ...

Страница 2: ......

Страница 3: ...REPLACEMENT HEREIN NO OTHER PERSON FIRM OR CORPORA TION CAN BIND THE COMPANY TO ANY WARRANTY OTHER THAN HEREIN ABOVE STATED To validate the new unit warranty an authorized Leach Distributor must have completed a pre delivery inspection before the unit is placed into service and the warranty registration form signed by both the customer and the distributor must be submitted to the Leach Service De ...

Страница 4: ...the safe operation of the unit This manual was produced with the intention of providing clear concise instructions for the proper operation and servicing of your refuse packer It was produced with the latest informa tion available at the time of publication We do however reserve the right to redesign and or discontinue the manufacture of parts components or assemblies at any time Leach Company has...

Страница 5: ...ainer to The Packer 3 13 Using a Winch or Container Lift Cylinder 3 14 Using a Container Push Bar 3 15 Packing The Load 3 15 Pushout Panel Operation During Packing 3 16 Disconnecting The Container 3 16 UnloadingAt Dumpsite 3 17 Lifting The Tailgate 3 17 Ejecting The Load 3 18 Lowering The Tailgate 3 18 Shut Down 3 19 SECTION 4 GENERAL REPAIR PRACTICES Preparation For Service 4 1 Replacement Parts ...

Страница 6: ...ker Panel Sweeps Hopper 8 13 Packing Refuse 8 14 Raising Tailgate 8 15 SECTION 8 Continued Ejecting Load 8 17 Retracting Pushout Panel 8 18 Lowering Tailgate 8 19 SECTION 9 SERVICEAND REPAIR General 9 1 Description Of Operating Cylinders 9 1 Test For Leaking Packer Panel Cylinders 9 2 Test For Leaking Carrier Panel Cylinders 9 4 Removal Of Packer Panel Cylinders 9 7 Removal Of Carrier Panel Cylind...

Страница 7: ...ontinued Installation Of Hydraulic Pump 9 39 New Pump Preparation 9 39 Testing A New Pump 9 39 Description Of Electrical System 9 40 Testing 9 40 Repair 9 40 Inspection 9 40 Schematics 9 40 SECTION 10 SERVICE TOOLS Service Tools 10 1 ...

Страница 8: ......

Страница 9: ... label content of all safety decals 1 These decals must be obeyed at all times 2 These decals must be in place at all times Report any damaged or missing decals to the proper authority at once 3 Replacement decals can be ordered free of charge from your local authorized Leach distributor DANGER WARNING AND CAUTION Throughout this manual DANGER WARNING and CAUTION notations accompanied by the Inter...

Страница 10: ...ved and using a non reusable fas tening device place a sign on the steering wheel indicating the unit is inoperative a b Proper servicing requires specialized tools and pro cedures Service must be performed by authorized personnel only following procedures in the 2RIII Service manual 4 Walk completely around the vehicle to make sure all persons and obstructions are clear before start ing the unit ...

Страница 11: ...e leaving the cab 1 2 3 4 5 6 7 8 9 10 11 12 13 14 Turn on appropriate warning lights put on a safety vest protective glasses and protective shoes All service opening covers and access doors must be maintained and latched in place while operating equipment Ensure all co workers are in view before operating or moving any controls or the unit Ensure that there is sufficient overhead clearance before...

Страница 12: ...ever hold the hook on an attachment point while taking up slack Take up excess cable slack before moving the ve hicle Check overhead clearance before dumping a con tainer 31 32 33 34 35 36 37 38 39 40 41 42 43 44 45 46 Do not move the vehicle with a container attached Always set the vehicle parking brake before attach ing or lifting a container Never lift a container which is non compatible with t...

Страница 13: ...tanks or storage batteries Never have an open flame as a light source Never load ashes or other materials which might be smoldering These materials could ignite refuse in the packer body 1 2 3 4 HOUSEKEEPING Good housekeeping habits are a major factor in acci dent prevention Keep handrails and steps clean and free of grease or debris Do not store brooms or other equipment where they could inadvert...

Страница 14: ...1 6 SAFETY PRECAUTIONS DECAL PLACEMENT SECTION 1 1 4 2 5 6 3 7 8 9 10 7 7 9 1 8 4 5 2 6 10 1 3 CART TIPPER CONTROL DOWN UP DOWN UP ...

Страница 15: ...SAFETY PRECAUTIONS DECAL PLACEMENT SECTION 1 2 1 3 4 5 1 2 3 4 5 CART TIPPER CONTROL DOWN UP DOWN UP 1 7 ...

Страница 16: ...SAFETY PRECAUTIONS DECAL PLACEMENT SECTION 1 1 2 3 4 5 6 7 8 9 10 1 8 7 4 9 10 13 15 16 18 19 8 20 21 22 14 23 11 2 3 1 17 5 12 24 6 ...

Страница 17: ...STOP 2 REINSTALL PROP RETAINER PIN AND CLEVIS 3 LOWER TAILGATE SLOWLY AND LATCH TAILGATE CLOSED 1 DISENGAGE TAILGATE PROPS A 1 RAISE TAILGATE SLOWLY UNTIL PROPS ARE NO LONGER SUPPORTING TAILGATE 2 REMOVE CLEVIS HOLDING PROP RETAINER IN PLACE 3 REMOVE THE PROP RETAINER PIN AND SWING THE PROP INTO STORAGE POSITION 2 3 3 1 ENGAGE TAILGATE PROPS A 2 3 1 UNLATCH TAILGATE RAISE TAILGATE SLOWLY UNTIL ENO...

Страница 18: ...IN UNTIL IT REACHES THE STOP 2 REINSTALL PROP RETAINER PIN AND CLEVIS 3 LOWER TAILGATE SLOWLY AND LATCH TAILGATE CLOSED 1 DISENGAGE TAILGATE PROPS A 1 RAISE TAILGATE SLOWLY UNTIL PROPS ARE NO LONGER SUPPORTING TAILGATE 2 REMOVE CLEVIS HOLDING PROP RETAINER IN PLACE 3 REMOVE THE PROP RETAINER PIN AND SWING THE PROP INTO STORAGE POSITION 2 3 3 1 ENGAGE TAILGATE PROPS A 2 3 1 UNLATCH TAILGATE RAISE T...

Страница 19: ...SECTION 2 INTRODUCTION 2 1 TERMS YOU WILL NEED TO KNOW TAILGATE ASSEMBLY BODY ASSEMBLY HOPPER LOADING EDGE HYDRAULIC TANK PUSHOUT PANEL CARRIER PANEL PACKER PANEL ...

Страница 20: ...ion of the 2R III and become familiar with the terms you will need to know LOADING Refuse is first loaded into the hopper of the tailgate assembly The carrier and packer panels which sweep up and pack the refuse from the hopper will be in the home position HOME POSITION CARRIER PANEL PACKER PANEL COMPACTION When the operator starts the packing cycle the carrier and packer panels move rearward over...

Страница 21: ...e is applied to the cylinders which control movement of the carrier and packer panels This causes the refuse to be compacted tightly allowing for a large carrying capacity Once the body is full the 2R III can be moved to the dumpsite for unloading PUSHOUT PANEL MOVES FORWARD PACKER PANEL CARRIER PANEL PUSHOUT PANEL UNLOADING At the dumpsite the unit is unloaded in two easy steps First the tailgate...

Страница 22: ...e arm latch The container arms when properly latched together with the guide ears will secure the container to the packer Only containers that meet the American National Standards Institute ANSI regulations should be used in conjunction with Leach Container Handling Systems CONTAINER HANDLING SYSTEMS To lift or dump a container several systems are avail able A hydraulically operated container push...

Страница 23: ...dential one 1 cubic yard container with casters or a ten 10 cubic yard stationary commercial container The equipment required to lift and empty these containers will vary according to the container s type and size TERMS YOU NEED TO KNOW Before going further become familiar with the container handling terms you will need to know HOOK 1 Throat Opening 2 Back 3 Heel 4 Hook Safety Latch 5 Point 6 Base...

Страница 24: ...NTAINER LIFTING CYLINDER CLC 1 Control lever 2 Engine speed up button 3 Roller guide 4 5 6 Cable 7 Lifting cylinder assembly Container attachment Stop bar Lid guard CONTAINER PUSH BAR CPB 1 Control lever 2 Push bar 3 Lift roller 4 Container dumping cylinder 5 Stop bar Lid guard 6 Container attachment 3 5 6 3 2 4 1 2 5 3 4 6 1 2 4 5 6 7 1 2 6 ...

Страница 25: ...he con tainer to the rear loader by securing it with the latch arms of the container attachment DUMP A container handling system is used to raise the con tainer and empty the refuse into the hopper of the rear loader DISCONNECT When the container is empty it is lowered to the ground the latch arms released and the truck is moved forward ATTACH CONTAINER DUMP DISCONNECT 2 7 ...

Страница 26: ...SECTION 2 2 8 ...

Страница 27: ...ON OF OPERATING CONTROLS The following information is for descriptive pur poses only It is not to be misconstrued as operat ing instructions For operating instructions refer to OPERATING PROCEDURES later in this section There are only a few controls required for the complete and efficient operation of the 2R III It is important that you know the location and function of each control be fore attemp...

Страница 28: ...OPERATION SECTION 3 LOCATION OF OPERATING CONTROLS 3 2 4 6 5 7 8 1 2 3 8 9 10 11 12 7 ...

Страница 29: ... style NOTE The engine speed up system consists of the solenoid ON OFF switch a relay and solenoid air cylinder on electronic engines the relay is wired to the engine ECU A speed up push button and speed up switch connected to the operating control linkage on the Operating Valve The function of the speed up system is to speed up the engine and provide more power to the hydraulic pump during operat...

Страница 30: ... movement of the pushout panel Moving the control lever rearward toward the tailgate will move the pushout panel to the rear Mov ing the control lever forward toward the cab will move the pushout panel to the front TAILGATE LIFT LEVER 6 The lower lever controls the tailgate Moving the lever rearward toward the tailgate will raise the tailgate Moving the lever forward toward the cab will lower the ...

Страница 31: ...E The engine speed up system automatically engages any time the carrier panel lever is shifted COMPACTION CYCLE OPERATION Both the packer panel lever and the carrier panel lever are shifted simultaneously inward to open the packer panel and lower the carrier panel to the interrupted cycle position Both levers are shifted outward to sweep the load from the hopper and pack it against the pushout pan...

Страница 32: ...ustration in SECTION 1 SAFETY of this manual and make sure all decals are in place and readable Replace any decals that are not NOTE A decal kit free of charge is available from your local authorized Leach distributor 2 As you are checking for decals also look for fluid leaks on and around the unit Check for fluid leaks at the hydraulic cylinders valves and fittings 3 Inspect the attaching hardwar...

Страница 33: ...vers are in the neutral posi tion Check a Packer panel lever b Carrier panel lever c Pushout lever d Tailgate lift lever Never operate the 2R III with any part of the control system or levers removed or serious damage will result Never under any circumstances enter the body if the truck is running Open the packer panel and release the pushout panel cylinder pressure before entering the body Always...

Страница 34: ...d Never place hands in or near the packer panel dur ing operation 9 With the engine running the speed up solenoid switch ON the PTO engaged and the transmission in neutral and the brakes applied depress the speed up push but ton on the forward left street side of the body You should hear the engine speed up Never hold the packer or the carrier panel lever in position by hand Always engage and let ...

Страница 35: ...nd packer panel movement it should be smooth The panels should stop automatically at the home position 12 Depress the two driver signal push buttons located on both sides of the tailgate to make sure that the au dible alarm located in the cab is working 13 Back the unit up a few feet to ensure that the back up alarm is working properly 14 Loosen the tailgate clamps and swing out Raise the tailgate...

Страница 36: ...s in place and readable Look for any fluid leaks Mounting hardware tight and in place Tailgate clamps closed and tightened Hydraulic fluid reservoir at correct level All operating levers in neutral positions Pushout panel area clear of debris Engine warmed up according to manufacturer s in structions All operating and running lights functioning Engine speed up buttons operational Packing cycle ope...

Страница 37: ...d start the truck as described in the pre operational walk around inspection 2 Engage the Pump PTO control to start the hydraulic pump 3 Place the engine speed up switch in the ON position ENGINE ENGINE SPEED UP SPEED UP SYSTEM SYSTEM ON OFF SECTION 3 3 11 ...

Страница 38: ...must be positioned toward the rear of the body TAILGATE CLAMPS Check the tailgate clamps to make sure both are securely tightened 1 Depress and hold the speed up push button Push the pushout lever rearward until the pushout cylinder is fully extended 2 ENGINE SPEED UP BUTTON PUSHOUT LEVER 3 ...

Страница 39: ...estrictions The vehicle should be backed with the latch arms open until the container trunnion bar is between the guide ears and within the latch assembly Center the container on the attachment After setting the vehicle parking brake the right and left container latch arms must be engaged Lifting a container without both latch arms secured can allow the container to swing away from the unit and ca...

Страница 40: ...tion shown on the instruction decal to raise the container When the cable is tight the speed up button should be depressed and held to provide suf ficient hydraulic power to lift the container The container should be raised until the contents begin to slide into the hopper of the packer or until it is resting against the container bump bar Do not overfill the hopper After assuring that all per son...

Страница 41: ...E The compaction cycle can be stopped at any time by moving both the packer panel lever and the carrier panel lever to the center neutral 1 Cycle the packer panel and the carrier panel by mov ing both the packer panel lever and the carrier panel lever inward toward the tailgate then let go The packer panel will open and the packer panel lever will automati cally shift to neutral The carrier panel ...

Страница 42: ...o if the packer panel stops short of the home position the car rier panel operating lever may need to be held overrid den to allow the refuse to move the pushout panel to ward the front of the body When the pushout panel has reached the front of the body neither the packer panel operating lever nor the carrier panel lever should be over ridden except to clear the final hopper load DISCONNECTING TH...

Страница 43: ...lamps and swing them out and forward as far as they will go LIFTING THE TAILGATE Stand clear when the tailgate is raised If you need to clean debris from the edges use a pole while standing to the side 1 Depress and hold engine speed up button 2 Push the tailgate lift lever rearward and hold until the tailgate is fully raised The tailgate open light and backup lights should illuminate The backup a...

Страница 44: ...ded If the unit is going to travel over one mile empty completely retract the cylinder When packing is about to resume extend the cylinder and start packing LOWERING THE TAILGATE 1 Pull forward on the tailgate lift lever slowly and in small increments to lower the tailgate a little at a time AVOID SLAMMING SHUT the tailgate 2 Place the tailgate clamps in the closed position and tighten securely NO...

Страница 45: ...nel lever and carrier panel lever to place the packer panel in the home position 2 Put all controls in neutral 3 Set parking brake 4 Disengage PTO 5 Shut off engine 6 Shut off solenoid dashboard switch 7 Remove key 8 Lock truck 3 19 SECTION 3 ...

Страница 46: ...SECTION 3 3 20 ...

Страница 47: ...f each job will allow you to perform the repair as easily and quickly as possible and reduce the incidence of misplaced tools and parts If the portion of the unit to be repaired is excessively dirty it should be cleaned before work starts The cleaning process may include the use of high pres sure equipment and strong chemicals Follow the manufacturer s instructions and precautions during this proc...

Страница 48: ...g the tailgate Always check to make sure the body access door is locked shut before entering the cab Pump removal due to the weight and location of the pump it is advisable to place a floor jack be neath the pump and apply a slight pressure so that when the bolts are removed the pump is supported When it becomes necessary to raise the tailgate for maintenance or repair do not enter the area beneat...

Страница 49: ...is very dangerous and can lead to a major explosion Welding should be done in a location well away from flammable materials 6 7 8 9 10 REMOVAL DISASSEMBLY AND REPAIR Cleanliness is very important dirst is the number one cause of wear in bearings bushings and espe cially in hydraulic components Inspect hydraulic components for leaks before cleaning The dirt buildup on the component can aid in traci...

Страница 50: ...g the tailgate Always check to make sure the body access door is locked shut before entering the cab Pump removal due to the weight and location of the pump it is advisable to place a floor jack be neath the pump and apply a slight pressure so that when the bolts are removed the pump is supported When it becomes necessary to raise the tailgate for maintenance or repair do not enter the area beneat...

Страница 51: ...gate 8000 lbs 3629 kg SLING STRAP SPECIFICATIONS Nylon sling straps should be used for the removal of cylinders The following specifications should be used to determine the type of sling straps to use for lifting Type USS 26 EN1 Rating Vertical lift 4800 lbs 2177 kg Choker lift 3600 lbs 1633 kg Basket lift 9600 lbs 4354 kg Width 2 in Length depends on type of lifting device used CHAIN AND HARDWARE...

Страница 52: ... 78 55 7 61 70 9 68 20 55 7 61 78 10 79 1 2 13 75 10 37 85 11 76 105 14 52 20 85 11 76 120 16 60 9 16 12 110 15 21 120 16 60 155 21 44 18 120 16 60 170 23 51 5 8 11 150 20 75 167 23 10 210 29 04 18 170 23 51 240 33 19 3 4 10 270 37 34 280 38 72 375 51 86 16 295 40 80 420 58 09 7 8 9 395 54 63 440 60 85 605 83 67 14 435 60 16 675 93 35 1 8 590 81 60 660 91 28 910 125 85 14 660 91 28 990 136 92 NOTE...

Страница 53: ...4 6 9 16 18 235 20 8 3 4 16 525 43 10 7 8 14 650 55 12 1 1 16 12 950 80 14 1 3 16 12 1200 100 16 1 5 16 12 1400 115 20 1 5 8 12 1900 160 24 1 7 8 12 2250 185 32 2 1 2 12 3000 250 FLAT FACE O RING ORFS FITTINGS SAE DASH SIZE TUBE SIDE THREAD SIZE TORQUE INCH LBS TORQUE FOOT LBS 4 9 16 18 220 18 6 11 16 16 360 30 8 13 16 16 480 40 10 1 14 60 12 1 3 16 12 85 14 1 5 16 12 95 16 1 7 16 12 110 20 1 11 1...

Страница 54: ...SECTION 4 4 8 ...

Страница 55: ... Opening Height 56 56 56 1423mm 1423mm 1423mm T Hopper Inside Width 80 80 80 2032mm 2032mm 2032mm U Rear of Body to Rear of 74 74 74 1880mm 1880mm 1880mm Tailgate Closed Height Above Chassis Frame 194 194 194 4928mm 4928mm 4928mm Tailgate Raised Loading Sill Below Chassis 5 5 5 127mm 127mm 127mm Frame Non Tag Axle Body Center of Gravity Measured From 117 131 151 2972mm 3328mm 3836mm Front of Body ...

Страница 56: ...3 31 31 Flash Degree F 375 380 390 Pour Point 20 20 20 Viscosity SSU 100 Degrees F 112 158 228 SSU 210 Degrees F 40 44 48 cSt 40 Degrees C 21 30 5 44 cSt 100 Degrees C 4 1 5 2 6 5 Viscosity Index 98 99 99 ASTM Oxidation Test Hours to 2 0 Neut No 2500 2500 2500 ASTM Rust Test A B Pass Pass Pass Foam Test Pass Pass Pass Vickers Vane Pump Test Pass Pass Pass Dielectric Strength ASTM 877 EC 180 Degree...

Страница 57: ...intenance is to antici pate and prevent operational difficulties before they re quire extended shut down for costly repairs OPERATING AND MAINTENANCE RECORDS Prepare and adhere to a maintenance schedule Keep detailed records of all maintenance performed Regu larly inspect operating and maintenance records for de viations from normal operating conditions Analyze the records for indications of poten...

Страница 58: ...nd bottom 4 Tailgate clamps 2 5 Operating cylinders 4 2 top pivots Not Shown Telescopic cylinder 2 pivot pins ILLUS LUBE POINT QTY NOTE NOTE The packer panel must be in the home position to lubricate the following lube points 6 Operating valve 4 1 control lever 7 Inside outside 3 bearing housing 8 Carrier panel cylinder 1 end 9 Packer panel cylinder 2 rod ends 10 Rollers 4 3 4 11 Optional control ...

Страница 59: ...i cation as necessary to be in prime working condi tion Remove the top cover for access to lube points Move roller track access covers to grease roller Rollers need lubrication roller tracks do not Grease on the tracks will cause the rollers to slide keep tracks clean and dry 1 2 3 4 1 11 6 3 4 5 9 9 8 7 10 12 ...

Страница 60: ...SECTION 6 6 4 PREVENTIVE MAINTENANCE 1 2 3 4 5 6 7 8 ...

Страница 61: ...tor 3 1 2 3 The condition of the filter element must be checked weekly by looking at the visual indicator on the filter Refer to item 3 on the tank illustration NOTE Under severe operating conditions the filter life may be re duced Replace the filter element regardless of elapsed time if the suction indicator is in the red zone REPLACEMENT OF FILTER ELEMENT See Hydraulic System Illustration Remove...

Страница 62: ...SECTION 6 6 6 ...

Страница 63: ...your sample has been allowed to stand for 20 to 30 minutes to eliminate air bubbles hold the bottle up to the light to check whether the fluid is clear or cloudy Any visible debris is an indication of a severe solid con tamination problem the source of which must be lo cated and corrected immediately Common sources of this kind of contamination may be component wear undersealed reservoir covers or...

Страница 64: ... unit inside and out with clean water Make sure no refuse is lodged in the body trough or behind the pushout panel especially near the telescopic pushout cylinder area or rear of the tank 3 LUBRICATION Frequent inspection of grease points will indicate when lubrication is needed 4 CONTAINER HANDLING EQUIPMENT In addition to performing the daily vehicle and packer body pre operation inspection also...

Страница 65: ... MAINTENANCE 5 CHECK OUT PROCEDURES Each week perform the CHECK OUT PROCE DURES listed in Sec 7 of this manual 6 CONTAINER HANDLING SYSTEM HARDWARE Check all container handling system hardware to make sure that no damage exists and that all fas teners are secure 7 PIVOT POINTS Check all pivot points for wear and smooth opera tion 8 WIRE ROPE CABLE A detailed inspection of all wire rope cable shoul...

Страница 66: ...onsisting of check ing for distortion cracks nicks wear latch engagement and secure end connections Maximum distortion allowable is an 8 percent increase in the throat dimen sion or a 10 degree twist in the hook Cracks nicks and wear must not exceed 10 percent of any dimension Visually inspect before each use for obvious damage THR OAT OPE NING BACK HE E L BAS E POINT LATCH YEARLY PREVENTIVE MAINT...

Страница 67: ...OPERATIONAL STATUS block presented at the beginning of each check NOTE Because of the location of various controls some checks will require two people OPERATIONAL STATUS Truck Running PTO Engaged Speed Up On OPERATIONAL STATUS Truck Off PTO Disengaged CHECK HYDRAULIC TANK FLUID LEVEL Make sure the tailgate is down and clamped se curely Position the packer and carrier panels to the IN TERRUPTED CYC...

Страница 68: ...E SPEED UP SWITCHES BODY OPERATIONAL STATUS Truck Running PTO Engaged Speed Up On Depress the engine speed up pushbutton The en gine should speed up 1 IF NOT OPERATIONAL STATUS Truck Off PTO Disengaged Locate the fault in the wiring or switch and repair See Sec 9 SERVICE AND REPAIR ELECTRICAL SYS TEM Activate carrier panel lever Engine should speed up 2 IF NOT OPERATIONAL STATUS Truck Off PTO Dise...

Страница 69: ...cycle time is correct before perform ing the following pressure checks CHECK PRESSURES The pressure checks provided below will indicate the operating condition of the hydraulic system Detailed adjustment procedures are provided later in this sec tion and are referenced at the appropriate check out procedure Prior to performing pressure checks OPERATIONAL STATUS Truck Off PTO Disengaged Install a g...

Страница 70: ... raising the tailgate If the pressure is below the appropriate setting loosen the lock nut on the relief cartridge and turn the adjusting screw in rotate clockwise to reach the correct pressure If the pressure is above the appropriate setting loosen the lock nut on the re lief cartridge and turn the adjusting screw out ro tate counter clockwise to reach the correct pres sure After readjusting reti...

Страница 71: ...uge slowly in crease the main relief valve setting The pressure indicator will increase until the knockout pressure setting is reached and the Main Control Valve spool returns to neutral The knockout pressures should be set at 1950 PSI 135 BAR for the packer panel section and 2150 PSI 148 BAR for the carrier panel section If the knockout pressure setting requires adjustment it may be changed by tu...

Страница 72: ...and test as shown on illustration WPRV SP P2 T2 T1 P1 ATTACH PORT A POWER WITH 0 3000 PSI GAUGE TO PORT MARKED P2 INSTALL RESISTANCE CARTRIDGE IN PORT MARKED SP TIGHTEN TO 20 FT LBS WHEN THE ADJUSTED PRESSURE IS REACHED 1800 PSI FLUID WILL DRAIN FROM PORT MARKED T2 0 1000 2000 3000 4000 1800 PSI ADJUSTING SCREW LOCKING NUT RESISTANCE CARTRIDGE ...

Страница 73: ...Use the test fixture part number 710475 and test as shown on illustration ATTACH PORT A POWER WITH 0 6000 PSI GAUGE TO PORT MARKED P1 INSTALL RELIEF CARTRIDGE IN PORT MARKED WPRV TIGHTEN TO 20 FT LBS WHEN THE ADJUSTED PRESSURE IS REACHED 3800 PSI FLUID WILL DRAIN FROM PORT MARKED T1 3800 PSI ADJUSTING SCREW LOCKING NUT 0 1500 3000 4500 6000 ...

Страница 74: ...he test fixture part number 710475 and test as shown on illustration ATTACH PORT A POWER WITH 0 3000 PSI GAUGE TO PORT MARKED P1 INSTALL RELIEF CARTRIDGE IN PORT MARKED WPRV TIGHTEN TO 20 FT LBS WHEN THE ADJUSTED PRESSURE IS REACHED 1700 PSI FLUID WILL DRAIN FROM PORT MARKED T1 1700 PSI ADJUSTING SCREW LOCKING NUT 0 1000 2000 3000 4000 ...

Страница 75: ...ear These items must be replaced before there is metal to metal contact Shim or replace worn parts as described in Sec 9 SERVICE AND REPAIR under PUSHOUT PANEL 1 2 WEAR SHOES POWER TAKE OFF P T O OPERATIONAL STATUS Truck Off PTO Disengaged Periodically re torque the mounting bolts or studs as outlined in the P T O manufacturers service manual 1 ...

Страница 76: ...SECTION 7 7 10 ...

Страница 77: ... amounts of space will re duce the compaction ratio Moisture content of refuse Wet refuse will pack tighter than dry and consequently a wet load will weigh more than a dry load Wet refuse loaded into the body will increase the compaction ratio Operation of equipment As with the operation of any type of heavy equipment one machine can yield different results with different operators Operating a rea...

Страница 78: ...when the fluid is subjected to a negative pressure vacuum of as little as 3 5 psi This can occur when the fluid is squeezed through a restric tion or an orifice The resulting pressure decreases can be sufficient to allow trapped air to separate from the fluid A good example may be a front mounted pump dry valve system In the dry mode of operation system hydraulic fluid is drawn through a small ori...

Страница 79: ...RTAIN AMOUNT OF NOISE POSSIBLE CAUSE REMEDY Pump starving for fluid Hydraulic fluid too cold PTO driveshaft and or u joints badly worn or out of balance Pump gears end plates bearings etc badly worn Improper grade of hydraulic fluid fluid foaming Air entering the system Open ball valve Check fluid level Check hydraulic fluid filter and tank Check for obstruction in suction lines hoses kinked or co...

Страница 80: ...or repair as described in Sec 9 Elec trical System Service and Repair Repair replace or adjust as required 1 2 3 4 5 1 2 3 4 5 ENGINE SPEED WILL NOT RETURN TO NORMAL WHEN PACKING CYCLE IS COMPLETE OR SPEED UP BUTTON IS RELEASED POSSIBLE CAUSE REMEDY Short circuit in electrical system Carrier panel lever speed up switch is defective Check for and repair short in system as described in Sec 9 Electri...

Страница 81: ... 2 3 1 2 3 PACKER CARRIER PANELS DO NOT DELIVER FULL FORCE TO PACK LOAD INTO BODY POSSIBLE CAUSE REMEDY Hydraulic pressure incorrect Hydraulic fluid in tank is low Tank strainer screen is dirty this condition will starve pump and cause noise in the system Wrong type of hydraulic fluid in system Main relief section of Front Control Valve opens too soon Hydraulic pump is defective and will not deliv...

Страница 82: ...ec 7 Check Out Move the unit forward to finish unloading 1 2 1a 1b 2 PUSHOUT PANEL SLIDES FORWARD TOO FAST WHILE PACKING REFUSE POSSIBLE CAUSE REMEDY Cylinder bypassing Resistance setting too low Perform test for leaking cylinder and repair Adjust resistance cartridge See Sec 7 Check Out 1 2 1 2 PUSHOUT PANEL WILL NOT SLIDE FORWARD AUTOMATICALLY POSSIBLE CAUSE REMEDY Resistance setting too high Pa...

Страница 83: ...ive Mainte nance Service filter See Section 6 Preventive Mainte nance Service breather See Sec 6 Preventive Mainte nance Replace pump See Sec 9 Service and Repair Perform test for leaking operating cylinder seals and repair as required Refill with proper grade of hydraulic fluid See Sec 5 Specifications Repair or replace as required See Sec 9 Service and Repair 1 2 3 4 5 6 7 8 1 2 3 4 5 6 7 8 TAIL...

Страница 84: ... weight of material in container Do not use lifting device to break container loose from the ground Repair or replace linkage as required Repair or replace the defective component Replace the key or pin 1 2 3 4 5 6 7 8 1 2 3 4 5 6 7 8 WINCH MOTOR LEAKING POSSIBLE CAUSE REMEDY Shaft seal damaged Motor worn internally Replace shaft seal Replace motor 1 2 1 2 CONTAINER RAISES VERY SLOWLY POSSIBLE CAU...

Страница 85: ... presented and then a description of the hydraulic flow and the interaction of system compo nents i e valves and cylinders follows Before pro ceeding to the flow diagram refer to the illustration and become familiar with the system component nomen clature SYSTEM COMPONENT NOMENCLATURE MAIN CONTROL VALVE HYDRAULIC FLUID TANK PUMP FRONT CONTROL VALVE TELESCOPIC CYLINDER TAILGATE LIFT CYLINDER CARRIE...

Страница 86: ...p from there it is pumped to the FCV Front Con trol Valve Flow continues through the valve to and through the MCV Main Control Valve and then back to the tank During packer operation if pressure increases to the main relief setting excess flow will be diverted from the front control valve back to tank MAIN CONTROL VALVE HYDRAULIC FLUID TANK PUMP FRONT CONTROL VALVE TELESCOPIC CYLINDER TAILGATE LIF...

Страница 87: ...rol Valve to shift diverting flow to the rod end of the packer panel cylinders The packer panel cylinders retract causing the packer panel to sweep rearward over the load Re turn fluid flow from the cylinder is back to tank MAIN CONTROL VALVE HYDRAULIC FLUID TANK PUMP FRONT CONTROL VALVE TELESCOPIC CYLINDER TAILGATE LIFT CYLINDER CARRIER CYLINDER PACKER CYLINDER CARRIER CYLINDER TAILGATE LIFT CYLI...

Страница 88: ... the car rier cylinders The cylinders retract moving the carrier and packer panels down to the interrupted cycle posi tion Trapped fluid keeps the packer panel cylinders retracted At the end of the carrier cylinder retraction stroke pressure builds to 2150 PSI 148 BAR causing the MCV Main Control Valve to shift to neutral PRESSURE RETURN MAIN CONTROL VALVE HYDRAULIC FLUID TANK PUMP FRONT CONTROL V...

Страница 89: ...d of the packer panel cyl inders As the cylinders extend the packer panel sweeps the load forward in the hopper As the packer cylinders extension stroke continues pressure builds to 1950 PSI 134 BAR causing the MCV Main Control Valve to shift RETURN MAIN CONTROL VALVE HYDRAULIC FLUID TANK PUMP FRONT CONTROL VALVE TELESCOPIC CYLINDER TAILGATE LIFT CYLINDER CARRIER CYLINDER PACKER CYLINDER CARRIER C...

Страница 90: ... Main Control Valve shifts into neutral and the packing cycle is completed As the carrier cylinders apply force to compact refuse the pressure of the trapped fluid in the packer cylinders will increase Should this pressure reach 3800 PSI 262 BAR a relief valve will open re ducing the pressure by allowing some trapped fluid to escape and return to the hydraulic tank PRESSURE MAIN CONTROL VALVE HYDR...

Страница 91: ... FCV Front Control Valve pushout section When this pressure reaches 1800 PSI 124 BAR a relief resistance cartridge opens in the FCV Front Control Valve pushout section allowing some case end pressure from the telescopic pushout cylin der to return to tank This allows the pushout panel to come forward slightly MAIN CONTROL VALVE HYDRAULIC FLUID TANK PUMP FRONT CONTROL VALVE TELESCOPIC CYLINDER TAIL...

Страница 92: ...ILGATE LIFT LIFT LEVER HYDRAULIC SEQUENCE Moving the tailgate lift lever rearward shifts a spool in the FCV Front Control Valve causing flow to the tail gate lift cylinders The cylinders extend causing the tailgate to raise Excess fluid flow from the FCV Front Control Valve returns back to tank MAIN CONTROL VALVE HYDRAULIC FLUID TANK PUMP FRONT CONTROL VALVE TELESCOPIC CYLINDER TAILGATE LIFT CYLIN...

Страница 93: ...NCE Moving the pushout lever rearward shifts a spool in the FCV Front Control Valve causing flow to the telescopic cylinder As the cylinder extends the load is ejected from the body MAIN CONTROL VALVE HYDRAULIC FLUID TANK PUMP FRONT CONTROL VALVE TELESCOPIC CYLINDER TAILGATE LIFT CYLINDER CARRIER CYLINDER PACKER CYLINDER CARRIER CYLINDER TAILGATE LIFT CYLINDER P O CHECK VALVE PRESSURE RETURN ...

Страница 94: ... UP BUTTON PUSHOUT LEVER HYDRAULIC SEQUENCE Moving the pushout lever forward shifts a spool in the FCV Front Control Valve causing flow to the telescopic cylinder As the cylinder retracts the pushout panel is positioned near the front of the body MAIN CONTROL VALVE HYDRAULIC FLUID TANK PUMP FRONT CONTROL VALVE TELESCOPIC CYLINDER TAILGATE LIFT CYLINDER CARRIER CYLINDER PACKER CYLINDER CARRIER CYLI...

Страница 95: ...hifts a spool in the FCV Front Control Valve allowing fluid in the tailgate lift cylinders to drain back to tank The weight of the tailgate forces fluid out of the cylinders the cylinders retract and the tailgate lowers MAIN CONTROL VALVE HYDRAULIC FLUID TANK PUMP FRONT CONTROL VALVE TELESCOPIC CYLINDER TAILGATE LIFT CYLINDER CARRIER CYLINDER PACKER CYLINDER CARRIER CYLINDER TAILGATE LIFT CYLINDER...

Страница 96: ...se instances the operational status will be indicated Otherwise make sure that the truck is shut off and the keys are removed The pressure of the hydraulic system and resulting movement of the units parts can cause serious injury or death DESCRIPTION OF OPERATING CYLINDERS CARRIER AND PACKER PANEL The four double acting hydraulic cylinders that control movement of the carrier and packer panels dur...

Страница 97: ...etter accessibility during testing 1 OPERATIONAL STATUS Truck Running PTO Engaged Speed Up On Shift the packer panel lever outward to fully extend the packer panel cylinders 2 NOTE Engine speed up only activates when carrier panel le ver is activated Loosen the hydraulic fittings slowly to release any trapped pressure Watch for inadvertent movement of components OPERATIONAL STATUS Truck Off PTO Di...

Страница 98: ... leak excessively continue test 4 OPERATIONAL STATUS Truck Off PTO Disengaged Reconnect the hydraulic lines to the end of cylin der and tighten to 110 Ft Lbs Repeat steps 3 5 for the other cylinder 5 OPERATIONAL STATUS Truck Running PTO Engaged Speed Up On Shift the packer panel lever inward to retract the packer panel cylinder to the interrupted cycle position 6 OPERATIONAL STATUS Truck Off PTO D...

Страница 99: ...ylinder and replace the piston seal as described later in this section 8 OPERATIONAL STATUS Truck Off PTO Disengaged If the cylinder does not leak reconnect the hydrau lic lines to the cylinder and tighten to 110 Ft Lbs Repeat steps 7 9 for the other cylinder PACKER PANEL LEVER OBSERVE FLUID FLOW TEST FOR LEAKING CARRIER PANEL CYLINDERS 9 NOTE Before testing any cylinder make sure the main line pr...

Страница 100: ...the case end of the carrier cylinders Hold the lever and observe the fluid flow from the open port on the rod end The flow of hydraulic fluid should be no more than 2 fluid ounces per minute Aflow greater than 2 ounces indicates an excessive piston seal leak If the cylin der does not leak excessively continue test 4 OPERATIONAL STATUS Truck Off PTO Disengaged If the cylinder does not leak reconnec...

Страница 101: ...PTO Engaged Speed Up On Shift the carrier panel lever inward to apply hydraulic pressure to the rod end of the carrier panel cylin ders Hold the lever and observe the fluid flow from the open port on the case end of the cylinder The flow of hydraulic fluid should be no more than 2 fluid ounces per minute A flow greater than 2 ounces indicates an excessive piston seal leak Disas semble the cylinder...

Страница 102: ...on the cyl inder 1 2 OPERATIONAL STATUS Truck Running PTO Engaged Speed Up On Shift the packer panel lever inward to partially re tract the packer panel cylinders Disengage the le ver when the panel is vertical This relieves the weight of the panel from the cylinder rod end 3 OPERATIONAL STATUS Truck Off PTO Disengaged Remove the capscrews 1 lockwashers 2 and pivot pin cover 3 from the rod end 4 P...

Страница 103: ...ylinder ports to keep fluid in and dirt out Remove capscrew 1 lockwashers 2 and nut 3 securing the pivot pin retainer 4 and remove the retainer Remove the pivot pin by using special packer pin puller See Sec 10 SERVICE TOOLS Check for bent pivot pins and inspect pin hubs for broken welds and elongated holes 5 6 7 8 9 10 OPERATIONAL STATUS Truck Running PTO Engaged Speed Up On OPERATIONAL STATUS Tr...

Страница 104: ...er assembly on the upper end of the carrier panel is in line with the open upper track hole 1 2 CARRIER PANEL LEVER 1 2 3 4 OPERATIONAL STATUS Truck Off PTO Disengaged NOTE See Sec 4 GENERAL REPAIR PRACTICES for more detailed information about the correct use of slings and lifting chains Secure chains or a sling to the upper and lower end of the carrier panel Attach the other end to a suit able li...

Страница 105: ...r piston rod This will provide enough clearance to remove the cylin der Disconnect both the case end 1 and rod end 2 pressure tubes from the carrier cylinder Immediately plug the pressure tubes and cap the cylinder ports to keep fluid in and dirt out Remove capscrew 1 nut 2 and lockwashers 3 securing the cylinder pivot pin retainer 4 and re move retainer Carefully remove the pivot pin and lift out...

Страница 106: ... rod assembly out of the cylinder Disassemble the cylinder and install replacement part s 1 2 3 4 5 6 NOTE During disassembly note the condition of each part as it is removed to aid in diagnosing Note the position of each part as it is removed to aid in reassembly INSPECTION AND REPLACEMENT OF OPERATING CYLINDERS Carefully and thoroughly inspect the inside of the cylinder for cracks scoring or une...

Страница 107: ...ers supporting the two panels move along a track inside the tailgate The packer panel sweeps forward through the hopper picking up the refuse and together with the carrier panel moves the refuse forward into the body where it is com pacted against the pushout panel BEARING PLACEMENT OPERATIONAL STATUS Truck Running PTO Engaged Speed Up On Move the packer panel lever outward to fully ex tend the pa...

Страница 108: ...ATION CHART Sec 6 PREVENTIVE MAINTENANCE 3 4 5 6 7 8 Check that the packer panel torque tube is straight Even a slightly bent torque tube may cause dam age to other components Replace the tube if bent or worn ROLLER REPLACEMENT SHIMMING OPERATIONAL STATUS Truck Running PTO Engaged Speed Up On Shift the control levers and cycle the unit several times while observing the rollers and action of the pa...

Страница 109: ... bly before removing the roller OPERATIONAL STATUS Truck Off PTO Disengaged Remove one roller at a time Replace any roller that is excessively worn cracked or out of round Inspect the condition of the track bar Replacement rollers should be installed with the original shims or the same amount of new shims A grease fitting should be installed in the replacement roller 4 5 6 OPERATIONAL STATUS Truck...

Страница 110: ...sing the capscrews 1 lockwashers 2 and spac ers 3 secure the cover weldment 4 over the four track holes 8 9 10 DESCRIPTION OF TAILGATE LIFT CYLINDERS These two hydraulically operated cylinders mounted on each side of the tailgate lift and lower the tailgate assembly The rod end is pinned to a pivot ear on the body frame near the discharge opening while the cylin der weldment pivot ear is bolted to...

Страница 111: ...ff PTO Disengaged With the tailgate closed attach a sling connected to a suitable lifting device with a capacity of 500 lbs 227 kg to the tailgate lift cylinder 1 NOTE See Sec 4 GENERAL REPAIR PRACTICES for more detailed information about the correct use of slings and lifting chains Disconnect the hydraulic line 1 at the cylinder port in the case end and cap the line Remove the capscrew 2 washer 3...

Страница 112: ...case or rod surfaces Slide the retaining ring off of the rod and discard Slide the rod assembly out of the case Remove the wear ring from the bottom of the cylin der rod and discard Remove the wiper from the head gland 9 10 11 12 13 INSPECTION REASSEMBLY AND INSTALLATION Thoroughly check all components of the cylinder for crackes scoring or uneven wear Parts that must be replaced together such as ...

Страница 113: ...s for car rier panel and pushout panel removal are different and are covered under REMOVAL OF CARRIER PANEL or REMOVAL OF PUSHOUT PANEL REMOVAL OF THE TAILGATE AS SEMBLY OPERATIONAL STATUS Truck Off PTO Disengaged Release the tailgate clamps and swing away Disconnect and remove the tailgate lift cylinders as described earlier in this section Disconnect and cap the hydraulic lines 1 2 3 NOTE See Se...

Страница 114: ...t metal for bends dents or tears Check the hardware holes for enlargement or breaks in the metal Check threaded holes for stripped or otherwise damaged threads Check the tailgate seal for any sign of deterioration Check handles for looseness Replace any defective or worn part Follow all safety precautions pertaining to welding described in Sec 1 SAFETY See Sec 4 GENERAL REPAIR PRACTICES for inform...

Страница 115: ... and re move the valve DISASSEMBLYAND INSPECTION OF FRONT CONTROL VALVE 1 2 Wash the valve body with solvent to prevent con tamination 1 NOTE Service should be limited to seal replacement cartridges and individual valve sections Field repairs of the spool assemblies are not recommended To separate valve sections from the inlet or outlet covers remove the four 4 tie bolts which secure the valve sec...

Страница 116: ... clean counterbore 4 5 6 7 8 9 REASSEMBLY OF FRONT CONTROL VALVE With all o ring seals removed and counterbores thoroughly clean lightly oil the new seals Slide over spools and cartridges and insert the seals in the counterbores Reassemble parts in reverse order of disassembly Torque the spool collar to 10 ft lbs 13 6 Nm Torque the bonnet and handle bracket capscrews to 10 ft lbs 13 6 Nm Replace w...

Страница 117: ...ue of the resistance main relief cartridge will be 20 ft lbs 27 2 Nm 7 REINSTALLATION OF FRONT CON TROL VALVE Secure the valve to the mounting bracket with the appropriate hardware Remove plugs and caps then attach hydraulic lines with new ORFS o rings Torque all hydraulic lines per torque chart as described in Sec 4 GENERAL REPAIR PRACTICES 1 2 FRONT CONTROL VALVE RESISTANCE CARTRIDGE MAIN RELIEF...

Страница 118: ...n the tail gate above the packer and carrier panels It controls the operation of the packer and carrier panels through the entire packing cycle It may have either 2 3 or 4 individual valve sections depending on the installation of options The standard valve will have 2 sections MAIN CONTROL VALVE ...

Страница 119: ...raight up and down Turn off the engine remove the keys Disconnect the shift linkage Disconnect and cap all hydraulic lines and hoses Plug all open ports on the valve to prevent con tamination 1 2 3 4 5 6 NOTE The Main Control Valve MCV assembly weighs ap proximately 100 lbs 45 3 Kg Use appropriate lifting procedures and techniques when handling this assem bly Remove the capscrews washers and nuts ...

Страница 120: ...arate carefully noting the location of o ring seals Thoroughly clean the o ring counterbores and ground surfaces of each section 2 3 REASSEMBLY OF MAIN CONTROL VALVE Replace work sections and covers with the tie bolts in the same order in which they were removed Secure tie bolts and tighten evenly to 25 ft lbs 33 8 Nm Torque 3800 PSI relief cartridge to 20 ft lbs 27 Nm NOTE Use care in replacing t...

Страница 121: ... is resting on the floor of the body Disconnect the hydraulic lines to the cylinder ports Cap the hydraulic lines and the cylinder ports to prevent contamination of the hydraulic system Remove the cylinder case end pin 1 2 3 4 5 6 7 8 OPERATIONAL STATUS Truck Off PTO Disengaged OPERATIONAL STATUS Truck Running PTO Engaged Speed Up On OPERATIONAL STATUS Truck Off PTO Disengaged NOTE For more inform...

Страница 122: ... it does not clean off a section of the tube and wrap masking tape around it Lower the wrapped section of tube down into the packing and then lift the tube once again 6 When removing the packing from succeeding larg er stages replace the head nut 3 on the stage directly above the section you need access to Wrap a strap under the head nut and use it to lift the tube 7 Prior to installing new packin...

Страница 123: ... it behind the retaining ring and work your way around the cylin der prying the ring out of the groove as you go When you are opposite the starting point hang one of the clips on the edge of the tube so that the long end of the clip is between the ring and the groove in the cylinder Continue to use the screwdrivers as pry bars and hang the remaining clips The clips should be equally spaced around ...

Страница 124: ...ion WEAR BLOCK REPLACEMENT The wear blocks should be replaced before there is metal to metal contact between the pushout panel and trough floor OPERATIONAL STATUS Truck Off PTO Disengaged Raise the side of the pushout panel one side at a time enough to take the weight off the wear blocks Use a hydraulic jack or pry bar Support the pushout panel and remove the capscrews nuts and lockwashers securin...

Страница 125: ... this sec tion Disconnect the telescopic pushout cylinder from the pushout panel Weld an eye to the center of the panel and attach a chain to prevent the panel from tipping over upon removal The pushout panel can now be removed from the body The method of removal will depend on the equipment available Whatever method is used the equipment must be capable of lifting a minimum of 2800 lbs 1270 kg an...

Страница 126: ...der until the case end is beneath the crossmember of the pushout panel where the lifting eye is welded Attach a lifting device capable of supporting 750 lbs 341 kg to the cylinder and the lifting eye welded to the crossmember Raise the cylinder and slowly extend it until it can be attached to the pushout panel with the bearing clamp halves and nuts 1 2 3 4 5 NOTE Do not allow the cylinder to becom...

Страница 127: ...ent by the roller assemblies located at the upper corners of each panel The rollers ride inside a roller track on each side of the hopper This section focuses on some factors that need to be taken into consideration when performing packer car rier repairs The packer carrier assemblies and interre lated components are designed for relatively trouble free use however they are subject to reduced serv...

Страница 128: ...ove the packer panel operating lever inward to bring the packer panel up When the panel reaches a vertical position bring the packer panel control lever back to neutral This will take the pressure off the rod eye when the pin is removed Remove the capscrews 1 lockwashers 2 and pivot pin covers 3 from the rod end Make sure the cylinder weight is securely supported bt the hoist and carefully remove ...

Страница 129: ... de scribed earlier in this section With the bearing assemblies removed carefully op erate the hoist and lift the packer panel out of the hopper Use care to avoid damaging the hopper 6 7 8 9 10 INSPECTION AND REPLACEMENT OF PACKER PANEL OPERATIONAL STATUS Truck Off PTO Disengaged Carefully inspect all pivot bearing and roller sur faces for excessive or uneven wear scoring or other damage Check the...

Страница 130: ...hed Weld a new edge in place 1 2 3 NOTE Pay particular attention to the torque tube Ensure that it is perfectly straight INSTALLATION OF PACKER PANEL OPERATIONAL STATUS Truck Off PTO Disengaged Install the packer panel in the approximate reverse or der of disassembly Pay particular attention to the in stallation of roller and bearing assemblies as described earlier in this section ...

Страница 131: ... break suspect that the unit is being skimmed Short cycling is when the carrier panel is stopped be fore it completely lowers The operator then attempts to penetrate down through the refuse that is in the hopper with the packer panel This incorrect method of opera tion results in much the same kind of failures as skim ming because the torque tube and lower carrier chan nel are put into a shear sit...

Страница 132: ...reverse or der of disassembly Pay particular attention to the in stallation of roller and bearing assemblies as described earlier in this section TRACK BAR REPLACEMENT OPERATIONAL STATUS Truck Off PTO Disengaged NOTE Refer to Sec 4 GENERAL REPAIR PRACTICES for welding instructions Remove the old track bar and make sure the track channel is smooth and clean Weld a new track bar in place The surface...

Страница 133: ...alve at the underside of the hydraulic fluid tank Remove the hose clamp Remove the pump suction line and allow the fluid to drain Disconnect the pressure hose at the pump and cap the end Loosen the setscrew 1 and free the yoke 2 from the pump shaft by telescoping the drive shaft to ward the PTO or engine Remove the key from the pump shaft keyway Remove the attaching hardware The pump assem bly may...

Страница 134: ...uid poured back into the tank NEW PUMP PREPARATION Before installing a new pump refer to Sec 6 PRE VENTIVE MAINTENANCE and the following This will prevent contamination of the new pump Remove and clean the hydraulic strainer 1 Change the filter element 2 Drain and flush the hydraulic tank as described in Sec 6 PREVENTIVE MAINTENANCE 3 Clean the magnetic ring 4 1 2 3 4 OPERATIONAL STATUS Truck Runn...

Страница 135: ...orm a continuity check across the between sus pected components as described in Sec 4 GENERAL REPAIR PRACTICES REPAIR Repair of the electrical system is limited to the replace ment of burned out bulbs and other defective parts or wiring INSPECTION Operate all light switches and push button controls to insure that they are operating normally Check all wiring for breaks frayed or worn insula tion an...

Страница 136: ...n will be required for some service and repair procedures These tools are available from your local authorized Leach Distributor The actual use of each tool is described in Section 9 Service and Repair of the appropriate service manual 10 1 0 1000 2000 3000 4000 5 WPRV SP P2 T2 T1 P1 7 ...

Страница 137: ...ector Quick coupling for pressure gauges All 4 103081 O Ring Kit 4 to 24 Straight Thread o rings All except FL104 6 970004 Plunger Tool Remove install spring loaded plungers on rear loader container attachments SECTION 10 SERVICE TOOLS 10 2 5 972087 ORFS O Ring Kit 4 to 24 ORFS o rings All 7 710475 Test Block Test resistance cartridge and circuit All Series III relief cartrides ...

Страница 138: ... 0011 ASL SERVICE ____ M01 0010 ASL OPERATORS ____ NO TITLE QTY Previous Production Units 105291 2RII PARTS 9719 16000 ____ 105615 2RII SERVICE 9719 16000 ____ 105546 2RII PARTS 8993 9718 ____ 105549 2RII SERVICE 8993 9718 ____ 105567 2RII PARTS 6972 8993 ____ 105544 2RII SERVICE 6972 8993 ____ 105600 2RII PARTS 0001 6972 ____ 105601 2RII SERVICE 0001 6972 ____ 105557 ALPHA PARTS 2140 3500 ____ 10...

Страница 139: ..._____________manual Part No __________________________________________________________________ Page s __________________________________________________________________ It should say _______________________________________________________________ Name ____________________________________________________________________ Address __________________________________________________________________ City...

Страница 140: ...Part Number 105341 2737 Harrison Street Oshkosh Wisconsin 54901 877 800 1111 Please visit our website www LeachUSA com PRINTED IN U S A October 1 2003 C A Subsidiary of Federal Signal Corporation ...

Отзывы: