


faytech Ltd. 2009
C
50
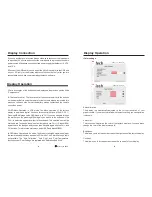
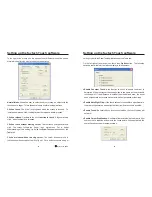
Setting up the faytech Touch software
The
tab gives information about the touch driver version as well as
information about the developer of the software.
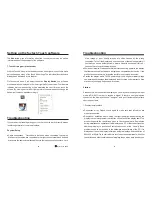
With the Touch Kit icon in the taskbar, you can use a right mouse click to make
quick changes in many of the Touch Kit settings. The individual functions have
already been described in this chapter.
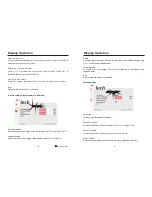
On the context menu, if you select the option
, you will see a
mouse animation displayed in the lower right half of the screen. The red mark
indicates which mouse button will be simulated the next time you touch the
screen. By clicking on the left or right pointer of the animation you change the
behavior of the touch panel accordingly.
About
7. Touchkit program in the taskbar
Display Button
If you are having trouble getting your touch monitor to work correctly, please
look through this list of common problems:
Cable connections. Care should be taken when connecting the cables.
Make sure the cables are connected to the right connectors at each end and
make sure the cables are attached firmly to their respective connectors. Lack
Physical Setup:
l
Troubleshooting
Troubleshooting
of an image or poor quality images are often caused by the wrong
connection. Turn off the display and check each pin of the cable separately. If
you think you have a defective cable, we are happy to exchange it for you -
you do not have to send the display back.
Avoid short circuits! Please be careful before connecting power to the display
that there are no cables that have not yet been connected at both ends. If the
monitor does not power up, try another outlet or another power source.
Provide the display with a 12V DC power supply only. Higher or lower voltage
can permanently damage the display and is not covered under warranty. Also
make sure you supply only one power source.
Please note: After you switch the display on, you may have to change the input
mode (VGA/AV1) in order to receive a signal. If there is no signal source
connected, the display will show "no signal" and go off automatically after a
short period of time.
1. Display remains black
Connection error: Please check again to make sure that all cables are
properly connected.
Resolution / activation errors: Using the right resolution and activating the
display is a common problem that is often not the fault of the display itself. The
monitor supports the resolutions given in the technical data. Sometimes
during simultaneous operation of two displays on a PC or the connection of an
additional display to a notebook complications can arise. Usually these
problems need to be resolved in the hardware and software of the PC. It is
always best to use the display initially as a single display with a resolution of
800x600 at 60Hz. Try to start with this resolution then experiment with other
resolutions and other combinations of displays to see which work best for you.
l
l
l
l
Startup:
51


