


46
faytech Ltd. 2009
C
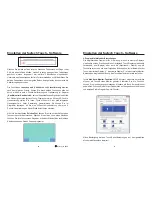
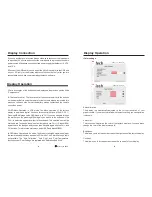
Setting up the faytech Touch software
You can adjust the parameter for the
function. This is a
criterion to judge if the most recent touched point is the same as the previously
touched point. If the difference between the two points is within this area, it will be
recognized as the same touch point and the driver does not generate a new
mouse event for this touch point.
You can adjust the
function. If the touch screen is
touched and held for this period of time, the driver generates a right mouse click.
tab
You can adjust the faytech touch panel calibration with the functions called
,
,
and
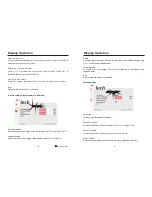
Start by performing the 4 points calibration. By using the application drawing
test, you can test the touch panel to determine if further setting changes are
desirable.
When you press the 4 Points Calibration button, the surface of the monitor
shows the following image:
Constant Touch Area
Auto Right Click Time
3.Tools
:
4
Points Calibration Clear and Calibrate Linearization
Draw Test.
Touch and hold each of the blinking X symbols in the calibration window until it
stops blinking to make sure that the utility can gather enough data for
computation. In addition, a progress bar is shown at the bottom of the window
Press blinking X symbol until stop blinking
47
to indicate time elapsed. If the touch screen is not touched before the progress
bar gets to the far right, the calibration task will be terminated automatically.
The
button will clear all calibration and linearization settings. It
will then automatically take you through a 4 Points Calibration.
The
( 25 or 9 points calibration ) function is used to compensate the
touch screen linearity. It will require you to press and hold on 9 or 25 targets on the
screen so it can compensate for the curvature (if any) of the display.
After
linearization is completed, the linearity of the touch screen will be shown in the
Linearity curve window.
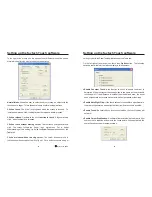
The
function is used for accuracy and performance checking. Press this
button and a new pop up window will be popped up on the monitor (see below).
Touch or drag your touch pen or finger on this grid to gauge the effectiveness of the
settings and calibrations that you have made. If you are using your finger, you may
have to press firmly to draw continuous lines. Press the Clear button to clear the
window. Press the Quit button to terminate this draw test.
Clear and Calibrate
Linearization
Draw Test
Setting up the faytech Touch software
quit
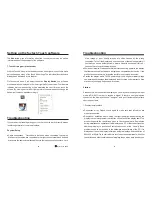
4.
Setting
Display-Multi-Monitor
tab:
If you selected
“
Support Multi-Monitor System
”
when you installed the Touch
driver, you will see a Display tab when you run the Touchkit Configure utility. If
you did not select this option, you will not see a Display tab.
You can have up to four faytech touch-screens connected simultaneously. You


