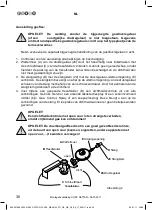
Connecting the gas canister:
CAUTION: The device must not be used without the supplied gas pressure
regulator (or one of a similar type). Details regarding country-specific gas
pressure regulators can be found on the type label of the patio heater.
Please refer to the separate book of instructions enclosed for the gas pressure regulator.
1. Check that all sealants are intact before turning on the device.
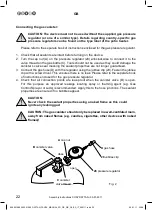
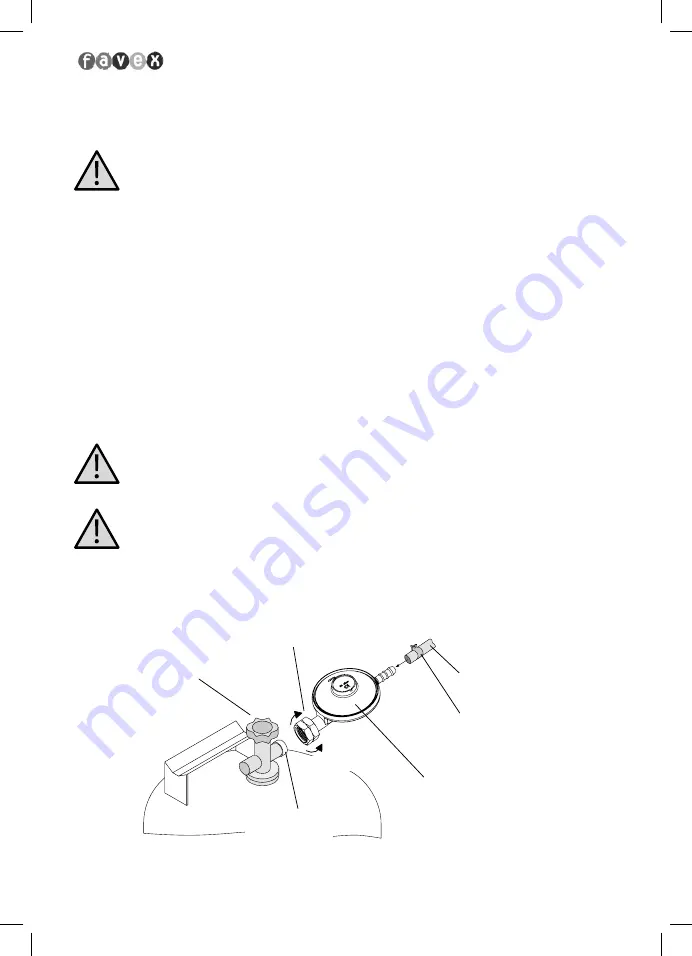
2. Turn the cap nut (A) on the pressure regulator (28) anticlockwise to connect it to the
valve thread on the gas bottle (C). Tools should not be used as they could damage the
canister‘s valve seal meaning the sealant properties are not longer guaranteed.
3. Connect the gas hose (D) with the regulator using the jubliee clip (29). Fasten the jubliee
clip with a screw driver. This ensures there is no leak. Please refer to the separate book
of instructions enclosed for the gas pressure regulator.
4. Check that all connection points are leak-proof when the canister valve (B) is open.
For this purpose an approved leakage locating spray or foaming agent (e.g. Gas
Control Sprayor or suds) is recommended. Apply this to the hose junctions. The sealant
properties are ensured if no bubbles appear.
CAUTION:
Never check the sealant properties using a naked flame as this could
ignite any leaking gas!
CAUTION: The gas canister should only be replaced in a well-ventilated room,
away from naked flames (e.g. candles, cigarettes, other devices with naked
flames)!
A
cap nut
D
gas hose
29
Jubliee clip
28
pressure regulator
C
canister
valve thread
close
open
B
canister valve
Fig. 2
22
GB
Assembly instructions COSY RATTAN • 05-01-2011
600551566_300551566_RATTAN_FAVEX_MANUAL_FR_DE_GB_NL_ES_IT_050111.indd 22
06.01.11 20:08


