background image

Fat Shark                               


                                                          6 

Image   Interface   

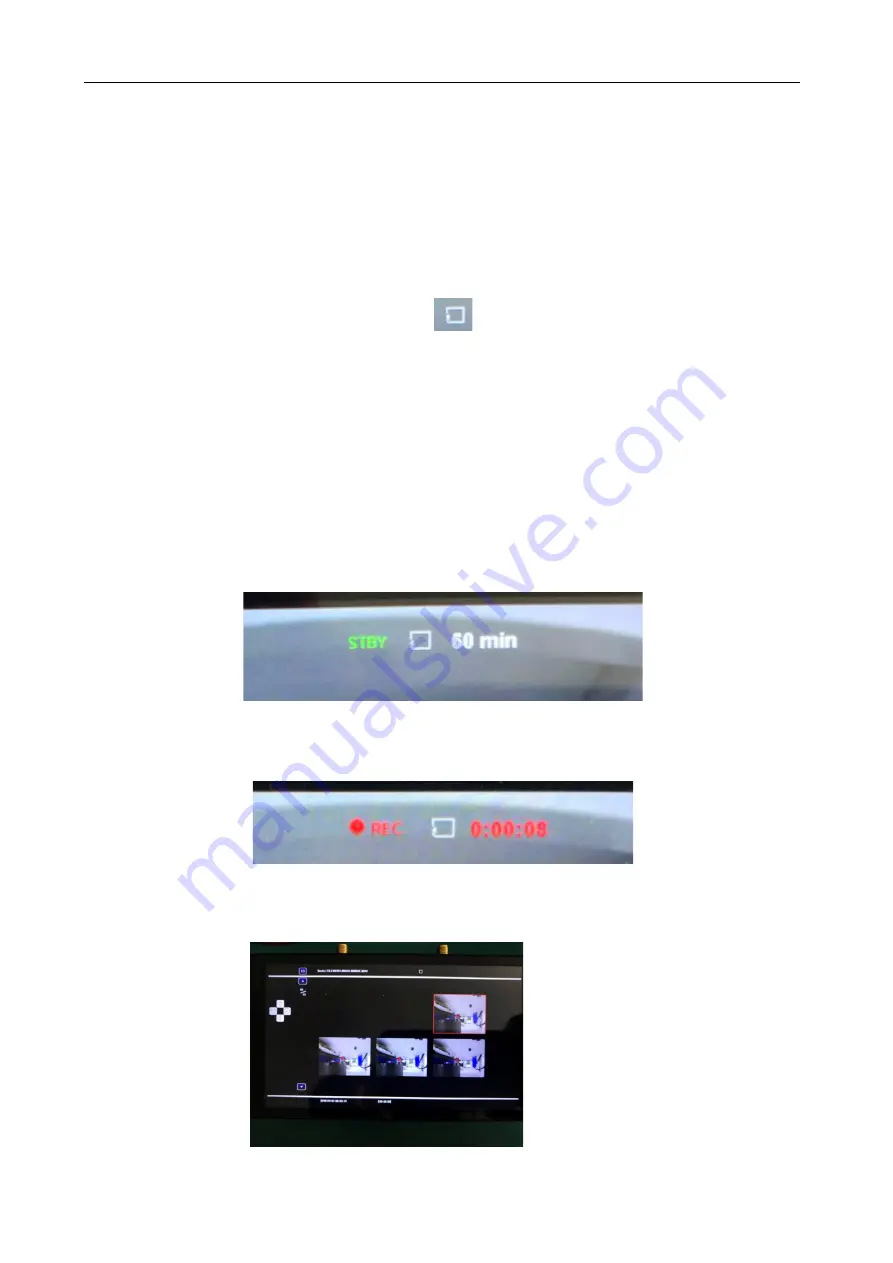
After   exiting   Sweep   Screen,   camera   image   will   be   shown   on   the   screen   (if   transmitting   and   on   
correct   channel)   with   the   following   OSD   information   on   the   top   portion   of   the   screen,   from   left   
to   right:   
Signal   strength   (0   to   5   bars)   
Channel   number   (HQ1   through   to   LQ6)   
DVR   status   (STBY/REC)   

SD   card   (icon   showing   detected/not   detected)   


Remaining   recording   time   available   on   SD   card       
   

OSD   Navigation   Icons   

Note:        OSD   navigation   icons   will   disappear   after   7   seconds   if   no   activity   detected.        Pressing   the   
joy   switch   in   any   direction   brings   up   the   OSD   navigation   icons.   


DVR   control       


After   the   OSD   navigation   is   called   up   (press   joy   switch   any   direction),   press   stick   to   right   bto   start   
recording.   At   this   time,   the   middle   position   of   the   screen   starts   to   record   time,   press   the   right   
button   again   to   end   the   recording.   


Press   the   down   button   to   enter   the   video   playback   interface,


Press   the   left   button   to   return   to   

the   image   interface,   press   the   up   and   down   keys   to   select,   short   press   the   right   button   to   play.   


Содержание Byte Frost

Страница 1: ...frequency hopping system It occupies a portion of the RF band and thus like analog can potentially be knocked out by other users powering on in your channel Likewise if you turn on your transmitter on an occupied channel you will knock that pilot out Please turn on your RX first and scan for RF noise and ensure your last channel used is clean before powering transmitter ...

Страница 2: ...quency Sweep 4 Image Interface 6 OSD Navigation Icons 6 DVR control 6 System Setup 7 System settings 7 Update firmware 8 BetaFlight OSD Set Up requires soldering 9 Byte Frost Camera user guide 11 Main menu 11 1 2 AE Exposure setting 11 1 3 Image Enhance Image enhancement Settings 11 1 4 Video Setting 11 1 5 RESET Factory Reset 11 RunCam Camera user guide 13 Troubleshooting 13 Specifications 14 VTX...

Страница 3: ...the system to be used with conventional cameras as well Using AHD between the camera and TX reduces wire count and increases system robustness The camera has a Divimath hand shake key IC which is supplied to qualified camera vendors The purpose is to ensure camera compatibility and performance quality The OSD information for recording and scanning only shows on the receiver monitor and not on the ...

Страница 4: ...Below is first draft only but do not attempt Short press to enter channel mode then press and hold 10 seconds until P flashes it will flash C a few seconds in but continue to hold for 10 seconds Set first digit 1 4 Short press to change number 0 9 Press and hold 3 seconds to confirm after confirm moves to next digit Continue on through remaining 3 digits On final confirm password set and exits Res...

Страница 5: ...st of all digital and analog transmission and RF noise including your transmitter if powered The green bars indicate available channels with the smaller the bar the less noise and the best channel to use Best to power and scan the RX before powering on the TX to ensure you are flying on the cleanest channel for best results 5 Way Joy Switch The button directions correspond to the OSD Icons in the ...

Страница 6: ...vigation Icons Note OSD navigation icons will disappear after 7 seconds if no activity detected Pressing the joy switch in any direction brings up the OSD navigation icons DVR control After the OSD navigation is called up press joy switch any direction press stick to right bto start recording At this time the middle position of the screen starts to record time press the right button again to end t...

Страница 7: ...1 Up and Down select setting 2 Right confirmation 3 Left exit and return back to image interface System settings 1 Movie Quality Set the image quality of recording video 2 Password Set 4 bit password which should be same as transmitter s password Only when the password match with TX can the receiver display the image 3 Format SD Card 4 HDMI Format 16 9 or 4 3 changes HDMI only recording and monito...

Страница 8: ...2 HDZERO_RX bin 3 HDZERO_VA bin 4 BYTE_FROST bin The first one is used to update VTX the last three are used to update VRX When updating VTX the VTX FW port needs to be connected to the VRX FW port via the supplied cable Copy the f w to your SD card and inset the SD card into VRX it can update firmware automatically once you power on If there are all 4 F W it means need update 4 times to finish up...

Страница 9: ...smits these data through its data channel to VRX and VRX display the data using its built in OSD engine 1 In the Betaflight Configurator choose an available UART port number for communication between FC and VTX Set speed to 19200 The below screen shot shows an example of selecting UART3 2 Refer to your FC manual to determine where the chosen UART ports are Hard wire the specified UART port on the ...

Страница 10: ...Fat Shark 10 3 If connected correctly OSD will have Armed Disarmed Current Voltage RSSI and Timer Timer will restart when FC is changing from disarmed to armed state ...

Страница 11: ...xposure setting 1 3 Image Enhance Image enhancement Settings 1 4 Video Setting 1 5 RESET Factory Reset 1 7 Save Exit 1 8 Exit Do not save and exit 2 AE Menu Exposure 2 1 brightness 1 100 2 2 Exposure mode There have 5 modes 1 BLC Backlight Mode There is a first level sub option BLC value selection 0 7 2 FLC Follow light mode 3 GND Ground mode when adjust exposure can make the bottom image clearer ...

Страница 12: ...ues 0 20 3 1 contrast 3 2 sharpness 3 3 saturate 3 4 R surp R RED weight component gain 3 5 B surp B RED weight component gain 3 6 2 DNR 2D Noise Reduction Level 4 Video Setting menu Used to switch HQ 720P and LQ NTSC mode while switch mode there has one more choice APPLY REBOOT select this option to make the switch take effect ...

Страница 13: ...a isn t communicating with TX and the TX power needs to be cycled Green LED indicates communication successful Warning It is possible that the camera can be put into unintended mode by accidentally pressing and holding the stick If it appears the camera isn t working blank screen with or without a green LED and you are on the right channel do the following Press and hold 5s stick to left ensures i...

Страница 14: ... expansion 1 2 3 4 5 6 7 8 9 10 11 12 HQ 5491 5527 5563 5599 5635 5671 5707 5743 5779 5815 5851 5887 LQ 5593 5617 5641 5665 5689 5713 5737 5761 5785 5809 5833 5857 VRX Power supply 8 28V DC Port 5V USB Type C Power consumption 0 9A 12V Screens size 5 5 inch Screen resolution 1280x720 HDMI output 5V 150mA DVR MicroSD card support to 128 GB Fat32 H 264 codec 60fps Mov Video quality selectable Suppor...

Страница 15: ...ower supply DC 5 36V Current 200mA 5V Interface 6Pin Compatible HDZero VTX Image Sensor Super WDR CMOS Sensor Resolution HQ 1280 720 50fps 60fps LQ PAL NTSC Lens FOV 150 Shutter Rolling Shutter Dimensions 19x19x21 mm Weight 9g ...

Отзывы: