GROWSPAN
™
GOTHIC PREMIUM GREENHOUSES
20
106205_06_07_08
Revision date: 06.28.18
Complete following general steps to install end wall panels.
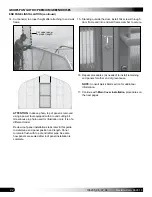
1. Consult panel location diagrams, select one 6' x 10'
polycarbonate panel, begin at edge of door opening,
and work to the outside edge of end wall.
END PANEL INSTALLATION (continued)
Mark UV Side
X
NOTE:
Remove protective film. When needed, panels
are cut to length
after
they are attached to end wall
frame and rafter.
3. Place Panel A in position. Add 104213 U-profile along
door.
4. Attach to end wall framing using long Tek screws
(FA4484B) and 102921B neo-bonded washers.
NOTE:
Consult end wall diagrams located in Quick
Start section for on-center dimensions.
Remember to
account for installation of H-channel.
Space screws evenly
at 16"
when securing panels.
DO NOT USE WASHERS WHEN SECURING
H-CHANNEL TO END WALL FRAMING.
5. With panel secured in place, cut top to proper size
using rafter as a guide.
2. Apply white vent tape to bottom of panel. Review
diagram in right column for aluminum profile (104213)
placement along edge adjacent to door. See also
Polycarbonate Panels diagram in Quick Start section.
Dashed line and arrows show where to install white
vent tape.
A
U-Profile attached to panel along door edge.
A
ATTENTION:
Skip this step if desired and complete
it once
all panels are installed
. Review roof panel
installation steps later in this guide to determine end
panel position and length. Panel to remain flush with
top of end rafter pipe. See also how panels are sealed
after roof panel installation is complete.
A
H-channel here
above door.


