


ENGLISH
ENGLISH
GB-13
GB-12
This refrigerator may be opened from the left or right hand side. By default, the door
can be opened from the right hand side. If you would like to open the door from the
left hand side, follow these steps.
Tools required Phillips screwdriver / Flat head screwdriver / Allen key
• To install the door on the other side, we advise you to call on a qualified
technician. Only try to install the door on the other side yourself if you have the
necessary qualifications.
• Check that the appliance is unplugged and empty.
• Adjust the two adjustable feet to the highest position.
• To remove the door, you need to tilt the machine backwards. Rest the appliance
against something solid so that it does not slip during assembly of the door.
• All removed parts must be retained in order to reinstall the door.
• The refrigerator must not be tilted further than 45°.
• Do not lay the appliance down, as this may damage the refrigeration system.
• You should rest the appliance against something solid, for example a chair, just
under the top cover.
• We recommend that 2 people handle the appliance together during assembly of the
door.
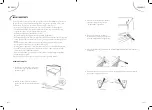
Follow the following stages to reverse the door from its initial position.
DEPOSIT DOORS
REVERSE DOOR
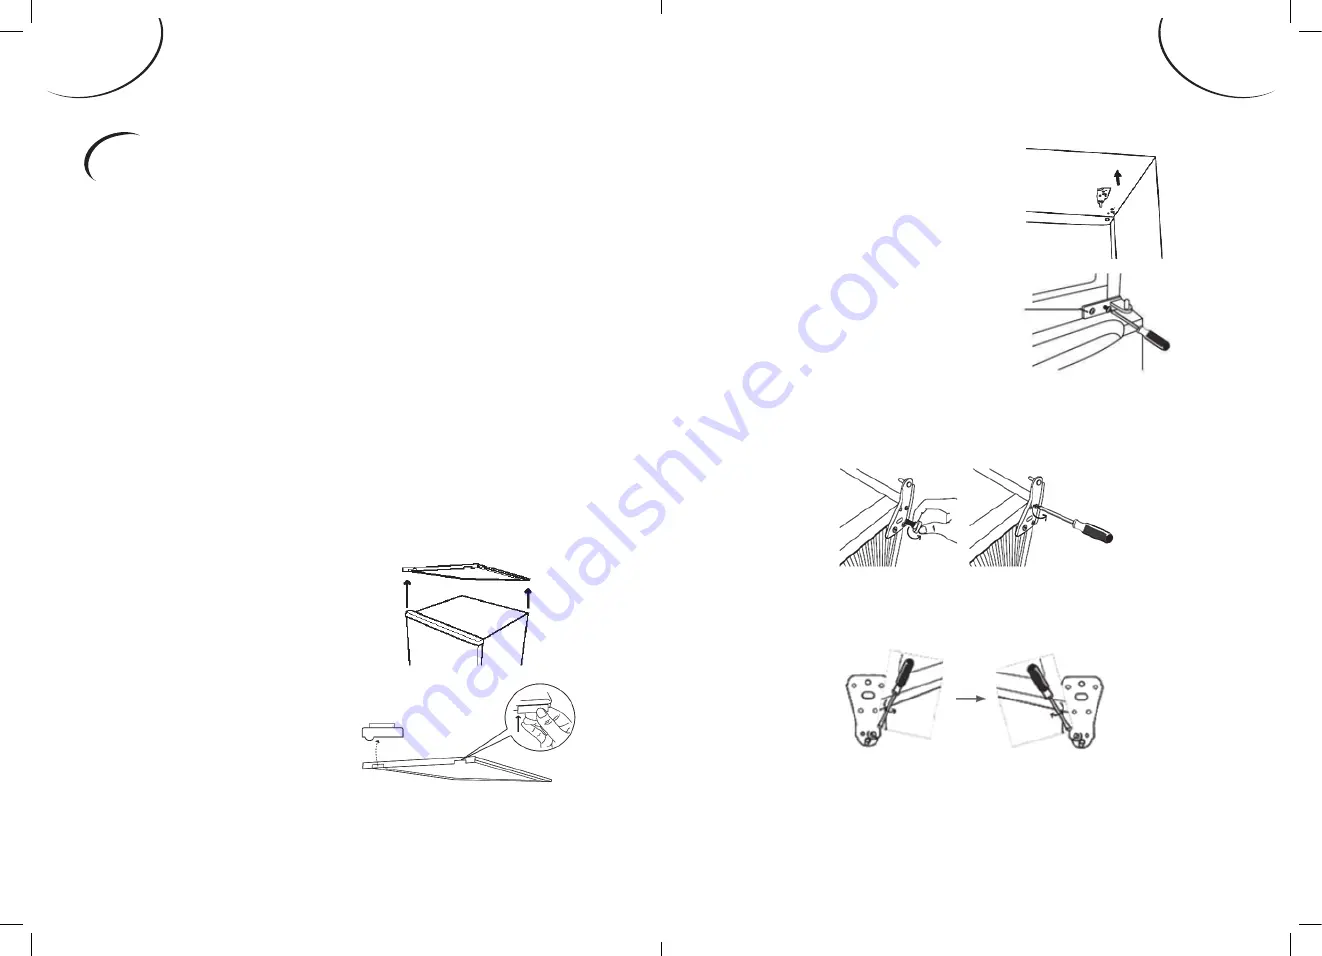
1.
Take away all hole covers and remove
all the cover’s screws. Lift the top cover
away from the Fridge.
2.
Remove the left hinge cover.
Insert the right hinge cover.
Remove
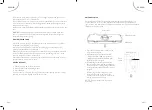
3.
Unscrew the screws and remove the
upper hinge. Deposit the door of the
freezing compartment.
4.
Remove the right middle hinge;
deposit the door of the refrigerating
compartment.
5.
Then unscrew the front foot to remove the bottom hinge.
6.
Remove the screw from the bottom hinge and refit it to the mirror position.
Unscrew
Screw
Unscrew
Unscrew
Содержание R2536WDW
Страница 1: ...R2536WDW R2536WDS R2536WDBK...
Страница 5: ...16 C...
Страница 18: ...16 C...
Страница 28: ......


