background image

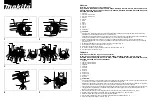
01

 Meule

02

 -

03

 -

04

 -

05

 -

06

 Base

07

 Pare étincelles

08

 Porte outils

09

 -

10

 Interrupteur

11

 -

12

 Eclairage

13

 Aiguiseur de forets

01

 Grinding-wheel

02

 -

03

 -

04

 -

05

 -

06

 Base

07

 Spark shield

08

 Tool holder 

09

 -

10

 Switch

11

 -

12

 Lighting

13

 Drills sharpener

01

 -

02

 Montage porte outils

03

 Montage pare étincelles

04

 -

05

 Fixation de la machine

01

 -

02

 Tool holder assembly

03

 Spark shield assembly

04

 -

05

 Fixing of the machine

01

 Meule

02

 -

03

 -

04

 -

01

 Grinding-wheel

02

 -

03

 -

04

 -

01

 L’utilisation d’accessoires adaptés et en bon état est 

garante d’un fonctionnement optimal.

Vérifiez régulièrement l’état de vos meules.

02

 Utilisez régulièrement un dresseur de meule pour rectifier 

la surface de la meule.

03

 Maintenir l’appareil toujours propre.

04

 Toujours contrôler l’état des meules ( y compris les 

meules neuves ).

05

 Ne pas exercer une pression trop importante sur les 

meules, brosses et autres accessoires afin de ne pas fatiguer 

inutilement le moteur.

01

 The use of suitable accessories in good condition will 

ensure the machine operates optimally

Check the condition of your grinding-wheels regularly.

02

 Use a grinding-wheel dresser regularly to rectify the 

grinding-wheel surface. 

03

 Always keep the equipment clean.

04

 Always check grinding-wheel condition (including new 

grinding-wheels). 

05

 Do not exert too much pressure on the grinding-wheels, 

brushes and other accessories in order not to overtax the 

motor needlessly. 

01

  Réglages porte outils et pare étincelles.

01

  Toolholder and spark shield adjustment.

Approchez lentement l’outil de la meule, aiguisez l’outil 

par pressions successives, et le tremper régulièrement dans 

l’eau. L’usure de la meule doit se faire sur toute la largeur, 

pour cela déplacez latéralement la pièce à travailler. 

01

  Travaux d’ébauche : Pour ébaucher, ébarber ou meuler, 

utilisez un gros grain (ex A40) et la meule sèche unique-

ment, finalisez avec un grain plus fin

02

  -

03

 Travaux d’affûtage des forets : pour affûter des forets de 

différents diamètres, remplacer le cache rond par le cylindre 

d’affûtage.

Approach the grinding-wheel tool slowly, sharpen the tool 

by exerting intermittent pressure and wet it regularly with 

the water. Grinding-wheel wear must be on the entire 

width therefore shift the workpiece sideways. 

01

  Roughing : To rough, deburr or grind, use a coarse grain 

(ex A40) and dry grinding-wheel only, finish with a finer 

grain

02

  -

03

 Drilling works: to sharpen drills of different diameters, 

replace the round cover with the sharpening cylinder.

FR

EN

Description et repérage des organes de la machine

Description and location of machine parts

Contents of box

Assemblage de la machine

Assembling the machine

Fonctionnalité de la machine

Functions of the machine

Réglages de la machine

Settings of the machine

Entretien, recommandations et conseils

Cleaning and maintenance and advice

FIG. A & B

FIG. A & B

FIG. C

FIG. D

FIG. D

FIG. E

FIG. E

FIG. F

FIG. F

FIG. G

FIG. G

Remplacement des consommables

Replacing consumables

Contenu du carton
FIG. C

110250-3-Manual-H.indd   10

110250-3-Manual-H.indd   10

18/04/2023   12:04

18/04/2023   12:04

Содержание BG 150 C

Страница 1: ...i K nn s alkuper isest ohjeet Sm rgel vers ttning fr n originalinstruktioner B nksliber Overs ttelse fra oprindelige brugsanvisning Polizor fix Traducere din instruc iunile originale Ufalama makaras O...

Страница 2: ...FIG A FIG C 01 13 06 10 08 12 07 x2 x2 13 110250 3 Manual H indd 2 110250 3 Manual H indd 2 18 04 2023 12 03 18 04 2023 12 03...

Страница 3: ...max 2 mm FIG D 02 03 x2 x2 110250 3 Manual H indd 3 110250 3 Manual H indd 3 18 04 2023 12 03 18 04 2023 12 03...

Страница 4: ...03 05 x2 110250 3 Manual H indd 4 110250 3 Manual H indd 4 18 04 2023 12 03 18 04 2023 12 03...

Страница 5: ...FIG E 03 13 X 3 110250 3 Manual H indd 5 110250 3 Manual H indd 5 18 04 2023 12 03 18 04 2023 12 03...

Страница 6: ...B A B A 110250 3 Manual H indd 6 110250 3 Manual H indd 6 18 04 2023 12 03 18 04 2023 12 03...

Страница 7: ...ax 2 mm max 2 mm max 2 mm max 2 mm 2 mm 2 mm 10 H max 2 mm max 2 mm max 2 mm max 2 mm max 2 mm max 2 mm 2 mm 2 mm 10 H FIG F 05 1 2 02 110250 3 Manual H indd 7 110250 3 Manual H indd 7 18 04 2023 12 0...

Страница 8: ...Ref 110812 110814 FR FIG G 1 2 X 3 X 3 110250 3 Manual H indd 8 110250 3 Manual H indd 8 18 04 2023 12 03 18 04 2023 12 03...

Страница 9: ...FIG G 8 2 kg 110250 3 Manual H indd 9 110250 3 Manual H indd 9 18 04 2023 12 03 18 04 2023 12 03...

Страница 10: ...orte outils et pare tincelles 01 Toolholder and spark shield adjustment Approchez lentement l outil de la meule aiguisez l outil par pressions successives et le tremper r guli rement dans l eau L usur...

Страница 11: ...uela afilar la herramienta ejerciendo presiones sucesivas y sumergirla en agua con regularidad El desgaste de la muela tiene que realizarse en toda la longitud para esto desplace lateralmente la pieza...

Страница 12: ...a ferramenta do rebolo afiar a ferra menta por press es sucessivas e mergulh la regularmente na gua O desgaste do rebolo deve ocorrer em todo o sentido da largura Para isso deslocar lateralmente a pe...

Страница 13: ...proper blijft 04 Controleer de staat van de slijpschijven altijd ook bij nieuwe slijpschijven 05 Niet te veel druk uitoefenen op de slijpschijven borstels en andere toebehoren om de motor niet onnodig...

Страница 14: ...hitaasti hiomalaikan luo teroita painaen toistu vasti ja kastele ty kalu s nn llisesti vedess Hiomalaikan on kuluttava tasaisesti koko leveydelt siirr ty stett v ty kalua sivusuunnassa 01 Karkea ty st...

Страница 15: ...d h lls ren 04 Kontrollera alltid slipskivornas skick inklusive nya skivor 05 Tryck inte f r h rt p slipskivorna borstarna eller vriga tillbeh r f r att inte anstr nga motorn i on dan 01 Inst llning v...

Страница 16: ...af v rkt jsholder og gnistsk rm 01 Reglaje suport instrumente i ap r toare de sc ntei F r v rkt jet langsomt frem mod sliberen slib det med efterf lgende tryk og dyb det regelm ssigt ned i vand Slibe...

Страница 17: ...uygulamay n 01 01 Alet ta y c ve k v lc m kesici ayarlar 01 40 02 03 Bile i ta aletine yava a yakla n z birbirini takip eden bast rmalarla aleti bileyin ve d zenli olarak suya dald r n Bile i ta n n a...

Страница 18: ...astaven n strojov ho dr ku a lapa e jisker 01 Nastavenia dr iaka n stoja a ochrany proti iskr m N stroj pomalu p ilo te k brusn mu kotou i postu pn m tlakem jej nabruste a pravideln jej nam ejte ve vo...

Страница 19: ...2 03 04 05 01 02 03 04 05 01 02 03 04 01 02 03 04 01 02 03 04 05 01 02 03 04 05 01 x 01 01 A40 02 03 01 A40 02 03 HE AR FIG A B FIG A B FIG C FIG D FIG D FIG E FIG E FIG F FIG F FIG G FIG G FIG C 1102...

Страница 20: ...sa 01 Nastavitve stojal za orodja in za ite proti iskrenju K zel tse lassan a szersz mot a k sz r koronghoz lezze ki a szersz mot egym sut ni hozz nyom sokkal s mer tse bele rendszeresen v zbe A k sz...

Страница 21: ...pon i nazivna frekvencija Puissance assign e 250 W S1 Nominal power Tahsis edilen g Leerlaufdrehzahl Stanoven p kon Potencia fijada Predp san v kon Potenza assegnata Pot ncia assinada Onbelast toerent...

Страница 22: ...r a dust mask Toza kar maske tak n Staubschutzmaske tragen Pou vejte masku proti prachu Llevar puesta una careta de protecci n contra el polvo Noste ochrann masku proti prachu Indossare una mascherina...

Страница 23: ...akustick ho tlaku Nivel de presi n ac stica Hladina akustick ho tlaku Livello di pressione acustica N vel de press o ac stica Niveau akoestische druk A hangnyom s szintje Nivo akusti nega pritiska Poz...

Страница 24: ...las t instrukcijas pirms lieto anas nainte de utilizare cititi instructiunile Pro itati upute prije uporabe Poids 8 2 kg Weight A rl k Gewicht Hmotnost Peso Hmotnos Peso Peso Gewicht S ly Te a Masa Pa...

Страница 25: ...BG 150D 110250 3 Manual H indd 27 110250 3 Manual H indd 27 18 04 2023 12 07 18 04 2023 12 07...

Страница 26: ...mes indd 1 11 05 2020 09 11 11 05 2020 09 11 MEULE GRAIN A36 GRIND A36 AFFUTAGE SHARPENING 150 mm 110250 3 Sticker H 02 Cotes indd 1 110250 3 Sticker H 02 Cotes indd 1 11 05 2020 08 59 11 05 2020 08 5...

Страница 27: ...EKLARACJA ZGODNOSCI Z NORMAMI OM VERENSST MMELSE VAATIMUSTENMUKAISUUSVAKUUTUS Overensstemmelseserkl ring Declara ie de conformitate Vyhl senie zhody Uygunluk beyan Prohl en shody Egyez s gi nyilatkoza...

Страница 28: ...s por intervenciones no autorizadas o por negligencia por parte del comprador La garant a no se aplica sobre los da os causados por un fallo del herramienta NL GARANTIE Dit gereedschap heeft een garan...
Страница 29: ...re terjed ki Ez a garancia nem rv nyes ha a k sz l ket nem rendeltet sszer en haszn lt k sem illet ktelen beavatkoz sok vagy a v s rl hanyag s ga okozta k rok eset n A garancia nem fedezi azokat a k r...

Отзывы: