background image

b)

Automatically: set the “Auto Timeshift”option as “Auto” in PVR/Timeshift menu

( Stop: set “Auto Timeshift”as “Off”) .

3.

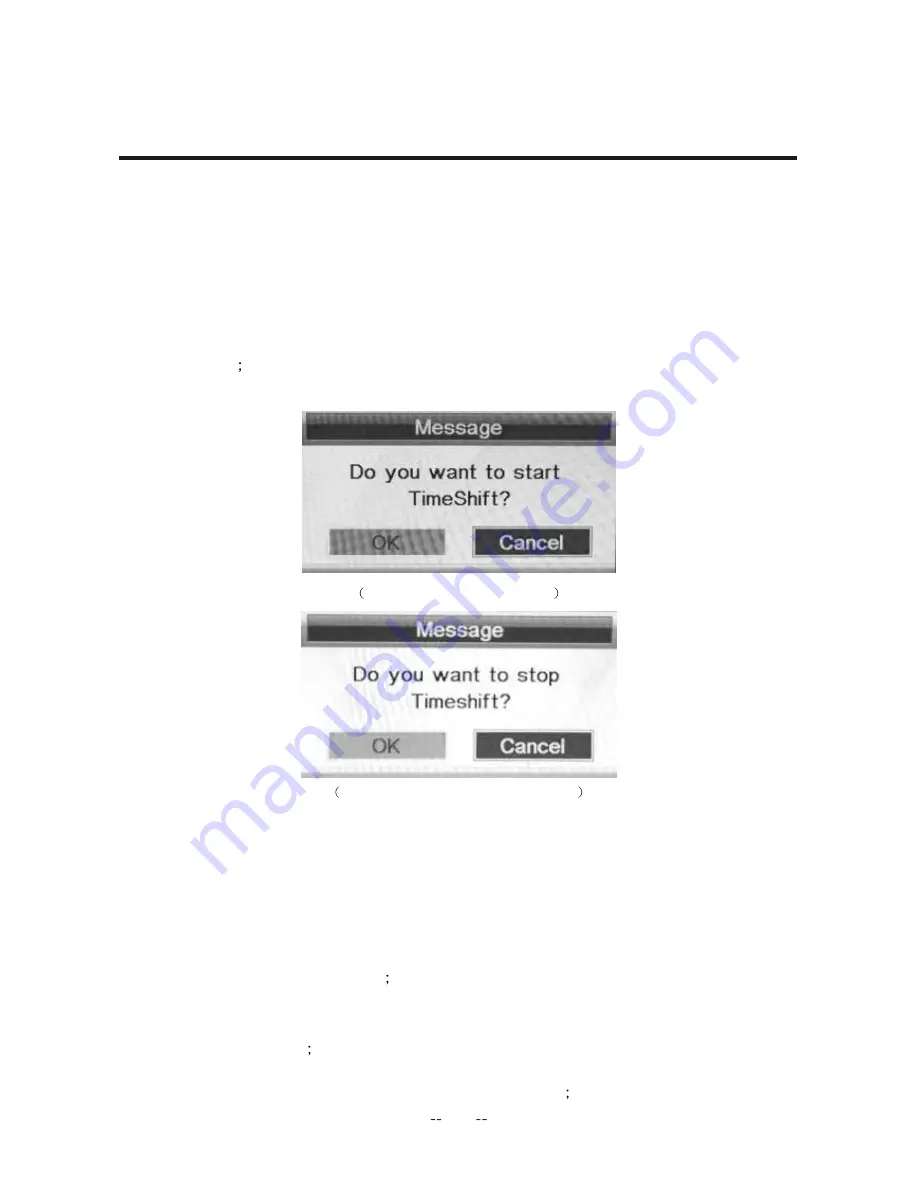
Before Manually Timeshift, there is a message “Do you want to start Timeshift”. After

confirm,If signal is stable, it will check whether the speed of the storage device that the

user inserted is enough for Timeshift. If the speed is not enough, a warning message

will pop up to let the user make decision whether to go on. If timeshift is force to take
place, there may be some pause or mosaic. Otherwise the speed is enough for

Timeshift, it’ll take place under background and users are able to pause or move fast

backward After a pause, users are able to pause or move fast backward;

4.

After Automatically Timeshift, it will take some minutes to initialize, then it take place

automatically;

Timeshift Play start prompt menu

Timeshift Play Info menu and stop prompt

5.

A UI (Timeshift time menu) on the right top corner shows the fallen time between the

current picture and the living broadcasting picture;

6.

During the recoding progress, if the signal is missing, the recording process will take a

pause until the signal is stable again.

1.

The recorded Videos can be played in Record List menu , in Record manage menu or

in Source Media Movie mode

2.

When a video playing, the Info Banner menu shows the length of the video and the

time that the video has been played. Also there is a progress bar indicating the process

of playing the video

3.

A playing video can move fast forward with the speed “x2”,“x4”,“x8”,“x16” or play in
a normal speed by pressing the button “fast forward”

OSD Menu

Play videos and recorded files

REC  Playback

45

Содержание FL-16101

Страница 1: ...By AMIRIDIS SAVVIDIS S A 15 6 Wide Screen LED TV MODEL FL 16101 Instruction Manual Read all of the instructions before using this TV and keep the instruction manual in a safe place for future reference ...

Страница 2: ......

Страница 3: ...Base OSD Menu 1 Picture menu 2 Sound menu 3 Channel menu 4 Feature menu Multimedia Operation 2 3 4 4 4 5 6 11 4 5 17 55 17 18 19 25 26 46 5 Setup menu 47 50 51 55 Connections 12 13 Remote Control 14 Basic Operation 14 16 Auto Installation 56 57 58 USB MULTIMEDIA PLAYBACK FORMAT Simple Troubleshooting 59 SPECIFICTIONS 1 ...

Страница 4: ... ...

Страница 5: ...on WARNING The battery battery or batteries or battery pack shall not be exposed to excessive heat such as sunshine fire or the like WARNING Excessive sound pressure from earphones and headphones can cause hearing loss ...

Страница 6: ...Control angle Batteries 0 infrared 5m 30 horizontal 2 x 1 5V size AAA Recommended USB standard USB2 0 USB file system NTFS FAT16 FAT32 Maximum supported hard disk size 1T POWER MUTE PICTURE ASPECT SOUND SLEEP SUBTITLE CH LIST REC LIST REC 1 2 3 4 5 6 7 8 9 0 VOL CH INPUT DISPLAY EPG TV RADIO FAV MENU TV TXT CANCEL REVEAL NICAM A2 INDEX HOLD SIZE SUBPAGE EXIT Product Introduction Front View Mini YP...

Страница 7: ...rection is correct as shown below 2 When you are putting on the stand please make sure the neck of the TV set is in the correct position and attached tightly If you do not attach the stand correctly it will make the TV unstable and may tip over Place the TV face down on a soft and flat surface blanket foam cloth etc to prevent any damage to the TV Attach the stand with the supplied screws When att...

Страница 8: ... headphone or other audio equipment Insert the CI card into the slot HDMI Connect it to the HDMI of DVD or other equipment VGA For PC display Connect it to the D Sub 15 pins analog output connector of the PC Connect to the power adaptor PC IN Connect it to the audio output terminal of PC SCART Connect to extermal equipment with SCART socket The SCART interface offers RGB AV singals with audio inpu...

Страница 9: ... could bring the TV out of standby mode by press the or t e s V T n o n o t t u POWER b remote control and the LED indicator lights green Antenna RF Connection RF Coaxial Round Antenna Cable Press button on the remote control to display the input source menu press button to select ATV DTV then press OK Wall jack with F Connector External Antenna INPUT lights red COAX RF SCART PC I N VGA HDMI POWER...

Страница 10: ...rce menu RCA Video Audio Cable DVD or VCR HDMI Connection Note All cables shown are not included with the TV DVD or VCR Connect the HDMI jack on the DVD to the HDMI jack on the TV set with a HDMI cable Turn on the DVD and select HDMI in the input source menu A V interface that supports uncompressed standard One jack supports both video and audio information the TV set with a RCA cable Audio_L Audi...

Страница 11: ...n on the remote control e TV set with a stereo audio cable Turn on the PC and select PC in the input source menu If using a sound card adjust the PC sound as required Set the video resolution of your PC to 1366x768 60Hz BEST on its original monito Make the connections between the TV monitor and your PC switch on the monitor before booting the PC You can now set your preferred resolution from the c...

Страница 12: ...perates as an Input Output connection If the TV does not select the SCART input automatically select SCART using the INPUT button on the remote control or TV COAX Connection Connect to Audio Amplifier device to the COAX output jack on the TV Connection COAX RF SCART PC I N VGA HDMI POWER COAX RF SCART PC I N VGA HDMI POWER ...

Страница 13: ...t provided as shown in figure For the sound please connect a mini RCA bicolor red and white cable cable not provided from the TV to the audio output of the device CI Connection Connection Mini YPbPr cable InsertacardintotheCommonInterfaceslottoreceiveconditional accesssignalssuchaspay DTTsignal inthiscaseinsertacardCAM Y Pb Cb Pr Cr GND YPBPR IN USB COMMON INTERFACE YPbPr AV USB COMMON INTERFACE Y...

Страница 14: ...UTE Press to mute the sound press again or press VOL to unmute REC LIST Record List SUBTITLE Turn on off the subtitle display in DTV mode REC Press to start recording inDTV mode PICTURE Select the picture mode ASPECT Change the screen display mode SOUND Select the sound mode SLEEP Standby timer CH LIST Display the channel list CURSOR KEYS OK Allows you to navigate the on screen menus and adjust th...

Страница 15: ...ram Fast reverse Fast forward NICAM A2 TV Nicam A2 select TV TXT Turn off on the Teletext display CANCEL Cancel the Teletext display REVEAL Reveal any hidden text HOLD Hold or carry on the current subpage SIZE Press to see top half of page double size Press again to see the bottom half of page double size Press again for normal size SUBPAGE Press to enter subpages pressagain to cancel INDEX Go to ...

Страница 16: ...ning on the TV and there are no programs in the TV menory The Auto Installation menu will appear on the screen There are 4 setups as follow CH button on the TV set or button on remote control to select the input source press button on the remote control to enter OK Note Before you select the input source make sure the connections are prepared Auto Installation ...

Страница 17: ...Move Enter Exit Exit OK Country UK France Italy Poland Spain Previous Page AUTO INSTALLATION Next Page Setup 2 Set up the Language Auto Installation Setup 2 Move Enter Exit Exit OK Language English French Italian Polish Spanish Previous Page Next Page 15 ...

Страница 18: ...rs can be chosen for a continuous viewing and after that the TV will be powered off off meas the viewing is timeless Off 1 Hour 2 Hours 4 Hours Previous Page Next Page Setup 4 Set up the Auto Search Auto Installation Setup 4 Move Enter Exit Exit OK Auto Search All ATV DTV Previous Page AUTO INSTALLATION ...

Страница 19: ... Standard Picture Mode Choose from Standard Dynamic User and Mild Contrast Controls the difference between the brightest and darkest regions of the picture Brightness Controls the overall brightness of the picture Colour Control the color Tint Adjust the hue of the picture Sharpness Object edges are enhanced for picture detail Colour Temperature Choose from Standard Cool Warm Aspect Ratio Cycles a...

Страница 20: ...f the left and right sound track Surround Allows you to turn on or off the surround Auto Volume Control the volume of the programme automatically when you turn on the function by selecting On SPDIF Allows you to select spdif type Off PCM and Auto Sound Move Enter Exit Return Menu Exit OK Picture Sound Sound Mode Bass Treble Balance Surround AVL SPDIF Channel Feature Setup Standard 50 50 0 Off Off ...

Страница 21: ... Favorite Management Country Auto Search DTV Manual Search ATV Manual Search Channel Feature Setup ENTER ENTER Greece ENTER ENTER ENTER To manage Delete Rename Swap Lock Skip all channels To manage Add Delete Favorite channels To select country To select auto search mode All Digital Analogue To search digital channel by entering parameters manually To search analogue channel by entering parameters...

Страница 22: ... DTV source The operation interface shows as follow Skip Swap 3 1 1 Delet Skip Lock Channel 2 After marking press MENU key to save the result Select the program to be swapped and press BLUE key the selected program will wink and then select another program and press BLUE key to swap them 1 Press UP and DOWN key to select the programs to be deleted and press RED GREEN or YELLOW key to mark them as ...

Страница 23: ...ion interface and shows as the follow RED key to enter space GREEN key to switch between capital letter and small letter YELLOW key to delete character OK key to select character MENU Blue key to return channel management page and save rename result Del Save Space Caps YLE TV1 0 1 2 3 4 5 6 7 8 9 A B C D E F G H I J K L M N O P Q R S T U V W X Y Z ...

Страница 24: ...ivitykset TF1 HD M6HD Fav1 Fav2 Fav3 Fav4 Fav1 Fav2 Fav3 Fav4 1 Press or RIGHT key on Favorite management of Channel page in ATV or DTV source The operation interface shows as follow 2 Press UP and DOWN key to select the programs to be added into favorite list and press RED GREEN YELLOW or BLUE key to mark them as following 3 Press MENU key to return Favorite management page and save the result OK...

Страница 25: ...alogue Channel Feature Setup ENTER ENTER ENTER All Mode Select All item to scan all digital channels carried by current signal mode firstly and then switch to scan all analog channels in selected country automatically User can skip digital search to analog search directly by entering EXIT or MENU key and can also stop auto scan directly by entering EXIT or MENU during analog scanning Digital Mode ...

Страница 26: ... directly by entering EXIT or MENU key carried by current Channel Tuning Move Enter Exit Return Menu Exit OK Picture Sound ATV Channels found DTV Channels found Radio Channels found ATV Process 186 5 MHz Channel Feature Setup Select Digital Manual Search item to enter air channel manual search in DTV source and the user operation interface as following Select channel number by RIGHT key or enterin...

Страница 27: ...search in ATV source and the user operation interface as following These parameters in this page show as the following table Analog Parameters Value Default Current Channel 001 100 001 Frequency Frequency of the current channel Search Fine Tune Color System Auto PAL SECAM Color System of the current channel Sound System BG DK I L L Press the button OK to open the search sub page Press the button O...

Страница 28: ...ose Hearing Impaired modes form Off and On PVR Timeshift This function is only available under DTV mode and includes Record Timeshift and playback functions CI Info This menu can display the CI card s information such as Module information smart card information language software download It only works under DTV mode If the CI card is not inserted in there will be prompting information to remind t...

Страница 29: ... at the bottom Press OK key on Start item to start current channel search The manual searching UI and the auto searching UI are the same Value Off turn off Parental Lock 4 18 turn on parental Lock and set the age level that are permitted to watch the program KEY RIGHT or KEY OK to enter the pin code changing page Change Pin Code KEY RIGHT or KEY OK to enter the hotel changing page Hotel mode Paren...

Страница 30: ...assword If the entered numbers are not exactly the old password then show a new password enter menu to enter again If they are right then it will ask user to enter the new password that will take place of the old ones If the New Password is the same as the Confirm New Password it ll show a success message If not it will ask you to enter the new password KEY_MENU Close the whole Main Menu KEY_EXIT ...

Страница 31: ...nnel Press to turn the Picture Lock On or Off When set to On the channel menu is locked Picture Lock Press to select sound lock on off If you select sound lock on The menu of channel will be locked Sound Lock Press to select feature lock on off If you select feature lock on The menu of channel will be locked Feature Lock Press to select setup lock on off If you select setup lock on The menu of cha...

Страница 32: ...alue OSD Language English French German Greek Preferred Subtitle English French German Italian Spanish Portuguese Danish Czech Dutch Finnish Swedish Greek Russian Polish Turkish Norwegian Preferred Audio English French German Italian Spanish Portuguese Danish Czech Dutch Finnish Swedish Greek Russian Polish Turkish Norwegian Trish Digital Teletext Language English French German Italian Spanish Por...

Страница 33: ...On It is used to check out the current system time and set time zone DST Range of the values of items in Clock Menu Date DD MM YYYY Time HH MM Time Zone 12 00 11 30 11 00 00 00 00 30 01 00 12 00 Auto DST daylight saving time On Off if it s On it ll be an hour earlier than the GMT If Time Zone is set to Auto it s not available e u l a V n o i t p O 31 ...

Страница 34: ... This function allows you to power off the TV with in a period of time Currently the supported time period are Off 1 Hours 2 Hours 4 Hours Feature Move Enter Exit Return Menu Exit OK Picture Sound Lock Language Clock Sleep Timer Auto Power Off Hearing Impaired CI Info PVR Timeshift Channel Feature Setup ENTER ENTER ENTER Feature Move Enter Exit Return Menu Exit OK Picture Sound Lock Language Clock...

Страница 35: ... chapter 6 section 2 CI setup for further information about the function of CI Feature Move Enter Exit Return Menu Exit OK Picture Sound Lock Language Clock Sleep Timer Auto Power Off Hearing Impaired CI Info PVR Timeshift Channel Feature Setup ENTER ENTER ENTER Off Off Off Off On Main menu feature PVR Timeshift PVR Timeshift menu Menu shows as follows Enter method Feature Move Enter Exit Return M...

Страница 36: ... Recorders PVR Timeshift Function List Key Stroke KEY_UP Focus on the previous option on the left function list KEY_DOWN Focus on the next option on the left function list KEY_LEFT KEY_MENU Return to the previous menu s focus KEY_RIGHT KEY_ENTER Focus on the later menu on the left function list KEY_ Exit Exit all menu PVR Timeshift menu Key Stroke Action Key Stroke menu Partition LIst menu Partiti...

Страница 37: ...n this menu a PVR Timeshift menu Timer Timer menu b Press KEY_CLOCK to enter Timer menu when there is no menu focused Timer menu Timer 07 02 2012 21 115 28 n r u t e R e v o M Menu Ch No Channel 01 02 03 04 05 06 07 0800 Del Del All Add Edit Start Duration Date Mode YLE TV1 22 17 00 10 00 1 10 Once OSD Menu KEY_UP Focus on the previous option on the partition list KEY_DOWN Focus on the next option...

Страница 38: ... Edit menu or EPG 2 Pressing KEY_YELLOW for add or KEY_BLUE for edit could enter Timer Edit menu Press KEY_RED to delete the focus program press KEY_GREEN to delete all the programs Prompted information explain KEY_UP Focus on the previous option on the record list KEY_DOWN Focus on the next option on the record list KEY_RED Delete the chosen program KEY_GREEN Delete all the programs KEY_YELLOW Ad...

Страница 39: ...e reasonable behind current system time If the timer is repeat or not reasonable there will be a message Set timer fail to prompt when return 2 The Edit function resemble Add function except that Type and Channel can not changed again Key Stroke In menu KEY_UP Focus on the previous option on the Edit list KEY_DOWN Focus on the next option on the Edit list KEY_0 9 Edit Start Time Duration Date KEY_...

Страница 40: ...atically REC REC REC REC info info info info banner banner banner banner menu menu menu menu Information Information Information Information REC info banner shows some current recorder s information Actually REC info banner shows different information with Timeshift info banner OSD Menu Enter method recorders in this menu Informationˍ Menu shows as follows KEY_UP Focus on the previous option on th...

Страница 41: ...e is some other menu exist Enter method After Timeshift start it will display automatically Timeshift info Information Timeshit info banner shows some current Timshift information Enter method After Timeshift start press KEY_DISPLAY three times to show the menu Function explain a Time is equal to current play time minus current recording time b Progress bar is for current recording length compared...

Страница 42: ...vice USB Card If user wants change the output direction he can open the partition list by pressing the button Device and make the choice It supports 4 partitions at most c The rules of naming the output files Program name REC date_time h m s eg BBCONE 20111023_123456 MPG If a long time recorded file takes more than 3 9GB it cuts and makes a new file named by adding an extra sequence number eg BBC ...

Страница 43: ...rded files will be stored in the default partition b Press KEY_REC to start recording when there is a program playing it will pop up a message Do you want to start Recording After confirm the system will read the speed of the storage device If the speed is too low for recording there is a message user choose Yes it will record constrainedly In addition the speed is high enough it initializes in th...

Страница 44: ... ends naturally when the timer is timeout Also user could press KEY_STOP to end recording manually REC info and stop recording window g System will prompt user error message and try to continue recording if there are some bad tracks in disk There are two methods to set a timer As follows 1 In the EPG menu user can preengage programs for watching or recording a Pressing KEY_GREEN once is to preenga...

Страница 45: ...ion in Timer Edit menu Flow of setting a timer s information a Type Set program type DTV or RADIO b Mode Way of triggering a timer once daily weekly monthly c Recorder ON preengage for watching and recording record OFF preengage only for watching reminder d Set the date time and Duration time exact to minutes Must be reasonable behind current time e Timer when there are some conflicts a warning me...

Страница 46: ...cally Timeshift can record program and play the current recording program at the same time 1 Set Timeshift Buffer in PVR Timeshift menu Timeshift Buffer means how long a recorder can be stored when Timeshift If Buffer is overstepped the previous recorder stored there will be lie over There are three modes auto 30Mins 1hr 2hr auto means all the free spaces on the storage media 2 In the normal playb...

Страница 47: ...imeshift it will take some minutes to initialize then it take place automatically Timeshift Play start prompt menu Timeshift Play Info menu and stop prompt 5 A UI Timeshift time menu on the right top corner shows the fallen time between the current picture and the living broadcasting picture 6 During the recoding progress if the signal is missing the recording process will take a pause until the s...

Страница 48: ...must have a rate higher than 14Mbps in SPV9202 speed test for Recorder and higher than 28Mbps in SPV9202 speed test for Timeshift Otherwise there may be some pause or mosaic when do Recorder or Timeshift by force b For programs which have a higher rate than 8Mbps the USB device must have a rate higher than 20Mbps in SPV9202 speed test for Recorder and Timeshift is not some pause or mosaic when do ...

Страница 49: ...s you to select the time for OSD menu displays on the screen Auto SCART Select Auto SCART on The menu of SCART will be locked PC Setup Press to select PC Setup in the PICTURE menu then press OK button to enter sub menu Blue Screen Turn on off the blue screen function when there s no signal Reset TV Setting Restore all settings in setup menu to factory settings Software Upgrade It is only used make...

Страница 50: ...e Enter Exit Return Menu Exit OK Picture Sound OSD Time Auto SCART PC Setup Blue Screen Reset TV Setting Software Upgrade Channel Feature Setup 15 Seconds 5 Seconds 10 Seconds 15 Seconds 20 Seconds 25 Seconds Setup Move Enter Exit Return Menu Exit OK Picture Sound OSD Time Auto SCART PC Setup Blue Screen Reset TV Setting Software Upgrade Channel Feature Setup 15 Seconds On Off On ENTER ENTER 48 ...

Страница 51: ...t V Position Phase Clock Channel Feature Setup ENTER 0 0 0 25 Auto Adjust OK H Position 16 16 V Position 16 16 1 3 0 e s a h P 0 5 0 5 k c o l C H Position OSD Menu Mode Options Value 5 4 Blue Screen It is not available in PC DTV source or when it is not movie mode in multimedia source In TV source If there is no signal and Blue Screen is Off It will show snow if there is no signal and Blue Screen...

Страница 52: ...and media plugged into the TV s USB interface press OK key to upgrade Don t power off during the upgrading process The system will restarts when the upgrading process is done 5 6 Software Upgrade Setup Move Enter Exit Return Menu Exit OK Picture Sound OSD Timer Channel Feature Setup 15 Seconds On ENTER ENTER ENTER Off Message OK Cancel Do you want to reset Database to default Setup Software Upgrad...

Страница 53: ...INPUT OK ...

Страница 54: ...s to select them Press to play or pause Press to stop and back to the previous folder Press to view the previous picture Press to view the next picture Press to view the rotation picture Press to view the list of pictures Press the photograph set to adjust the photo telecast function Press to change the zoom mode Press to display the information of the current picture Resolution Date Model Size ...

Страница 55: ... be opened by every key on remote Same as Pause key on remote to start playing file or resume a paused file Same as STOP key on remote to stop the playing file Press to go the point you want to play To switch the repeat mode including Repeat 1 Repeat All Repeat Dirand Random modes All Same as key on remote to play fast backward or forward The speed can switch to twice four times eight times and xi...

Страница 56: ...o set B then press the third time to cancel AB Press to stop and back to the folder interface Press to view the list of movie Press to display the information of the current movie Press to Movie set up you can adjust the movie playback capabilities Press to go the point you want to play Press to play back faster Press to play forward faster Press to play the previous movie Press to play the next m...

Страница 57: ...mnopqrstuvwxyz abcdefghigklmnopqrstuvwxyzabcdefghigklmnopqrstuvwxyz abcdefghigklmnopqrstuvwxyz abcdefghigklmnopqrstuvwxyz abcdefghigklmnopqrstuvwxyz abcdefghigklmnopqrstuvwxyz Add Del bookmark Go to page Bookmark list Playlists Key Operation RED To add del bookmark GREEN YELLOW To enter the bookmark list page To page down page up EXIT To close the file and return to the file browser To input the p...

Страница 58: ...1 2 MPEG 1 Video MPEG 2 Video 1920 x 1080 MPEG4 MPEG 2 Video MPEG 4 ASP H 264 MJPEG H 264 1920 x 1080 WMV WMV 9 VC 1 1920 x 1080 RealMedia RV30 RV40 1920 x 1080 Flash Sorenson H 263 H 264 1920 x 1080 QuickTime MPEG 4 ASP H 264 MJPEG 1920 x 1080 ASF WMV3 WVC1 MP4S M4S2 Matroska Video MPEG 2 Video MPEG 4 ASP H 264 RV30 RV40 WMV9 VC 1 1920 x 1080 TS Stream MPEG 2 Video H 264 WMV 9 VC 1 1920 x 1080 ...

Страница 59: ...MA WMA STD WMA Prof C A A E H C L C A A C A A MPEG MP1 MP2 MP3 AAC LC HE AAC Read Audio AAC HE AAC Cook s i b r o V g g O C A L F C A L F Special Note 1 USB only support PHOTO MUSICˈTEXT and MOVIE The system automatically classified files only show the supported files 2 Support hard disk the maximum storage capacity is 1T 3 Photo Not support EXIF format 4 Flash non support animation 5 Support for ...

Страница 60: ... Check the aerial connections Check that the channel is tuned in properly Adjust the picture settings brightness color sharpness contrast hue Make sure that the TV is not located close to electrical appliances that may emit radio frequency interference No colour Adjust the color setting Check that the programme is broadcast in color Check that the channel is tuned properly TV does not respond to r...

Страница 61: ...t Ra 600 1 SPECIFICATIONS Brightness mini AV mini YPBPR 1 1 PC AUDIO 1 1 HDMI CI Slot 1 Input Connector RF 1 VGA 1 Output Connector SCART Coaxial 1 1 Earphone 1 USB 1 Design and are subjec o change without prior no ce Weight and dimensions are approximate Power Source Standby Power Dissipa 0 5W Power Consum 36W DC 12V 3A ...

Страница 62: ......

Страница 63: ......

Страница 64: ......

Отзывы: